You are viewing the RapidMiner Hub documentation for version 10.0 - Check here for latest version
Create a deployment file from Projects
The deployment file can now be downloaded from any RapidMiner AI Hub Project either via command line or via browser. Both possibilities are described below.
Ensure that you already have a deployable asset meaning at least one process in one of your project folders.
Downloading the deployment from a RapidMiner AI Hub Project will create a .zip file with a snapshot of the current deployment folder content together with a configuration file that defines the endpoints of deployment.
Download via browser
To trigger the deployment creation via browser you just need head over to your project from the projects overview by clicking on View or the Project's name.

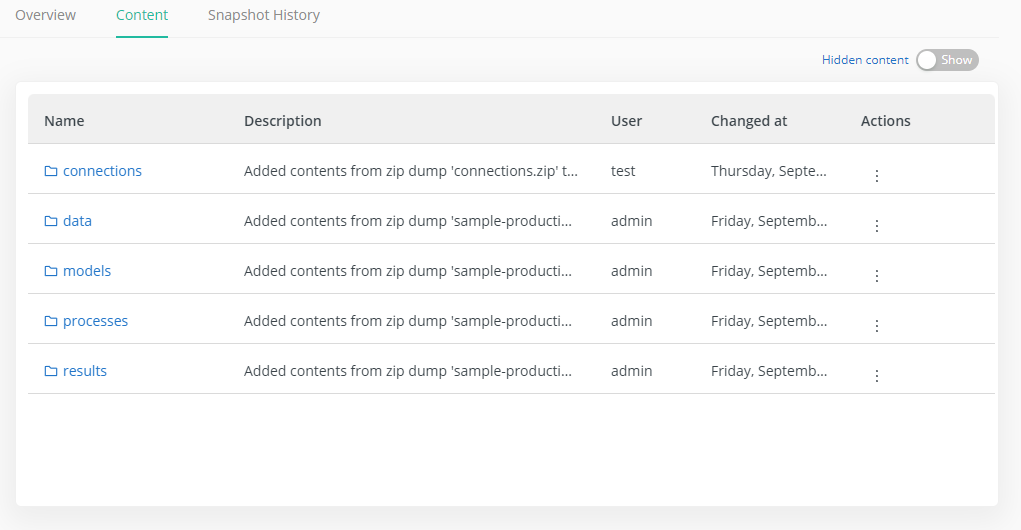
After that you'll be redirected to the contents of your project. You now have two choices to create a deployment file for a folder:
- Click on the top right button Create Deployment which will use the current path as deployment base path or
- Open the context menu for a folder and click on Create Deployment which will use the folder's path as deployment base path.

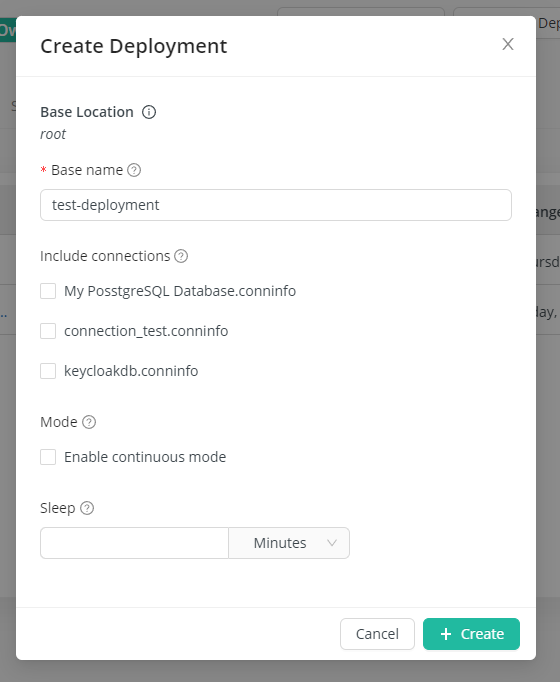
After you clicked on one of the Create Deployment buttons, a dialog opens.

In this dialog you can configure your deployment file:
- Base Location: The folder's path which will be used as deployment base folder. It has to contain at least one process. All processes of this folder will be exposed as endpoints from the RTSA.
- Base Name: The deployment's base name. If you pick
my-first-deploymenta processmy-processin the base location will later be reachable on the RTSA with/services/my-first-deployment/my-process. Ensure to that the base name is URL conform. - Include Connections: You can also include connections and the RTSA will use them in the processes. You can only use connections which don't use any injected parameters!
- Mode: Enable or disable continuous mode meaning that the deployment will be executed without the need to trigger an endpoint manually.
- Sleep: Only applies when continuous mode is enabled. Determines the delay between sequential execution of deployment endpoints.
Pressing the Create button will download your deployment file.
Besides the download via browser, you can also utilize the command line to create a deployment file.
Download via command line
To trigger the deployment creation via command line or API you can, for example, use curl or any other tool which fits the needs.
The creation URL is defined as
http://$RM_SERVER/api/v1/repositories/$PROJECT_ID/deployment/$REF/deploymentLocation=$LOCATION&deploymentName=$DEPLOYMENT_NAME
where
$RM_SERVERis the host name of the RapidMiner Server (e.g.localhost:8080)$PROJECT_IDis the lower case ID of your project (e.g.sample-dev)$REFis the reference exposed by the underlying Git (projects rely on Git under the hood), most likely it'smaster$LOCATIONis the absolute location within the project pointing to the folder you like to expose (e.g./processesor/score-fraud)$DEPLOYMENT_NAMEis the name of the deployment, e.g. when setting it tomy-first-deploymentall endpoints (processes residing in the$LOCATIONfolder) will be available underhttp://$RTSA_HOST:$RTSA_PORT/services/my-first-deployment/<an-endpoint-name>
So, in our case the URL looks like this:
http://localhost:8080/api/v1/repositories/sample-dev/deployment/master?deploymentLocation=/score-fraud&deploymentName=my-first-deployment
and an example curl command looks like this:
curl -u user:password '<url-from-above>' -o deployment.zip
It's also possible to include one or more connections from the Project into the deployment.zip file by
referencing the name of it. Assume a connection is called MyDB and it resides in the default location /Connections/MyDB
of the repository, then adding a query parameter with &connection=MyDB will include the connection into the created
deployment file.
So, in our case the URL might look like this if we like to include connections MyDB and MySecondDB at the same time:
http://localhost:8080/api/v1/repositories/sample-dev/deployment/master?deploymentLocation=/score-fraud&deploymentName=my-first-deployment&connection=MyDB,MySecondDB
Connections having injected parameters are not supported within the Scoring Agent. Please ensure that you didn’t define any injected parameters for the connections you like to include into your deployment ZIP file.
Enable 'continuous mode' for deployment
You can enable the continuous mode during the download of a deployment by adding the query parameter &continuous=true.
You can also define a delay in milliseconds between each execution by adding the query parameter &sleep=5000.
If you omit the sleep parameter a default of 1 milliseconds will be used but only if continuous mode is enabled.
So, as an example, if you want to enable the continuous mode with a delay of 5000 milliseconds between each execution the browser URL would look like this:
http://localhost:8080/api/v1/repositories/sample-dev/deployment/master?deploymentLocation=/score-fraud&deploymentName=my-first-deployment&continuous=true&sleep=5000
What's next?
After you have downloaded the deployment file you can install it on a Scoring Agent.