You are viewing the RapidMiner Developers documentation for version 8.0 - Check here for latest version
Using Eclipse
Installing Java
The first step of setting up your development environment is installing Java, if you haven't already. You can download Java here.
Downloading and installing Eclipse
To work with Eclipse:
- Go to the Eclipse website and download the Eclipse installer for your operating system.
Execute the installer and select the package
Eclipse IDE for Java Developer.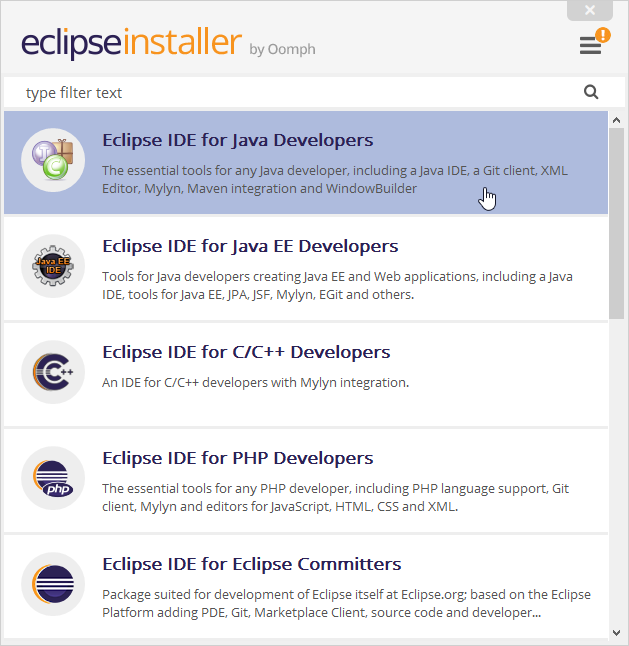
Select the installation folder and click on
Install.- Click
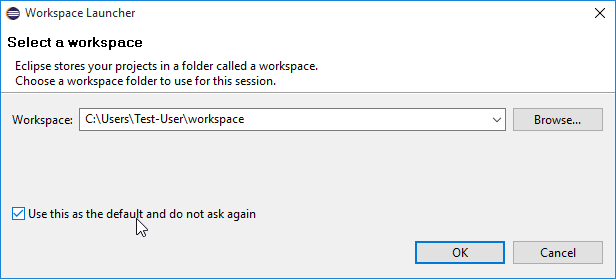
Launchto start Eclipse. When Eclipse starts, a window pops up prompting you to select a workspace. Select the folder for storing your Eclipse projects. Click on the checkbox to keep this setting each time you open Eclipse.
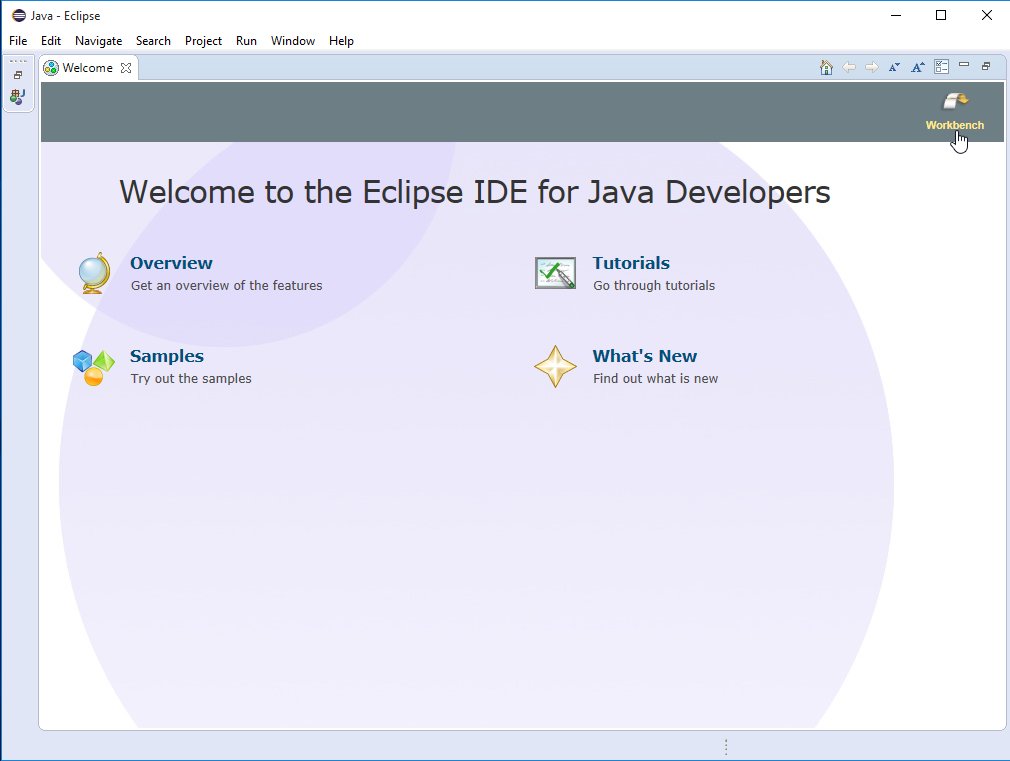
You should now see the Eclipse Welcome screen. If you have never used Eclipse before, try the tutorials and play around with Eclipse before proceeding. When you are ready to proceed, switch to the workbench (click the arrow in the upper right corner).
- To display a list of all keyboard shortcuts, press Ctrl+Shift+L.
- Press Ctrl+Space in the Java editor to get a list of suggested completions. Typing some characters before pressing Ctrl+Space will shorten the list.
- Code completion supports camel case patterns (for example, entering ‘NPE’ and pressing Ctrl+Space will propose
NullPointerException). - Select an opening or closing bracket and press Ctrl+Shift+P to find its matching bracket.
- Type
/**and press enter to automatically add a JavaDoc comment stub. - Press Ctrl+Shift+O to organize all imports automatically.
- Press Ctrl+1 to show possible fixes for a problem or possible actions.
Installing the Gradle plugin
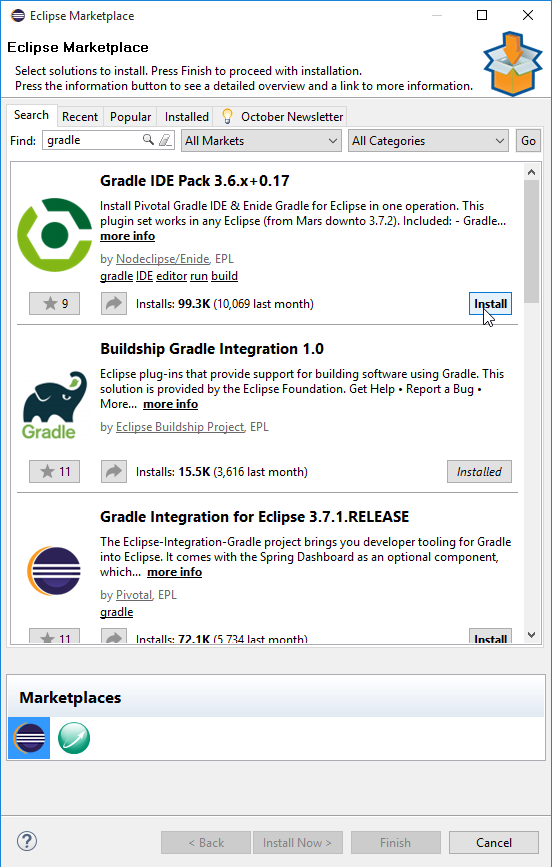
Next, install the Gradle plugin for Eclipse. Open the Eclipse Help menu and click on Eclipse Marketplace....
Search for Gradle IDE Pack and install the plugin. You then need to restart Eclipse.
Open the new Gradle Tasks view for later use.
To do this, open the Window > Show View menu and click on Other....
Search for gradle and select the Gradle Tasks view.
This view now opens in your Eclipse. Move it to an appropriate place.
Importing the extension template
To import the template:
- Open the RapidMiner GitHub page in your browser.
- Select the repository
rapidminer-extension-template. - Clone the repository or download and unpack the .zip file into your workspace you selected when starting Eclipse the first time.
- Open Eclipse, right-click on the Package Explorer view.
Select Import..., search for
gradleand select Gradle Project. Then click Next.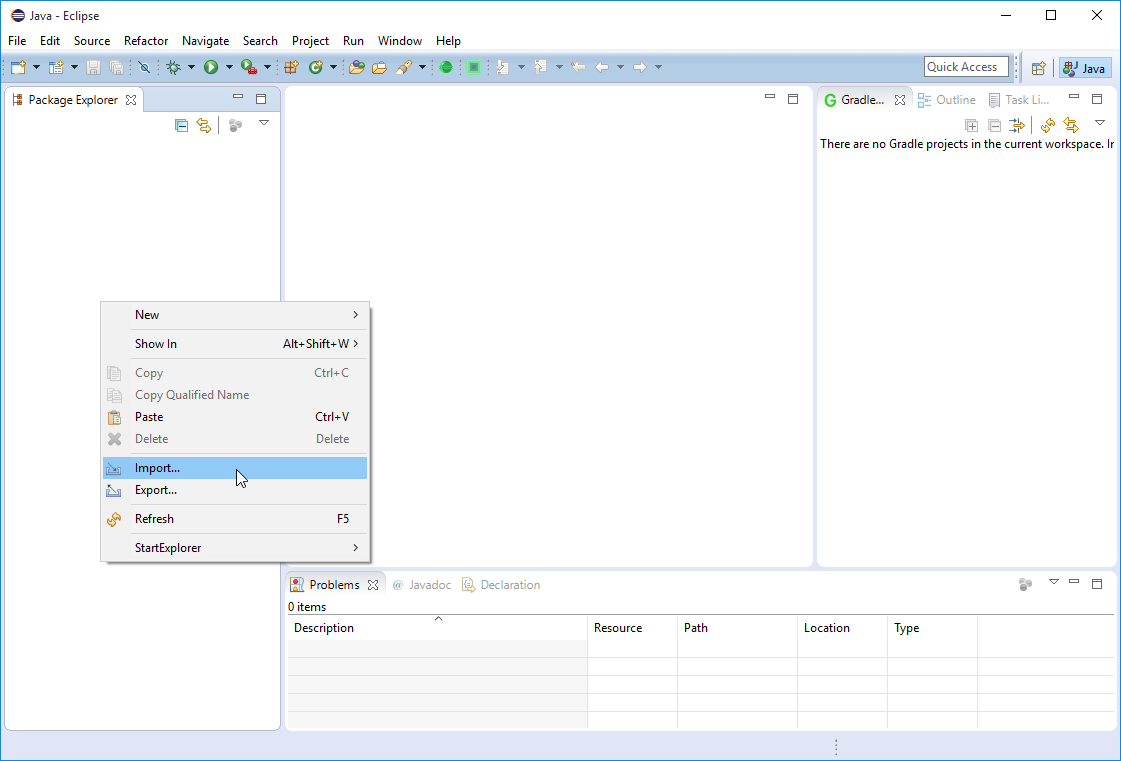
Browse for the folder that you just unpacked or cloned and click Finish.
If you use an older version of Eclipse, you need to browse for the folder, click Build model, select the complete project and click Finish.
Using build.gradle
You can now see the imported project in the Repository Manager view.
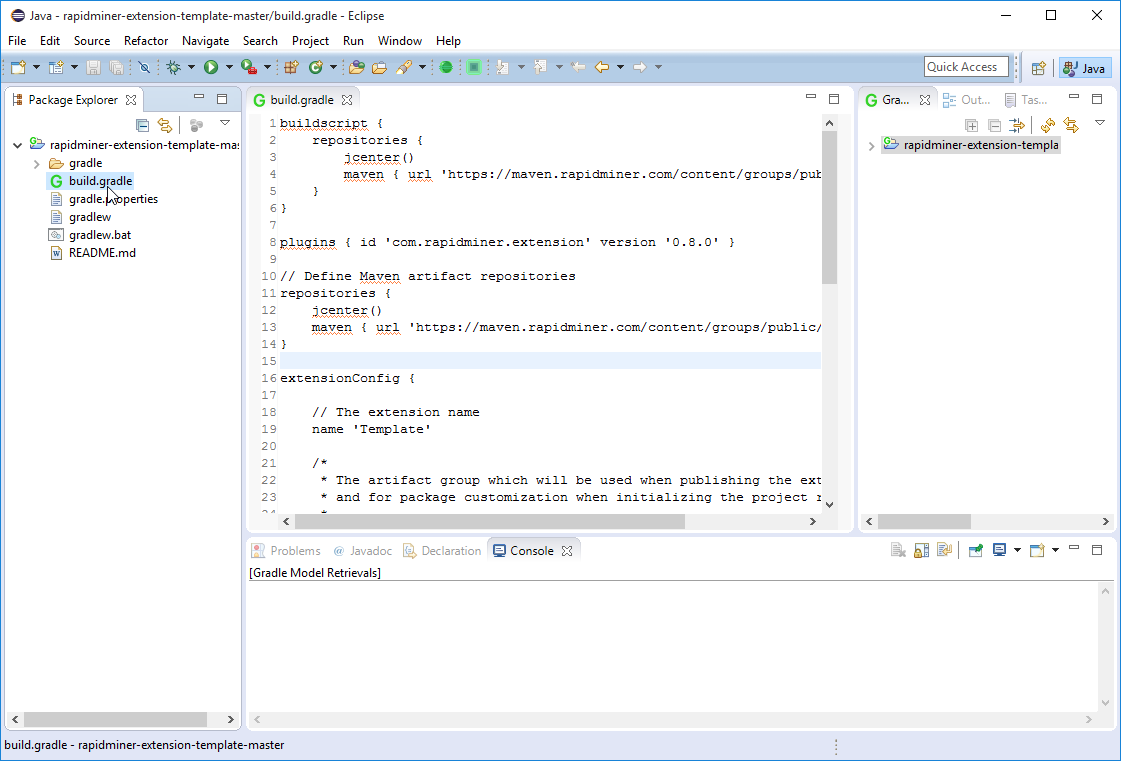
Open the project, double-click the file build.gradle to open it, and proceed to the next step - giving your extension an individual name and settings.