You are viewing the RapidMiner Server documentation for version 9.6 - Check here for latest version
Call web service from QlikView
See also: Call web service from Qlik Sense
This guide will walk you through the process of configuring and calling a RapidMiner Server web service from your QlikView environment:
- Launch QlikView and go to File > New to create a new empty QlikView document.
- Press CTRL + E or go to File > Edit script. The script editing page will open.
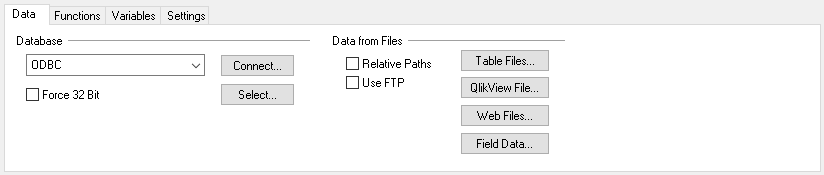
- On the Data tab, click on Web files:
- A new Source window, where the data source is configured, will open. Select the Internet File radio button and insert the direct link of the RapidMiner web service in the text box provided and click Next.
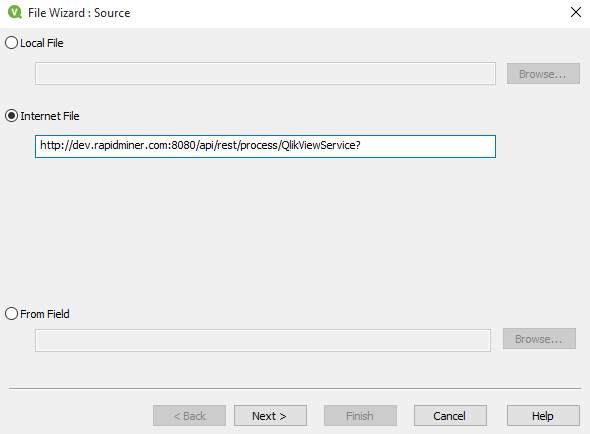
Note: If the web service requires authentication, the URL has to be modified to include user credentials as follows: http://username:password@web-service-url
When the Next button is clicked, QlikView will call the RapidMiner web service and as a result, RapidMiner Server will execute the process behind the web service. Depending on the complexity of your process and the amount of data, this step can take some time. Once RapidMiner Server has executed the process and all data is received by QlikView, a new window will open.Example: http://admin:pass123@dev.rapidminer.com:8080/api/rest/process/QlikViewService?
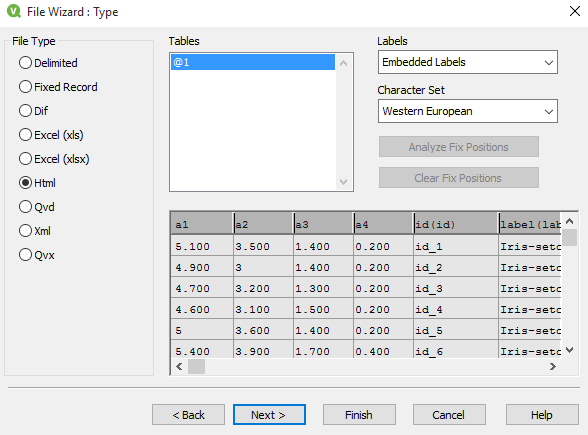
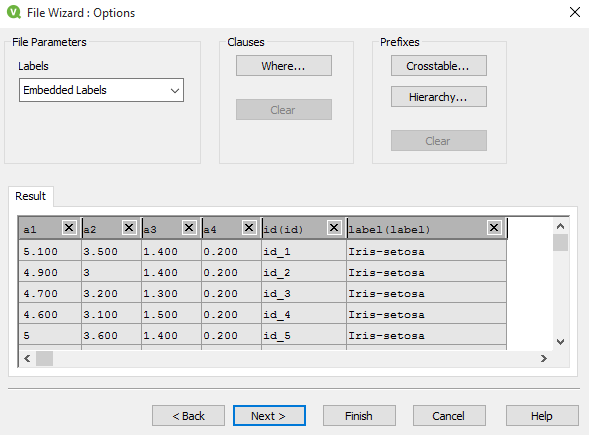
- Select Html as File type and (based on your data) choose appropriate Labels and Character Set values. Click the Next button.
Labels tell QlikView where to look for column names. If the first row contains the column names then the Embedded Labels setting should be selected. If the first row does not contain column names, None should be selected. RapidMiner always sends column names in the first row so Embedded Labels is the setting to use.
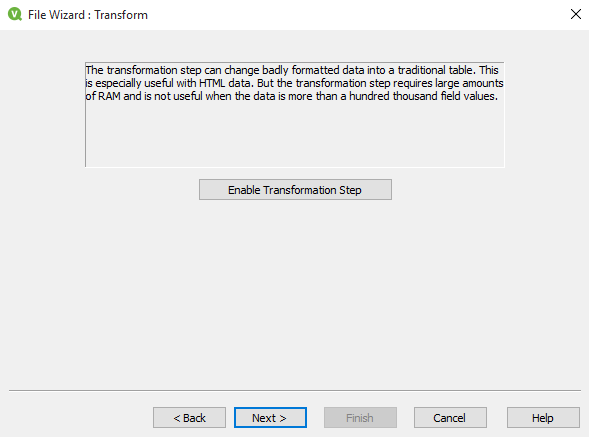
- On the Transform window, click the Next button (as all data have already been transformed and prepared to be read by QlikView).
- The Options window can be used to further filter input data if needed. Once finished, click the Next button.
- The last window will show a QlikView load script. No action is required so simply click the Finish button.
QlikView will automatically create a data loading script. Click the OK button:
- The data loading script is created but in order to use it, the script must be saved. Go to File > Save and save to a location of your choice.
- The last step is to load the data in QlikView. To do that, press CTRL + R or go to File > Reload.
- The data is now in QlikView and ready to use. To view data table press CTRL + T or go to File > Table Viewer. Now that the two tools have been connected and data is pulled from RapidMiner Server to QlikView, data can be used to build dashboards. Data can also be refreshed on demand by going to File > Reload or pressing CTRL + T. On data reload, the script will call the RapidMiner web service again and receive fresh data back.
Call Parameterized Web Service
It is possible to configure a RapidMiner Server web service to accept URL query parameters. QlikView offers two ways by which a parameterized web service can be called:
- Statically using a data loading script
- Dynamically using QlikView variables
Using Data Loading Script
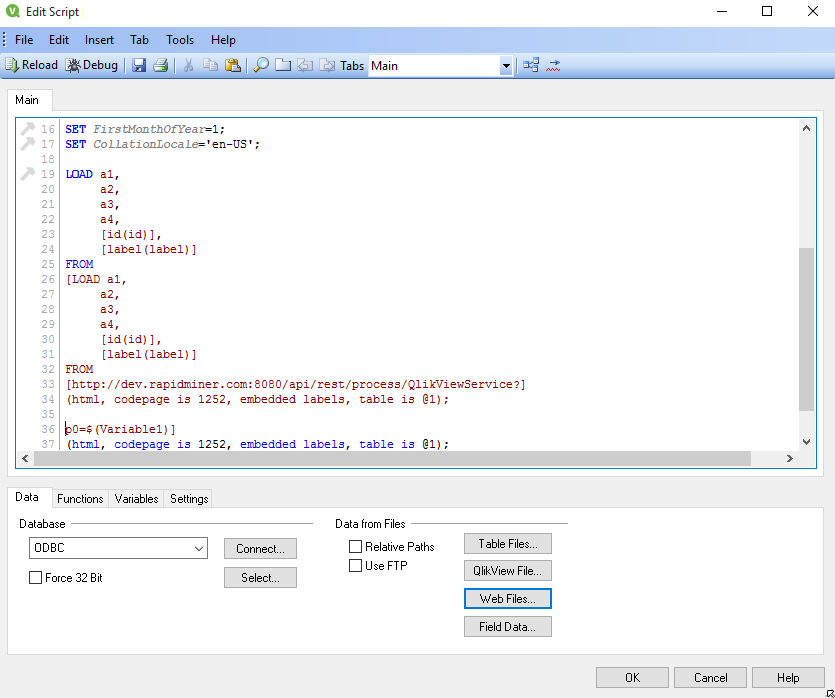
Parameters are passed through the URL of the web service. To be able to edit the service URL, the data loading script has to be modified.
- Press CTRL + E or go to File > Edit script. The Edit script window will open.
- Locate the URL of web service and add parameters to URL.
Parameters are added to the end of the web services URL preceded by a question mark (?).
Syntax: http://username:password@web-service-url?param-name=valueExample: http://admin:pass123@dev.rapidminer.com:8080/api/rest/process/QlikViewService?p0=1
- Save the script by pressing CTRL + S or going to File > Save.
- Reload the script by pressing the CTRL + R or going to File > Reload.
Using QlikView Variables
To be able to pass QlikView Variables as parameters to a RapidMiner web service, they have to be defined in QlikView and the data loading script has to be modified to use them.
- To create a QlikView Variable go to Settings > Variable Overview or press CTRL + ALT + V
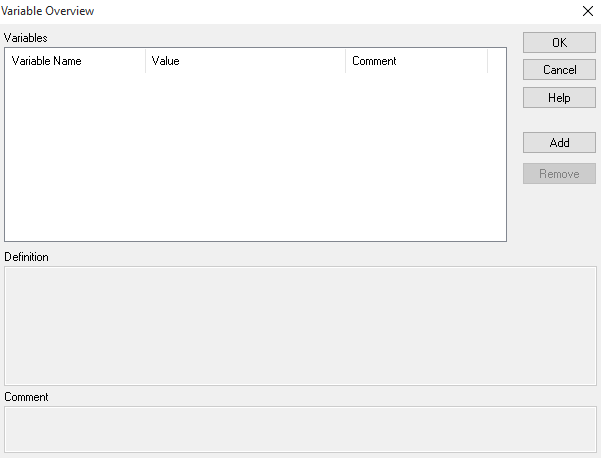
- Click the Add button, enter the name of variable and click OK button to accept.
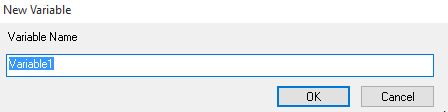
- Then click the OK button on Variable Overview window.
- Create a new object (like a button) on QlikView dashboard or use an existing one.
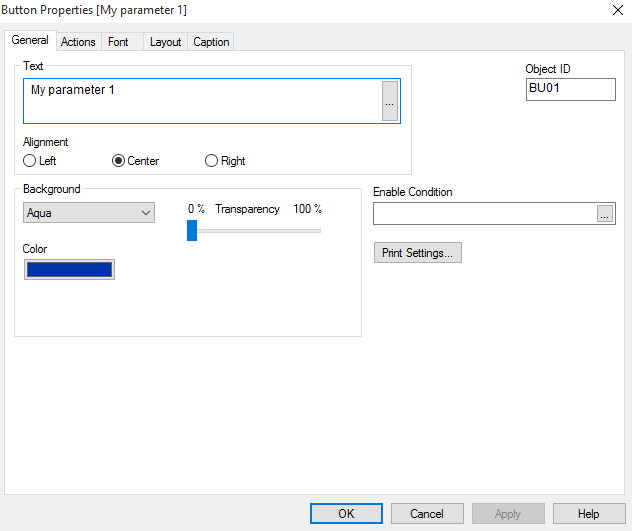
- Right click on the object and select Properties.
In the Text box enter the name of your object.
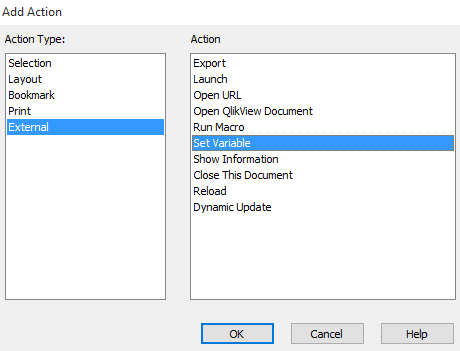
Go to Actions tab and click Add button.

- As Action Type select External and as Action select Set Variable. Click the OK button.
- Under the Actions list box, Set Variable will appear. On the right side open variable selection window by clicking the … button.
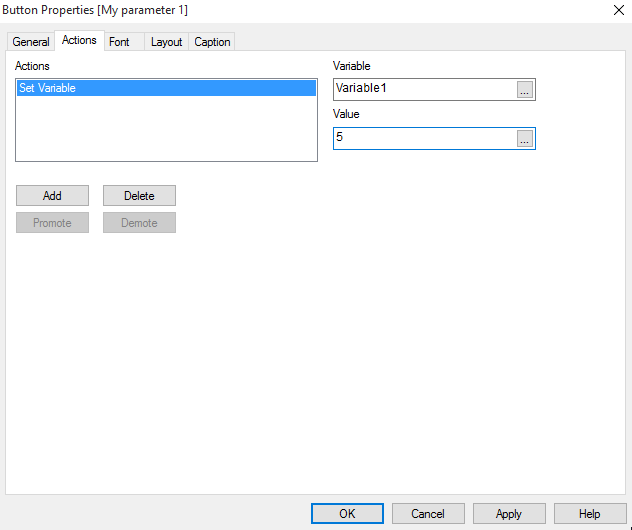
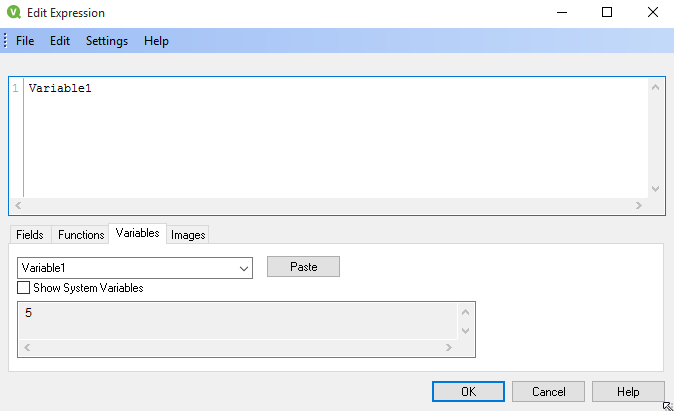
- An Edit Expression window will open. Click on the Variables tab, choose the variable from the dropdown menu and click Paste button.
- Click the OK button to accept changes.
- On the right hand side, enter the Value of your variable in the corresponding text box and click the OK button.

- Click on the object to apply the new variable value.
- Open the data loading script window by going to File > Edit Script or pressing CTRL + E.
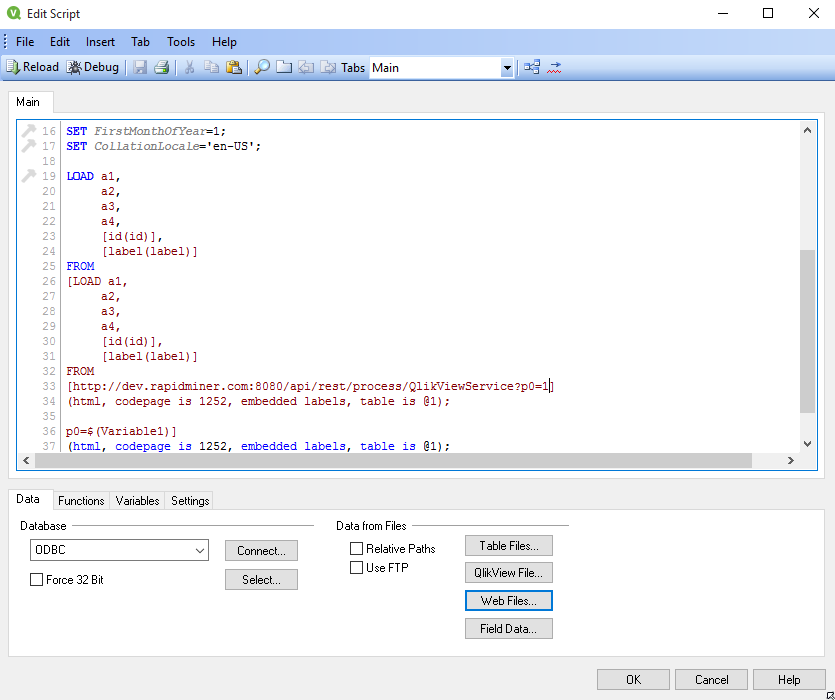
- Locate the URL of the web service and add the QlikView variables as parameters to the URL.
Parameters are appended to the end of a web service URL string, preceded by a question mark (?).
URL syntax: http://username:password@web-service-url?param-name=value
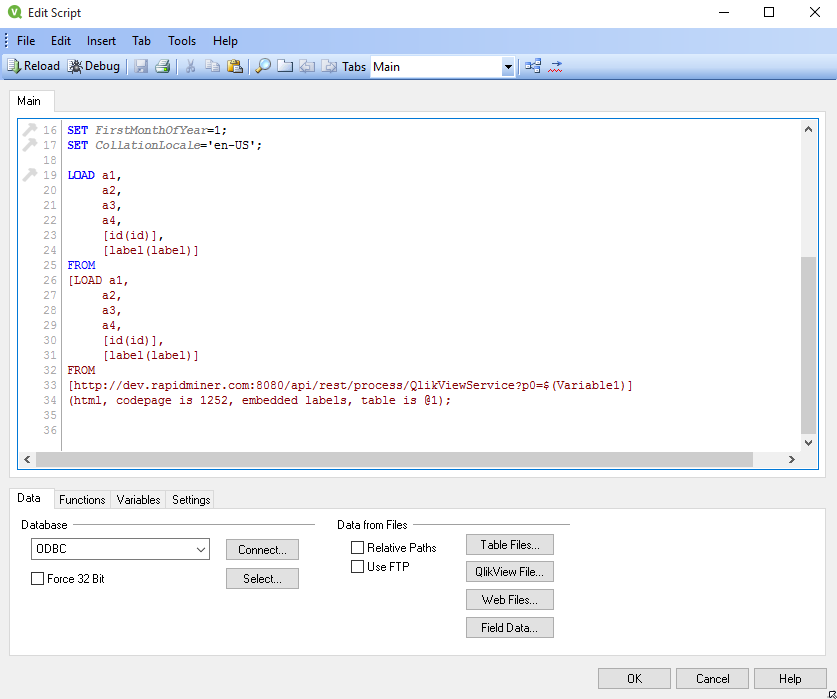
QlikView variables can be referenced with the following syntax: $(variable-name)Example: http://admin:pass123@dev.rapidminer.com:8080/api/rest/process/QlikViewService?p0=$(Variable1)
- Save the script by pressing CTRL + S or going to File > Save.
- Reload the script by pressing the CTRL + R or going to File > Reload.
- Data will be reloaded with parameter value equal to variable value.