Collaborate via Projects
A Project is a shared repository with version control provided by Git.
Projects enable your team to collaborate easily and safely, because you can roll back your changes at any point in time. Under the hood, the Projects of Altair AI Hub utilize a Git Server, enabling the connection to third-party tools, but no knowledge of Git is required when working with Projects.
The following sections outline how to use and manage Projects. For additional details, see the Altair AI Studio documentation.
- Create a new Project (or migrate an old one)
- Connect to a Project
- View a Project
- Edit a Project (permissions)
- Delete a Project
Read more: Configure projects
Create a Project
Create a Project within the Altair AI Hub Web UI:
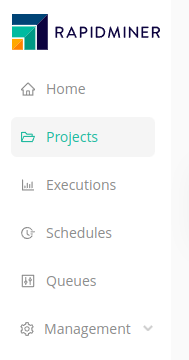
On the left, click on Projects:
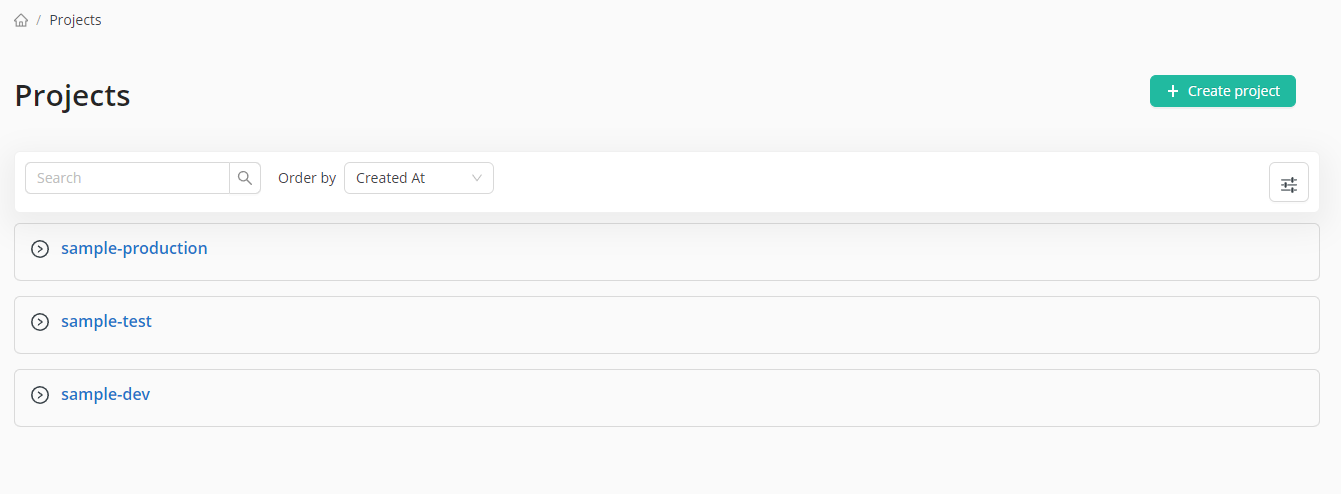
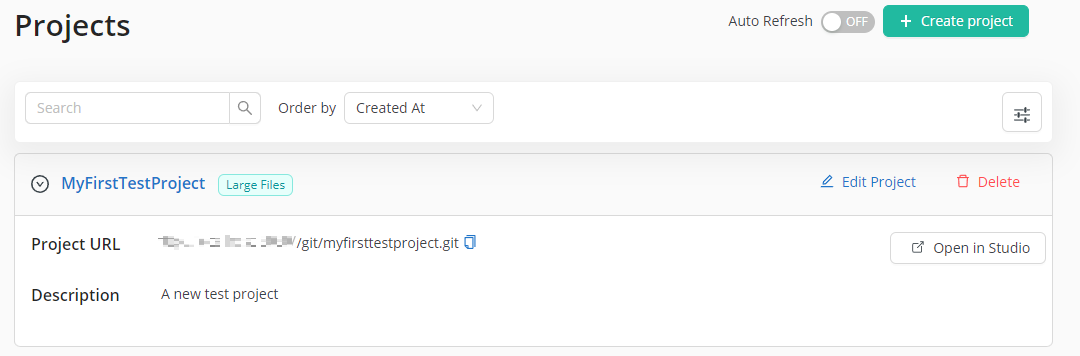
The Projects page is displayed. On the top right, click Create Project.
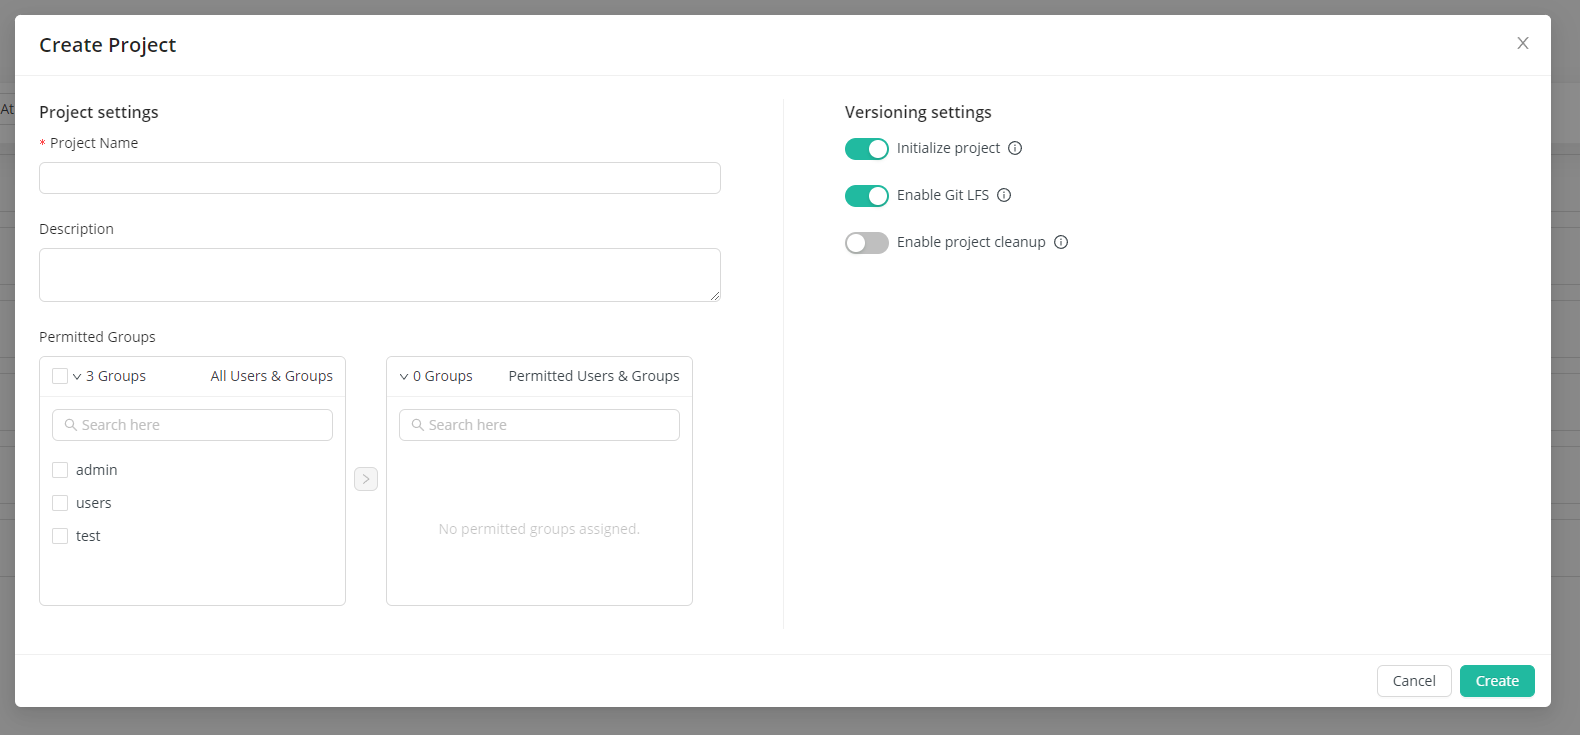
The Create Project dialog opens.
- Enter a Project name.
- Enter a Project description.
- Grant permission to the users and groups who are allowed to connect to this Project.
- Configure cleanup if you want to enable automatic Project cleanup.
- Click Create.
Migrating an external Git repository to Altair AI Hub
If you are creating a completely new Project, you should leave Initialize Project and Enable Git LFS checked. Enabling Git LFS reduces the impact of large files in your Project. By default, .ioo, .rmhdf5table, .collection and .conninfo file types are tracked with LFS.
If, on the other hand, you want to share an externally-created Git repository as a Project via Altair AI Hub, you should:
- leave Initialize Project unchecked, and Create the Project
insert the Project URL as the remote URL in the external
.git/config, and executegit push[remote "origin"] url = http://localhost:8080/git/my-project.gitif Git LFS is enabled, the use of LFS in the client is highly recommended. Install LFS with
git lfs installand configure the LFS URL by runninggit config lfs.url <your_server_address:port>/lfs/my-project.gitMake sure that the .gitattributes file is tracked. By default, a file
.lfsconfigis created during Project creation to ease this process for clients other than Altair RapidMiner.
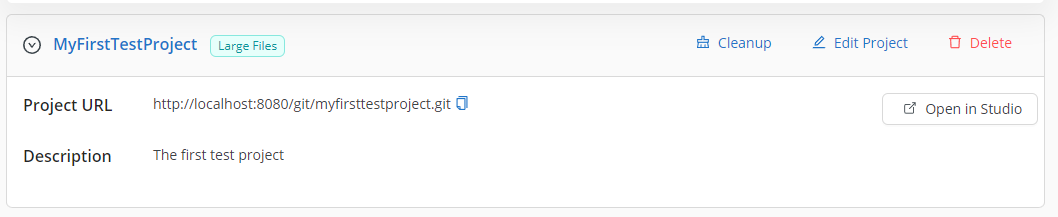
Congratulations! You have created your first Project and it will be visible on the Projects page:
Connect to a Project
After you have created your first Project you can connect to it via Altair AI Studio by
using the associated Project URL.
In the same way, any external Git client can connect to the Project. For example, using the Git command-line interface, you can connect to the Project as follows:
git clone <Project URL>
If you need Bearer authentication to work with your CLI git clone, then you need to retrieve a valid JWT (idToken) before invoking
the clone command from the REST API. Once you retrieved it, you can change the initial clone command to:
git -c http.extraHeader="Authorization: Bearer $idToken" clone <Project URL>
If you need to debug CLI git calls, add any of the common git debug environment variables before your git command.
Available are GIT_CURL_VERBOSE=1, GIT_TRACE=1 and GIT_VERBOSE=1.
View a Project
From the Projects page, you can browse individual Projects by clicking the drop-down icon.
 +
+
Overview
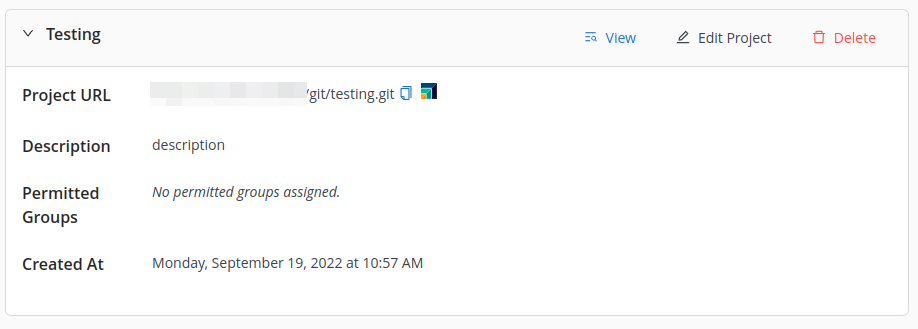
The Overview page displays the meta information of the Project. Depending on your privileges, you can edit the permissions or delete the entire Project.

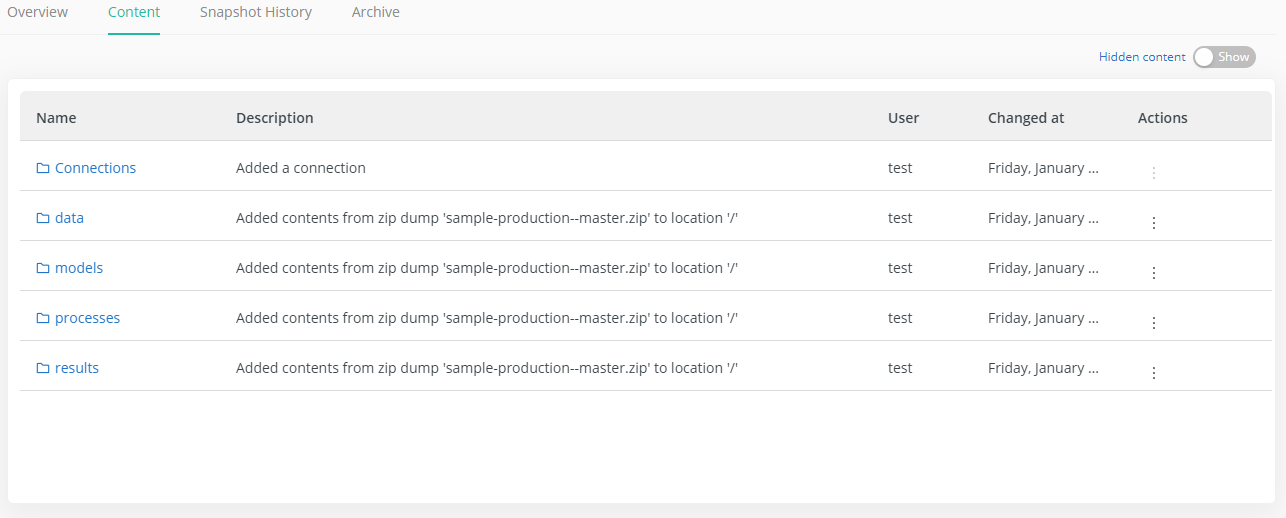
Contents
The Contents page allows you to browse the Project content on Altair AI Hub.
- A click on a folder will display its content.
- A click on a file will open the details view for the specific file type.
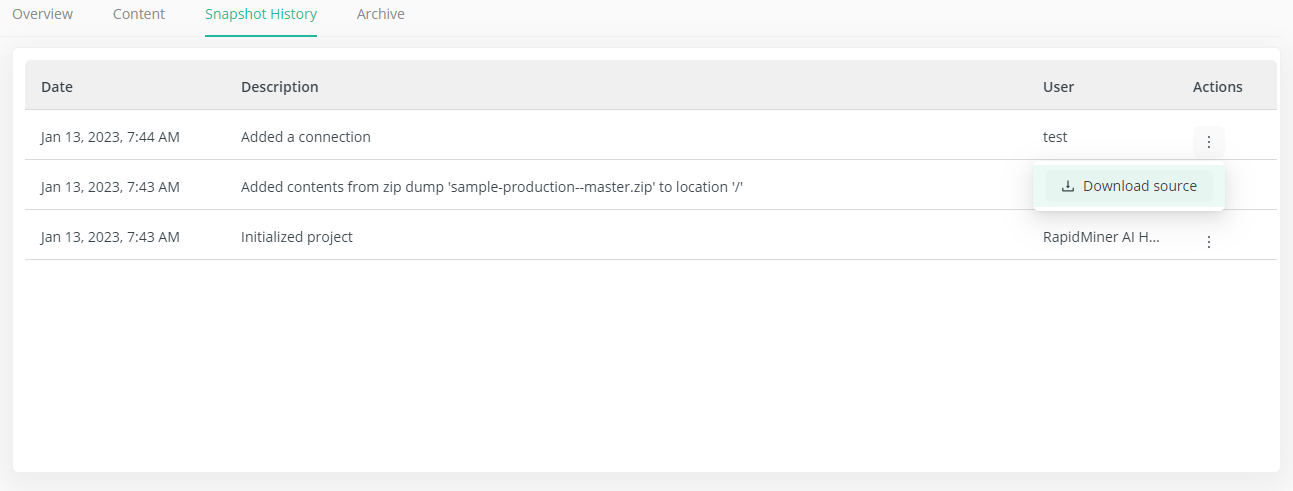
Snapshot History
The Snapshot History page displays the history of the Project. Each row in the table corresponds to a Snapshot.
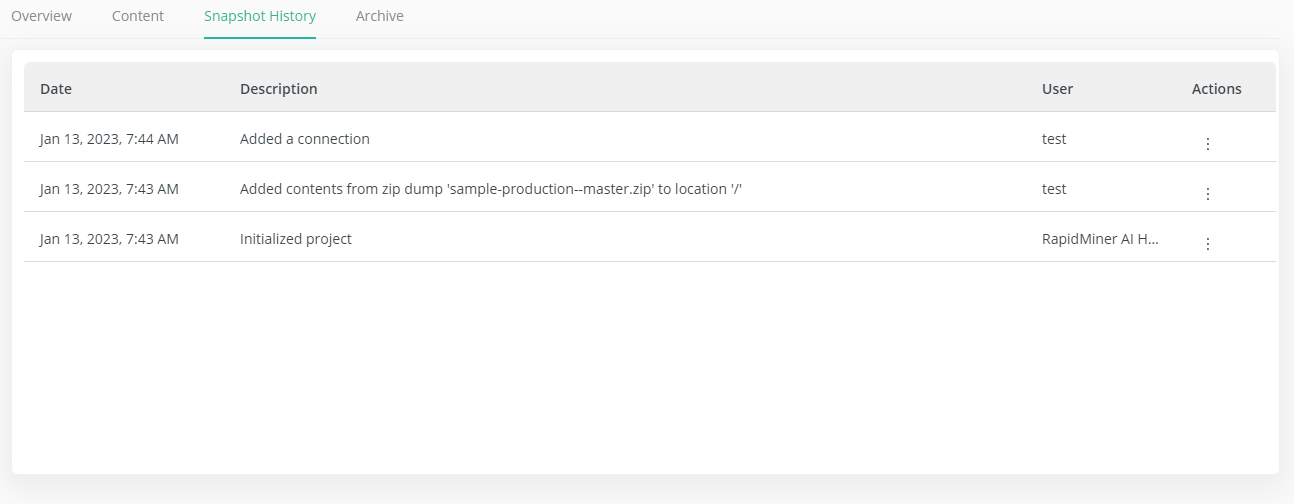
To inspect a Snapshot, click on the Description message for that row. The details page lists the files and folders that have been changed in this Snapshot. You can download the whole Snapshot as a ZIP file by clicking Download source.
Edit a Project (permissions)
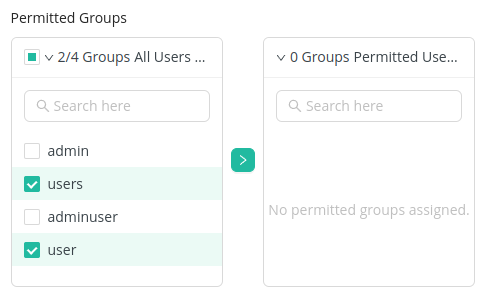
The permissions system distinguishes between content permissions and Project permissions.
Permitted Users & Groups have access to the contents of the Project. To add a user or group, select them from All Users & Groups, and press the right arrow.
- They can browse the Contents tab.
- They can modify the content via Altair AI Studio or an external Git client.
- They cannot alter Project-related settings in the Overview tab.
Owners can change the Project-related settings in the Overview tab. To add an owner, use the search box below the list of existing owners.
- They can modify the lists of Permitted Users & Groups and Owners.
- They can delete the Project.
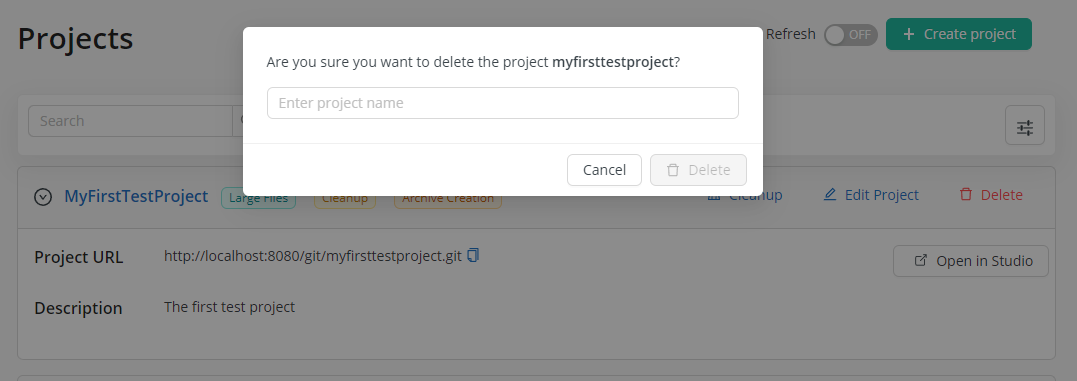
Delete a Project
CAUTION: The delete operation is a destructive operation and CANNOT be undone. Deleted Projects are NOT recoverable!
Only the owners of a Project can delete a Project. To delete a Project, click Delete from within the Projects page or the Overview page.

To protect the Project, a confirmation dialog is displayed. To confirm that you really want to delete the Project, you must first enter the Project name, and then click Delete.