Custom operators
On this page we explain how you can embed your Python code into processes even more by creating custom operators using the Python Learner, Python Transformer and Python Forecaster operators. You can then share these custom operators with others who aren't adept Python coders.
The Python Learner operator

With Python Learner, you can create a Python based model that is compatible with Altair RapidMiner's model interfaces. Models created using Python Learner (and custom operators derived from it) can be applied using the Apply Model operator, can be trained using Altair RapidMiner's Cross-Validation operators, can be fine-tuned using Optimize operators, and so on.
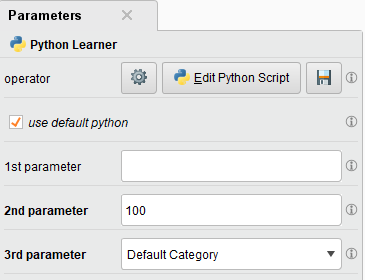
When you drag a new Python Learner to the canvas from the Operators panel is Altair AI Studio, you will get an operator similar to other learners (in operator color and input/output ports). It will also have a few predefined parameters which you can edit. See the list of supported parameter types below.
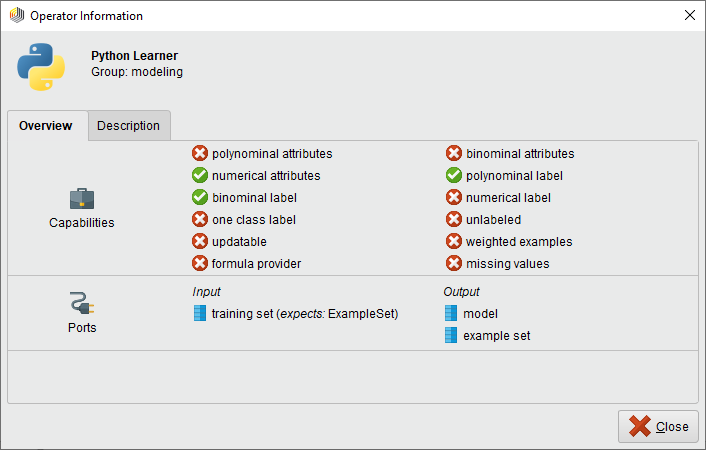
The operator information panel also shows the capabilities of this Python based learner.
To edit the parameter definitions and capabilities, click the gear icon on the Parameters panel. A JSON editor will appear where you can add and modify these traits. The JSON you write here will be validated and you will get warnings if something isn't correct. If you Apply an incorrect configuration, your input ports will disappear from the operator on the canvas.
To implement a Python learner, you need to define two functions named rm_train and rm_apply. As the name suggests, the first will run when you train a model in your Python Learner operator. The second will run when the model created with Python Learner is being applied with e.g. Apply Model. We advise to study the provided tutorial processes for more hints on how to implement these functions.
The Python Transformer operator
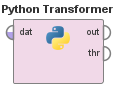
You can think of the Python Transformer as an Execute Python operator with user defined parameters and an arbitrary number of input and output ports.
The name of the operator, its parameters and their types and default values, as well as the input and output ports, are defined by clicking on the gear icon in the operator parameters panel, and editing the JSON definition in the editor that pops up. This is very similar to the one explained above for the Python Learner operator (Transformer doesn't take a list of capabilities, but it requires inputs and outputs). The JSON you write here will be validated and you will get warnings if something isn't correct. If you Apply an incorrect configuration, your input ports will disappear from the operator on the canvas. See the list of supported parameter types below.
In order for the code to execute as expected, you have to follow the same convention as for Execute Python: your main entry point will be the rm_main function, and the number and order of the function parameters and return values will correspond to the operator's input and output ports.
If you need multiple inputs and outputs for your Python Transformer based custom operator, you have to explicitly define this using the inputs and outputs part of the JSON definition. Users accustomed to Execute Python’s dynamic ports may find this non-intuitive.
The sample parameter configuration and code present when you drag a new Python Transformer to the canvas contains all the above hints.
The Python Forecaster Operator
Note: the Python Forecaster operator is only available from version 9.10.2.
With the Python Forecaster operator, you can create forecast models similarly to Altair AI Studio's time series operators. It is also compatible with the Apply Forecast operator.
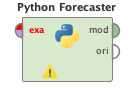
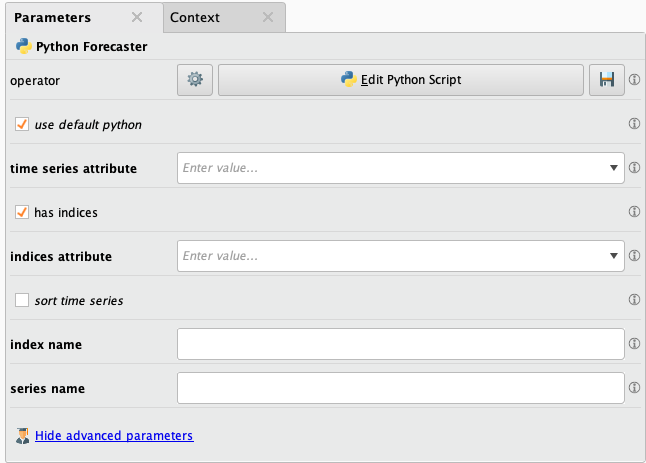
When you drag a new Python Forecaster to the canvas from the Operators panel in Altair AI Studio, you will get an operator similar to the Python Learner operator (in operator colour and input/output ports). It will also have a few predefined parameters. You can also add extra parameters, inputs and outputs. See the list of supported parameter types and configurable in/output ports below.
To implement a Python Forecaster, you need to define two functions named rm_train and rm_apply. As the name suggests, the first will run when you train a model in your Python Forecaster operator. The second will run when the model created by Python Forecaster is being applied with an Apply Forecast operator. So, this operator generates a Python Forecast model that is compatible with Altair RapidMiner's Apply Forecast operator.
Python Forecaster operator has similar parameters to the Python Learner operator, which allows you to:
- modify the JSON configuration,
- modify the Python scripts,
- save the operator,
- use different environments,
- Python binary,
- virtual environment,
- conda environment.
But there are some extra parameters which are not defined in Python Learner. These are:
- timeseries attribute: to be able to choose what to forecast,
- has indices: allows the user to choose if the data has indices,
- indices attribute: to be able to choose the index column,
- sort time series: if the data is not sorted, it can sort it.
By default, there are two hidden parameters that can help using the timeseries attribute and the index in the Python script. These two extra parameters are:
- series_name,
- index_name.
They can be reached from the Python script the following way:
index_name = parameters['index_name']
series_name = parameters['series_name']
For more examples check the tutorial processes.
Supported parameter types
Here's a list of supported parameter types for Python Learner, Python Transformer and Python Forecaster which you can use in the parameters list of your operator parameter configuration JSON:
| Type in JSON | Parameter appearance |
|---|---|
| string | string in a textbox |
| category | single-choice dropdown |
| boolean | checkbox |
| integer | integer in a textbox |
| real | floating point number in a textbox |
Each parameter definition has the following attributes, which are represented by key-value pairs in the tuple describing a parameter:
| Attribute | Mandatory? | Description |
|---|---|---|
| name | yes | the parameter name shown on the operator parameter panel |
| type | yes | the parameter type (see above table for supported types) |
| categories | only if type is category |
the choices shown in the parameter dropdown, displayed in the order provided by the user. Must be a list of values. |
| optional | no | if set to true, the operator will be executed even if the parameter value is empty |
| value | only if optional is false or not provided |
default value of the parameter |
Here are some examples to the above parameter definitions:
"parameters": [
 {
  "name": "1st_parameter",
  "type": "string",
  "optional": true
 },
 {
  "name": "2nd_parameter",
  "type": "integer",
  "value": 100
 },
 {
  "name": "3rd_parameter",
  "type": "category",
  "categories": [
    "Category A",
    "Category B",
    "Category C",
    "Default Category"
  ],
  "value": "Default Category"
 },
 {
  "name": "4th_parameter",
  "type": "boolean"
 },
 {
  "name": "5th_parameter",
  "type": "real",
  "value": 3.1415
 },
 {
  "name": "6th_parameter",
  "type": "string",
  "optional": true
 }
]
User configurable input and output ports
Note: configurable input and output ports feature is only available from version 9.10.2.
It is possible for the user to define additional input and output ports for Python Learner, Python Transformer and Python Forecaster. To do so, you have to add elements, JSON objects, to the array of inputs or outputs in the editable JSON configuration.
Here are some examples for additional inputs:
"inputs": [
  {
    "name": "additional input 1",
    "type": "table"
  },
  {
    "name": "additional input 2",
    "type": "table"
  }
]
Here are some examples for extra output ports:
"outputs": [
  {
    "name": "additional output 1",
    "type": "table"
  },
  {
    "name": "additional output 2",
    "type": "table"
  }
]
To use the previously added ports check the following sections. You can also find examples in the tutorial processes of the Python Forecaster operator.
How to use user configurable input ports
After extending the inputs array, the user defined input ports can be reached from the rm_train method. The rm_train is called with an *inputs argument which includes the additional input ports. So, if you add extra parameters to the rm_train() method definitions you will be able to reach the inputs.
Here is an example for the Python Learner:
# The original definition:
rm_train(X, y, parameters)

# The new definition with two additional inputs:
rm_train(X, y, additional_input_1, additional_input_2, parameters)
Here is an example for the Python Forecaster:
# The original definition:
rm_train(index, series, parameters)

# The new definition with two additional inputs:
rm_train(index, series, additional_input_1, additional_input_2, parameters)
How to use user configurable output ports
After extending the outputs array, the rm_train method can transfer data to the user defined output ports. The rm_train method returns a model, object, you want to pass to the rm_apply method. In the return statement always the first object will be passed to the rm_apply method, additional ones will be transferred to the additional output ports. These data should be pandas DataFrames.
Here is an example with returning a model:
# The original return statement:
return model

# The new definition with two additional outputs:
return model, additional_output_1, additional_output_2
An extra example for returning an object:
# The original return statement:
return {
    'model': model
}

# The new definition with two additional outputs:
return {
    'model': model
}, additional_output_1, additional_output_2
Environment handling in custom Python operators
Similarly to the Execute Python operator, you can uncheck the use default Python parameter and specify which environment to use. In case of Python Learner, the model application will be done using the same environment that was used for training.
In case the model application is done on another machine (e.g. on Altair AI Hub), ensure that the same Python environment with the same name is available, otherwise your execution will either fail, or produce unwanted results.
Sharing and distributing custom operators
When you are happy with how a Learner, Transformer or Forecaster you created behaves, the next step could be sharing it with others on your project. All of these operators have a Save button on their parameters panel.
When you click Save, then specify a location in your project or repository, a .pyop descriptor file will be created.
Users can then drag this .pyop file to the canvas in Altair AI Studio, and the Learner or Transformer containing all your code and parameter definitions will be created, using the name you provided for your custom operator. This operator will not be editable, which ensures that code you wrote earlier will execute the same way as you intended it (provided the Python environment it uses is present on the machine running the process).
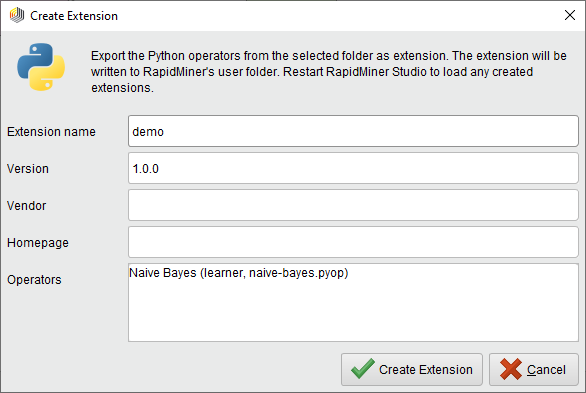
One drawback of this method of sharing is that it is not possible to update the operators after the .pyop descriptor has been dragged to the canvas and a new operator was created based on it. If you need to ensure that these operators get updated, you need to distribute your custom operators as an extension. To do this, right-click on the folder containing your .pyop files and click on Create Extension... Enter the details on the dialog that appears. You will also be given a list of the custom operators that will be compiled into your new extension. Click Create Extension.
Once the extension is created, you can distribute it as any other extension. When you want to update your operators, you create a new version of the extension and redistribute it to all users.
Note: the created extension will depend on the Python Scripting extension version 9.9 or later, so each user has to have that extension installed as well.