You are viewing the RapidMiner Developers documentation for version 2024.0 - Check here for latest version
Create custom templates for your extension
This article will guide you through:
- Designing a new template process
- Bundling the template with your extension
Designing a template
Templates are self-contained files that can be distributed via extensions or loaded from your local file system. While the file format is simple, it is important to comply with the structure described below.
File format
Templates are ZIP archives that use the .template file extension and contain at least three files:
my_template.template
├── icon.png
├── My Template.rmp
└── template.properties
The template.properties files defines the name of the template and contains a short description.
It must be encoded as ISO-8859-1 – in particular, unicode encodings will most likely not work.
For the example above, the file's contents could be like this:
template.name=My Template
template.short_description=This is my custom template.
The template must contain exactly one Altair RapidMiner process (*.rmp).
It will be loaded if the user selects the template.
The icon that should be used for the template, e.g., in the New Process menu,
must be provided as portable network graphic (*.png), named icon.png, and should be of size 64×64.
In addition to these files, you can bundle arbitrary repository entries. For instance, if you want to include a certain data set in your template, you can do so by adding the corresponding files from your local repository. The following section covers an example for this.
Finally, please note that the template mechanism does not support subdirectories. Altair AI Studio will refuse to load template archives that include folders.
Developing templates
You can load your template processes locally without bundling them with your extension. The bundling only becomes necessary if you want to distribute your templates.
All you need to do is to move the template archive into your .RapidMiner\templates directory.
Please note that templates stored in that directory override bundled templates:
if you bundle a template with your extension and have a local copy of the template installed,
only the local copy will loaded.
A minimal template
Let us start with a simple “Hello, world!” template that displays a single process annotation. To create the process file open a new process in Altair AI Studio and add an annotation with a message of your liking:
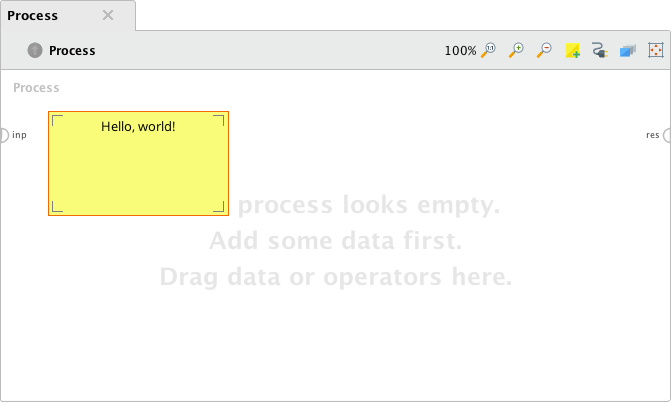
Export the process via the File menu (choose Export Process…) and save it as Hello World.rmp.
Next we need a template icon in the correct format. If you like, you can download this one:
![]()
As last file, we need to create the template.properties file that contains the name and the description of the template.
template.name=Hello World
template.short_description=A minimal template.
Finally, we need to create the template archive.
For this purpose, create a new ZIP archive containing the three files using an archiver of your choice.
Then change the file extension from *.zip to *.template, e.g., rename hello_world.zip to hello_world.template.
The final file structure should be like this:
hello_world.template
├── Hello World.rmp
├── icon.png
└── template.properties
To load the newly created template, copy the template file to .RapidMiner/templates and restart Altair AI Studio.
In the New Process menu, you should now be able to select your new template:
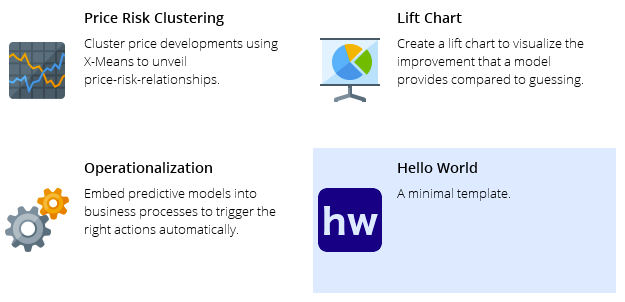
Selecting the new entry should open up the process we created in the first step.
Including repository entries
Let us now add a custom data set to the template. In principle, you can bundle any repository entry with a template. But keep in mind that the template mechanism is not designed to handle large data sets.
Before we start, let us revisit how Altair RapidMiner processes reference repository entries.
This is either done via an absolute path, e.g., //Local Repository/data/example or via a relative path, e.g., ../data/example.
For templates we can use neither: While absolute paths will work on the machine that you use to develop the template, the paths will most likely be invalid on other machines. Relative paths will not work at all, since the template mechanism always creates a new process that has no repository location to begin with.
However, Altair AI Studio will create a hidden samples repository for each template.
For instance, the contents of our “Hello, world!” template are available via the absolute path //Samples/Templates/Hello World.
Thus, we will have to adjust repository references in our template processes accordingly.
First, create a new folder in your local repository, e.g., //Local Repository/Hello World.
Then create a new process and drag in the Generate Data by User Specification operator and specify a small data set:
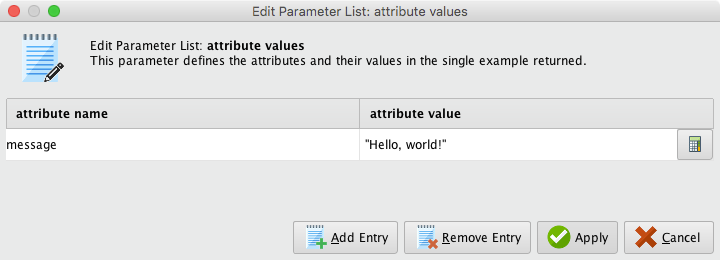
Add a Store operator to save the specified data set.
Configure it to store the data set in the directory created above, e.g., as //Local Repository/Hello World/Hello World Data:
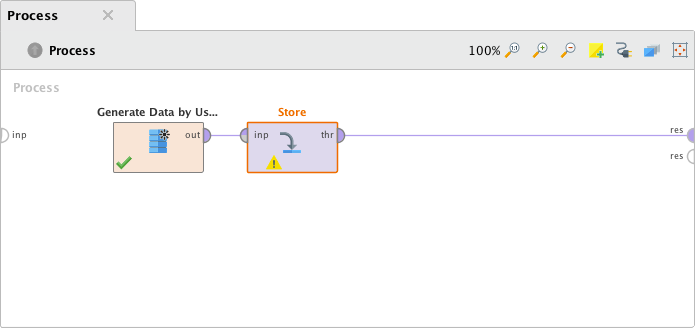
Run the process once to create the repositor entry.
Create a new process and store it in the same directory as the data set, e.g., as //Local Repository/Hello World/Hello World.
Drag the data set into the blank process and connect the Retrieve operator to the results port:
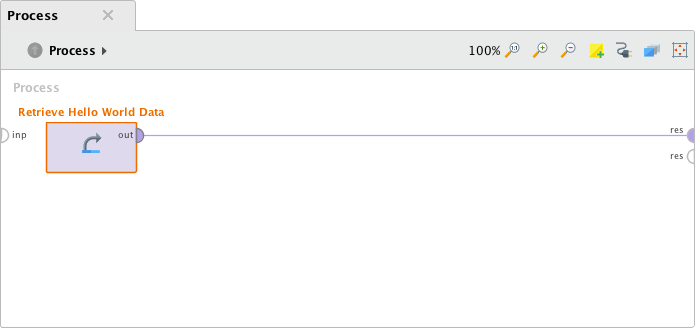
Once you save the process, the repository entry will be referenced via a relative path:
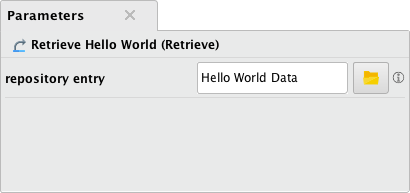
Change this to //Samples/Templates/Hello World/Hello World Data (this assumes that we continue with the template name Hello World):
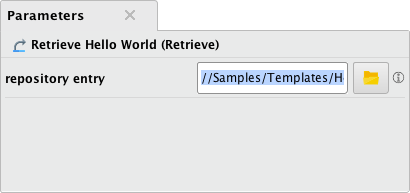
Altair AI Studio might warn you about in invalid path since the template has not yet been loaded. Ignore the warning and save the process.
Your local repository should now have a structure similar to this:
Local Repository
├── data
├── processes
├── …
├── Hello World
│   ├── Hello World Data
│   └── Hello World
└── …
If you browse the repository with your operating system's file browser, you will get a slightly different picture. To do so, alternative-click on the repository and choose Open in file browser:
.RapidMiner/repositories/Local Repository
├── …
├── Hello World
│   ├── Hello World Data.ioo
│   ├── Hello World Data.md
│   ├── Hello World Data.properties
│   ├── Hello World.properties
│   └── Hello World.rmp
└── …
As you can see the generated data set is split into three files.
It is important that we bundle both the *.ioo (the actual data) and the *.md (meta data) with the template.
However, we can ignore the *.properties files.
Update the template archive created in the previous section and add the generated data set. The archive should now look like this:
hello_world.template
├── Hello World Data.ioo
├── Hello World Data.md
├── Hello World.rmp (updated process)
├── icon.png
└── template.properties
Restart Altair AI Studio to load the updated template. You should be able to run the template without having to modify the process.
Bundling templates
Bundling templates with your extension is a straight forward process. All you have to do is to add your template archives as resources and register them in the initialization code of your extension.
If you have no experience with writing extensions yet, please refer to our guide Create your own extension. Sections 1-3 cover all you need to know to build an extension that can be used to distribute templates.
Adding templates as resources
By convention build tools such as Maven and Gradle look for resources in the src/main/resources directory.
We recommend using this structure for Altair RapidMiner extensions as well.
Let us assume that you chose org.myorg.myextension as group id.
Then your resources should be located in src/main/resources/org/myorg/myextension.
Note that Altair RapidMiner will add the template directory to the path automatically.
Thus, you could bundle the template create above as …/org/myorg/myextension/template/hello_world.template:
my_extension
├── README.md
├── build.gradle
├── …
├── src
│   └── main
│       ├── java
│       │   └── …
│       └── resources
│           ├── org
│           │   └── myorg
│           │       └── myextension
│           │           └── template
│           │               └── hello_world.template
│           └── …
└── …
However, Altair RapidMiner will not search for resources in that directory unless you register the location as resource source.
This can be easily done in the initialization code of your extension.
All you need to do is to add the following line to the initPlugin() method:
/**
 * This method will be called directly after the extension is initialized. This is the first
 * hook during start up. No initialization of the operators or renderers has taken place when
 * this is called.
 */
public static void initPlugin() {
    // register extension resources
    Tools.addResourceSource(new ResourceSource(PluginInitMyExtension.class.getClassLoader(),
        "org/myorg/myextension/"));
}
Now you can register extension via the so-called template manager. To register the template designed above, you could add another line to the plugin initialization code:
public static void initPlugin() {
    // register extension resources
    Tools.addResourceSource(new ResourceSource(PluginInitMyExtension.class.getClassLoader(),
        "org/myorg/myextension/"));
    // register hello world template
    TemplateManager.INSTANCE.registerTemplate("hello_world");
}
Testing the templates
There are no further special steps involved in testing the bundled templates.
All you need to do is to build a new version of your extension, e.g., via the command gradle clean installExtension.
But keep in mind that templates stored in your .RapidMiner directory override bundled template of the same name.
Thus, make sure to remove all working copies of your templates before starting Altair AI Studio.