You are viewing the RapidMiner Developers documentation for version 8.2 - Check here for latest version
Adding Custom User Interface Elements
Learn how to add custom panels to the UI of RapidMiner Studio and how to modify the Preferences dialog to your needs.
Adding custom panels
The PluginInit class offers the ability to modify the GUI. We will add a single new window here for demonstration purpose. All we have to do is to implement a new class implementing the Dockable interface and a component that is delivered by the Dockable.
public class SimpleWindow extends JPanel implements Dockable {

    private static final long serialVersionUID = 1L;
    private static final DockKey DOCK_KEY = new ResourceDockKey("tutorial.simple_window");
    private JLabel label = new JLabel("Hello user.");

    /**
     * Constructor for a {@link SimpleWindow}.
     */
    public SimpleWindow() {
        // adding content to this window
        setLayout(new BorderLayout());
        add(label, BorderLayout.CENTER);
    }

    /**
     * Sets the simple window label
     *
     * @param labelText
     *            the text to show
     */
    public void setLabel(String labelText) {
        this.label.setText(labelText);
        System.out.println(labelText);
        revalidate();
    }

    @Override
    public Component getComponent() {
        return this;
    }

    @Override
    public DockKey getDockKey() {
        return DOCK_KEY;
    }
}
While the content of the window is rather simple and only a variant of the well-known 'Hello world' program, it illustrates the concept of the ResourceDockKey.
A DockKey contains information about a Dockable, for example it stores the name and the icon of the window.
The ResourceDockKey retrieves this information from the GUI resource bundle that is loaded in a language dependent manner from the resource file GUIXXX.xml where 'XXX' is the extension name.
The following is an example of what might describe the new window:
gui.dockkey.tutorial.simple_window.name  = A simple Window
gui.dockkey.tutorial.simple_window.icon  = window2.png
gui.dockkey.tutorial.simple_window.tip   = Take a look at what RapidMiner has to say.
In the example, the icon window2.png has been added to the folder icons/16 in the resources folder of your extension, making it available when starting RapidMiner.
The final task before seeing the new window is to register it at RapidMiner's MainFrame.
You want to do this independent of operator execution, and in fact, want to have the window before any process is executed.
To do so, use one of the PluginInit hooks, so we are going to fill the initGui method:
public static void initGui(MainFrame mainframe) {
    mainframe.getDockingDesktop().registerDockable(new SimpleWindow(););
}
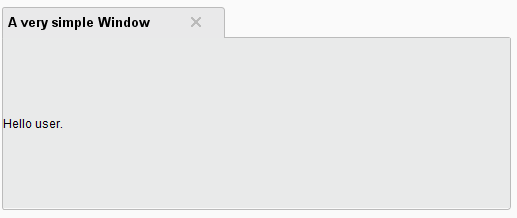
That's it! You can now select the new panel from the View > Show Panel menu. The result looks like this:
Adding custom settings to the Preferences dialog
Open the Settings > Preferences menu and look at the existing preferences dialog. As you can see, there are several tabs that contain specific settings that the user can make. For your extension, you can create your own tab.
Complete these three steps to build your own tab in the Preferences dialog:
Adapt the file
settingsNAME.xml, where 'NAME' is the name of your extension. Then, specify keys for the tab name and the single preferences you want to add. For example:<?xml version="1.0" encoding="UTF-8"?> <settings> <group key="extension_name"> <property key="extension_name.url" /> </group> </settings>Adapt the file
SettingsNAME.properties, where 'NAME' is again the name of your extension. Specify names for the keys that you defined in the first step.extension_name.title = My Extension extension_name.description = extension_name.url.title = A Server URL extension_name.url.description = Default value of a server URLChange the method
initPlugin()in yourPluginInitclass and register the settings that you want to add to the Preferences dialog.public static void initPlugin() { ParameterService.registerParameter( new ParameterTypeString( "extension_name.url", "The server URL","http://localhost:8080")); }
If you want to use a boolean setting (a check box), register it like this:
ParameterService.registerParameter(
    new ParameterTypeBoolean("extension_name.url","Use a URL?", false));