You are viewing the RapidMiner Radoop documentation for version 8.2 - Check here for latest version
Guide to Loading Data
Ideally, your data already resides on the cluster. If this is the case, importing does not mean the movement of data, but the object creation that allows Radoop to access the data. If not already on your cluster, import involves copying data from your client machine. In either case, data import can be part of your Radoop process.
This section uses the following operators:
- Read CSV
- Read Database
- Store in Hive
- Append into Hive
- Retrieve from Hive
Each is briefly described in context; for more detail, see the section on operators or the operator help text.
RapidMiner Radoop primarily uses Hive as a data warehouse layer over Hadoop. To define the structure of your data as inputs in your processes, use Radoop's operators and wizards. The easy-to-use interface helps manage database objects while the visualization tools let you quickly explore them.
Import scenarios
When you design your import process, choose from the following basic scenarios:
Define a Hive external table for your data on HDFS, Amazon S3 or Azure HDInsight. No data movement is involved.
Define a Hive-managed table for your data on HDFS. Source data will be copied to the HDFS directory structure managed by Hive. You can specify a custom storage format for the target table.
Define a Hive-managed table for local data on your client machine. The data from the local machine will be copied to HDFS into the directory structure managed by Hive. Note that this can be the slowest of the options.
Regarding the execution of the import, there are two options:
| Option | Description |
|---|---|
| Launch the import immediately | Open the Import Configuration Wizard on the Hadoop Data View, describe the source and target object, then launch the import immediately. This is only recommended for external tables (created instantly) or smaller HDFS or local sources. The import configuration is not saved and the Radoop client waits until the operation finishes. A progress bar shows operation progress. |
| Create an import process | Use the Design view to create a process that includes one or more data import operations. Use an operator from the Radoop / Data Access / Read operator group. The Read CSV operator opens the Import Configuration Wizard. The Read Database operator opens a similar import wizard for the configuration of a data import from an external database that the client accesses (the data streams through the client machine). The import operation is performed when you run the process. Choose this option if you may want to reuse the configuration, do periodic imports, schedule, or share the import process with others. |
There is a third option for use when you load a process' data set (ExampleSet) from the client's operative memory to the cluster. This is done automatically by the Radoop Nest operator chain—every ExampleSet connected to any of its input ports is pushed to the cluster and becomes automatically available to any operator inside the nest that expects a data set as input.
Using the import wizard
The easiest way to access the import wizard is from the Hadoop Data view. After you complete the steps, RapidMiner Radoop immediately imports the data to your cluster. If you have more than one cluster connection defined, the wizard prompts for the connection you want to use for the import. Import time depends on the size of your data and the connection to the cluster.
Note: The process is basically the same for a local source and for a file or directory on the cluster.
There are two ways to open the import wizard:
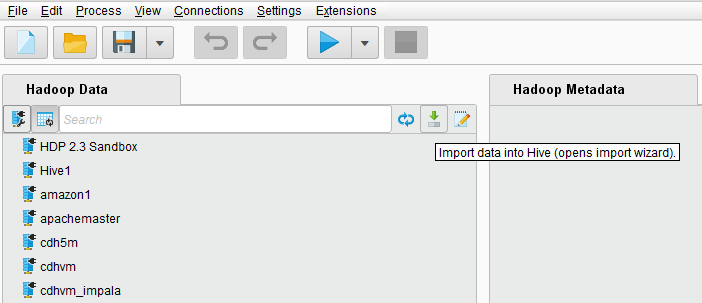
From the Hadoop Data view:
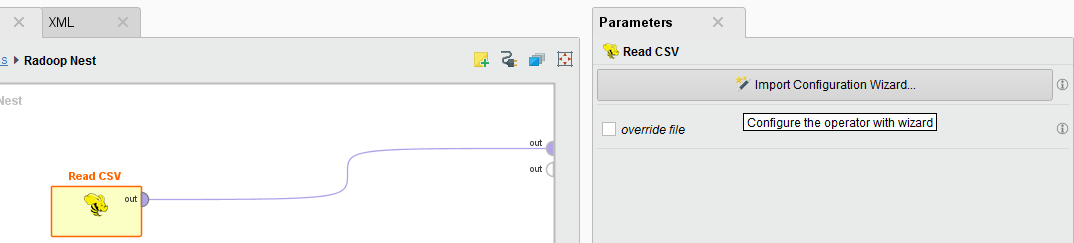
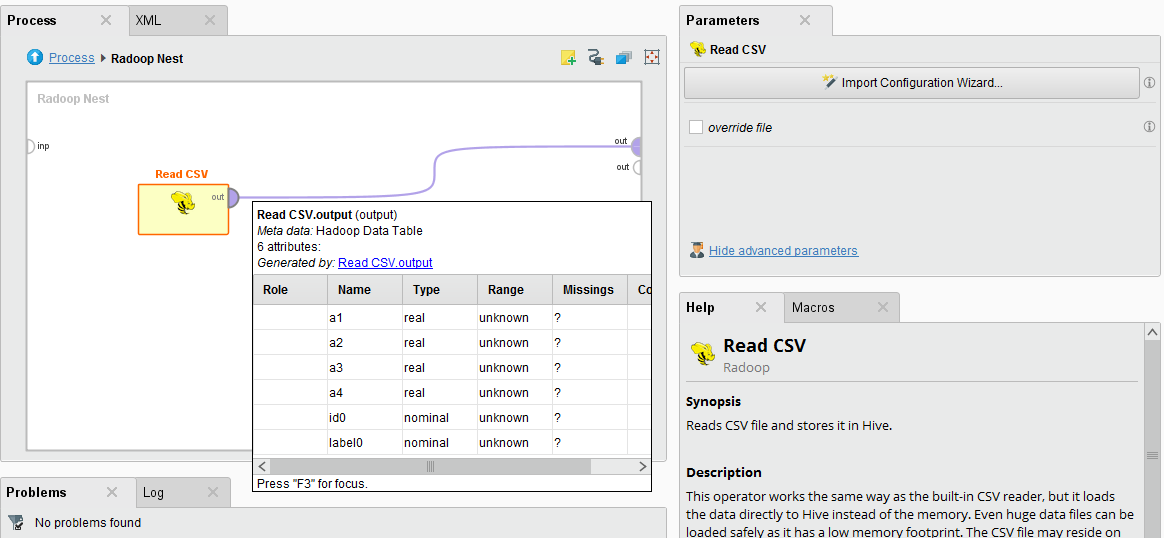
Creating a new process using a Read CSV operator inside a Radoop Nest operator, then clicking on Import Configuration Wizard in the Parameters panel. In this case, completing the steps only defines the import parameters to the operator; the import is performed when you run the process.
When you save your process, Radoop saves the configuration defined using the wizard in the process file. If you will be repeating the import later, it's a good idea to create a process.
The wizard guides you through the following steps to describe the source file and define the destination structure on Hive (and in RapidMiner).
Step 1 of 4
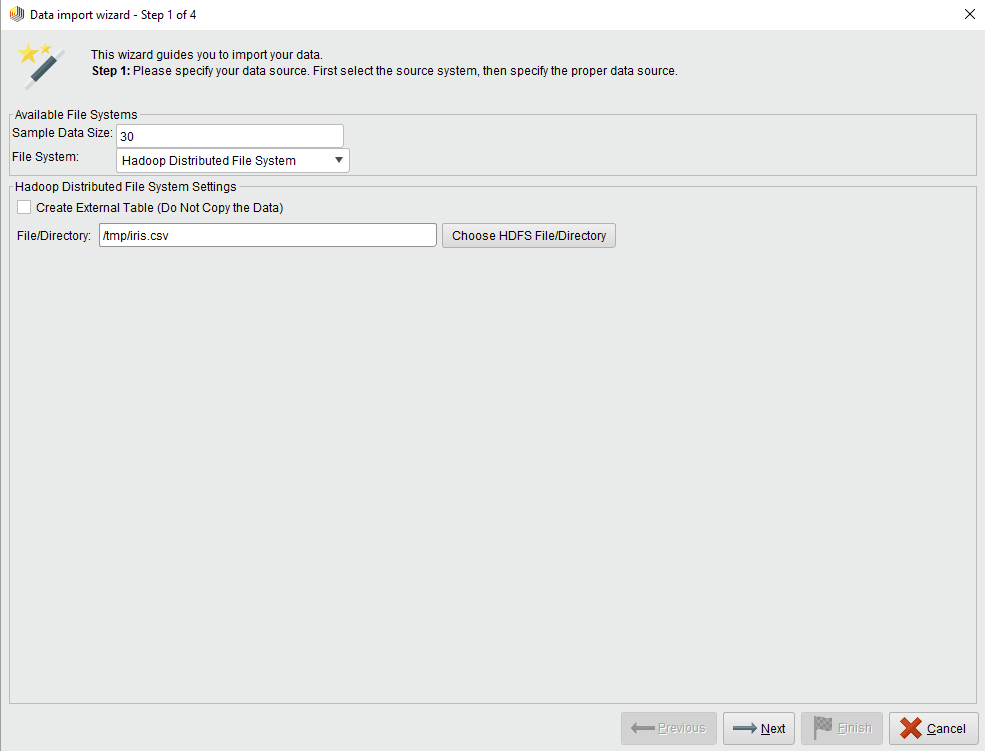
Set the Sample Data Size and identify the file system. The Sample Data Size specifies the number of rows that are shown as the data sample in Steps 2 and 3. Choose from local, HDFS, Amazon S3, or Azure HDInsight (Blob / Data Lake) file systems.
Local File System
When selected, you are offered a button that opens a file browser. Click Choose Local File and select the input file or directory. Click ![]() Next to proceed to Step 2.
Next to proceed to Step 2.
Hadoop Distributed File System
When selected, you are offered a button that opens a file browser. Click Choose HDFS File/Directory and select the input file or directory. For an HDFS source, you may want to create an external table instead, which you can accomplish by checking the Create External Table... checkbox. For an external table, select a source directory; the content of the files in this directory will be the content of the external table. For a non-external (managed) table, you can select a single file or a complete directory as a source.
Click ![]() Next to proceed to Step 2.
Next to proceed to Step 2.
Amazon Simple Storage System (S3)
Specify the S3 Path and File Format. Enter the path according to the instructions shown in the wizard. Select one of the listed standard file formats. Or, select Custom Format and complete the input and output fields (for example, classnames like org.apache.hadoop.hive.ql.io.IgnoreKeyTextOutputFormat).
You can then test the connection and view the log for test results. Click ![]() Next to proceed to Step 2.
Next to proceed to Step 2.
Azure HDInsight Storage Systems (Blob / Data Lake)
Specify the Storage Type, Path and File Format. Enter the path that matches the chosen Storage Type according to the instructions shown in the wizard. Select one of the listed standard file formats. Or, select Custom Format and complete the input and output fields (for example, classnames like org.apache.hadoop.hive.ql.io.IgnoreKeyTextOutputFormat).
You can then test the connection and view the log for test results. Click ![]() Next to proceed to Step 2.
Next to proceed to Step 2.
Step 2 of 4
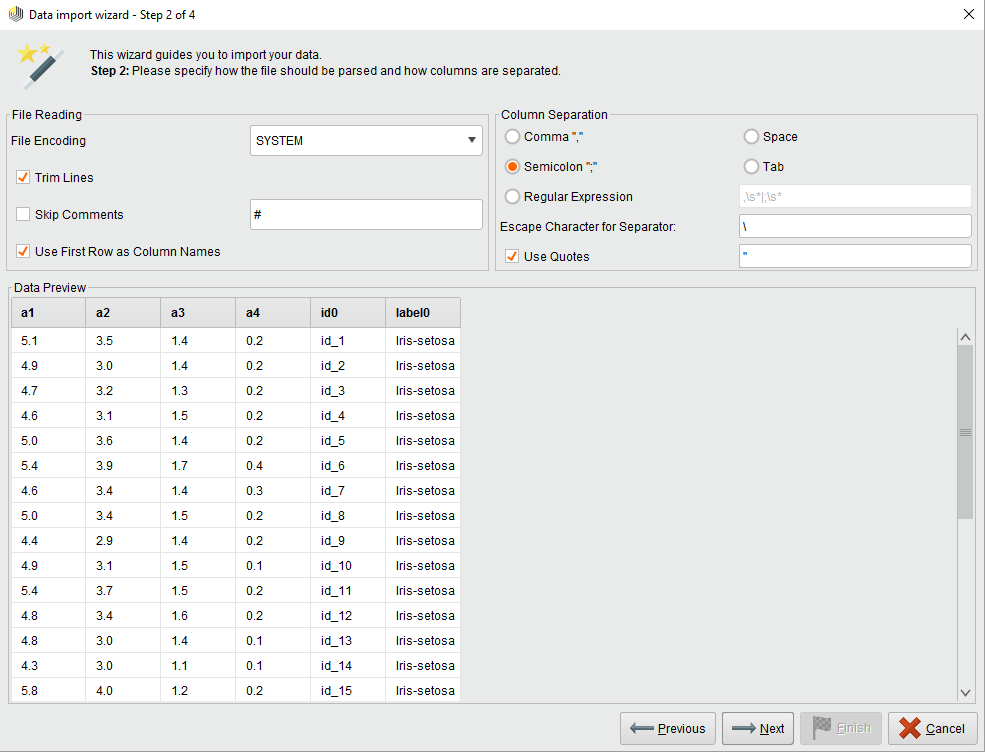
Configure the format of the input data. Select the encoding, the column separator (use a regular expression if needed), and other options, such as reading attribute/column names from the first line. You can then preview the parsed data based on the settings in the Data preview pane. When satisfied, continue to the next step.
Step 3 of 4
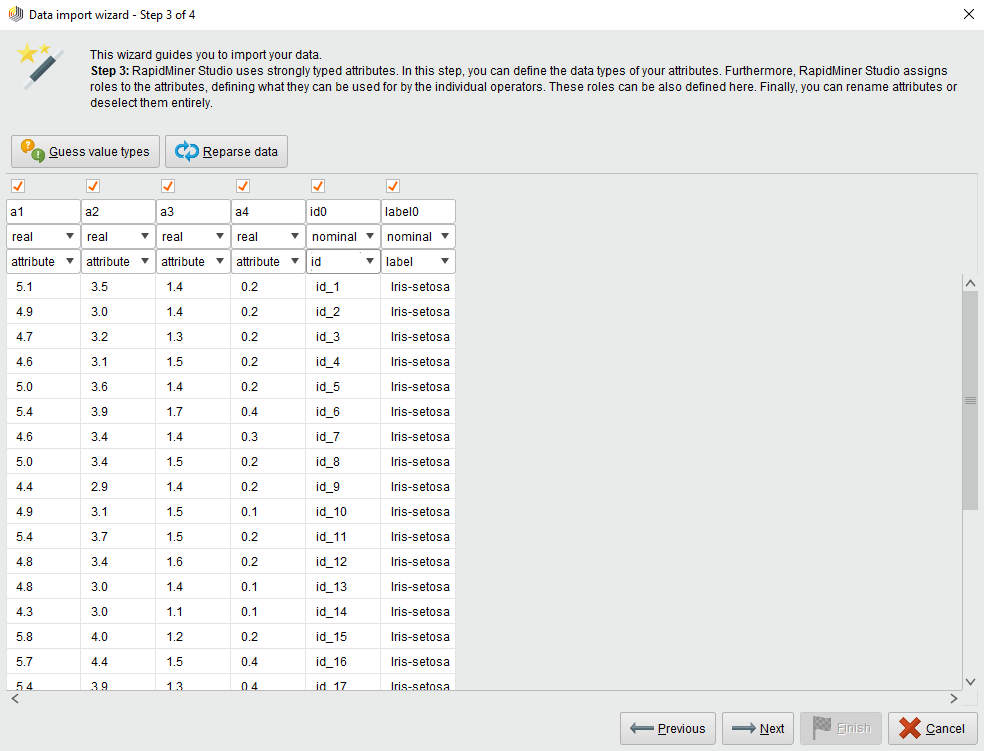
RapidMiner uses strongly typed attributes. This step helps define the attributes of the table you create on Hive. The table corresponds to a HadoopExampleSet. The columns of the table are attributes in this example set. The wizard guesses the attribute types based on the values it finds in the beginning of the file. The allowed data types are: real, integer, nominal and binominal. RapidMiner Radoop stores real and integer attributes in Hive as DOUBLE and BIGINT columns; nominal attributes are stored as STRING columns; binominal attributes are stored as either STRING or BOOLEAN columns. Radoop does not explicitly support other types but you can load, for example, DATE function values into a nominal attribute without any problem. You can later process them with operators (for example, with Generate Attributes) and also use any of Hive's numerous DATE functions on them.
You can also assign roles to the attributes, defining how they can be used by individual operators. You can set these roles later in the process as well using the Set Role operator.
Step 4 of 4
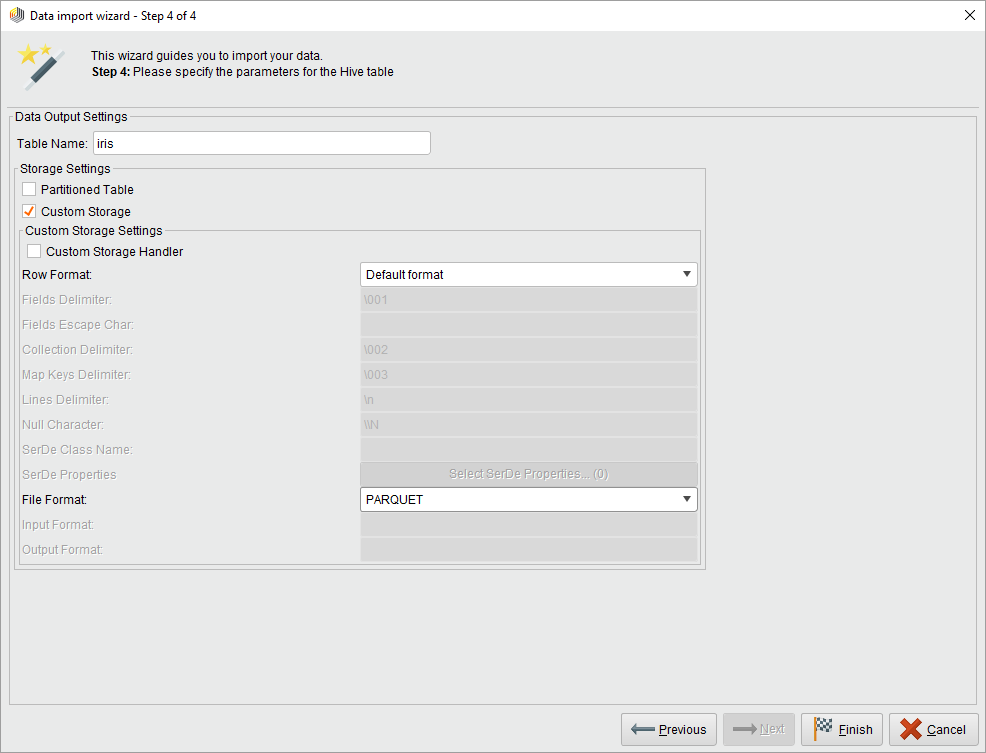
In the last step you choose a name for the destination Hive table and optionally change the storage format. If you opened the wizard from the Parameters panel of a Read CSV operator, you can also select whether you want to store the data in a temporary or permanent table. Choose temporary if you want to immediately process the data using other Radoop operators and do not need the original data in this format later. (In any case, you can store the processed data with the Store in Hive operator.)
You can optionally change the default storage format of a permanent table defined by the Fileformat Hive setting (or as a parameter) by selecting the Custom storage option. You can use partitioning, which may enhance query performance when filtering on the partitioning column. Special storage formats may decrease the required space and increase the performance, but note that choosing a special format can increase the import run time as the conversion may require additional overhead. Refer to the Hive Documentation for details of the storage types.
After you have imported data to the cluster, you can easily access, query, and visualize it using the Hadoop Data view. You can access the imported data in a process using the Retrieve from Hive operator. Right click on the object in this view and click Create Process: Retrieve to instantly create a new Radoop process that uses this data as an input.
If you opened the wizard for defining the parameters of a Read CSV operator from the Design view, you can immediately explore the metadata that appear on the output port of the operator (just as with the Retrieve from Hive operator after selecting the input table you created).
Reading the database
Radoop can also stream data to the cluster from a database. The client reads from the defined database connection and pushes the data instantly to the cluster. The source can be a database object, but also the result of a query that you define in a parameter. The operator supports connections to MySQL, PostgreSQL, Sybase, Oracle, HISQLDB, Ingres, Microsoft SQL Server, or any other database that uses an ODBC Bridge.
Note: The software may not contain the closed source JDBC driver for certain database systems. In this case, download the driver file and configure it by following these instructions.
Loading from the memory
To load data from the client's operative memory, connect a RapidMiner core operator that delivers an ExampleSet object on its output to a Radoop Nest operator input. The delivered data set is pushed to the cluster; processing continues within the nest. This concept is described in more detail in Radoop basics.
Accessing data on Hive
With the Store in Hive operator, you can save the current data set in your process. Because the data inside a Radoop Nest always resides on the cluster, storing effectively means saving the structure and the data itself in a Hive table for later use (that is, it is not deleted after the process completes). The storing process is not time consuming, although deferred calculations may have to finish before it can complete.
Use the Retrieve from Hive operator to access Hive tables. It delivers the data from the selected table on its output port. The data resides on the cluster until you connect a Radoop operator output port to the output of the Radoop Nest. In this case, a sample from the data is fetched to the client machine's operative memory.
If the target table does not yet exist, Append into Hive is similar to the Store in Hive operator. If it does exist, the operator first checks if the table's structure is the same as the structure of the data set on its input port. If they match, the data is appended to the current destination table. If the structures are different, the system throws both design-time and runtime errors.