You are viewing the RapidMiner Server documentation for version 8.2 - Check here for latest version
How to Schedule a Process from RapidMiner Studio
To run a process on a specified date and time, or regularly at a specified time, use the scheduling feature. This feature is only available to processes that are stored on RapidMiner Server.
Accessing the scheduler
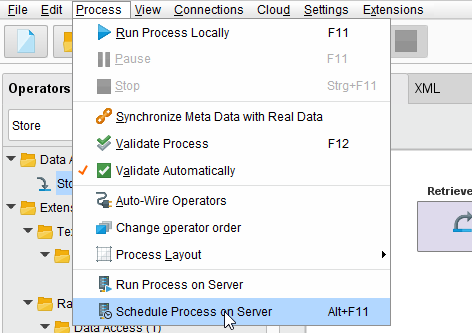
From the Process menu pull-down of RapidMiner Studio, select Schedule Process on Server:
The Run process on RapidMiner Server dialog opens with the Schedule tab selected:
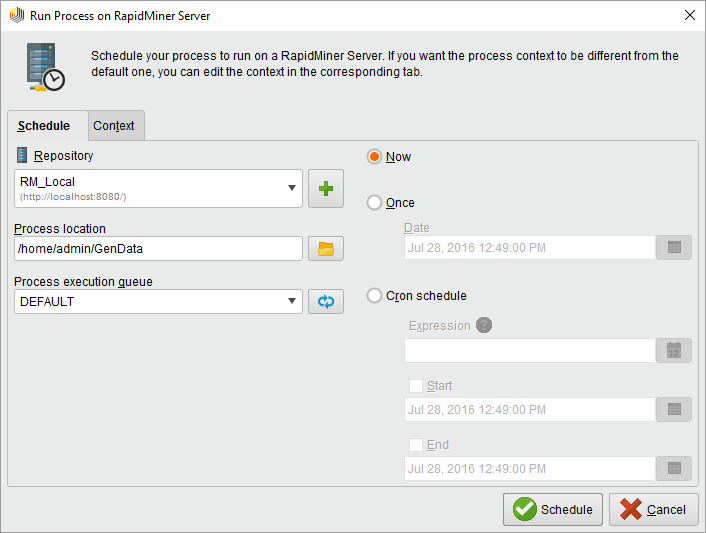
Complete the fields then click ![]() Schedule to run or schedule your process. The following table describes the settings:
Schedule to run or schedule your process. The following table describes the settings:
| Field | Description |
|---|---|
| Repository | Select the Server instance on which you want to run the process. Or, click the |
| Process location | Enter or browse to the location of the process to run. |
| Process execution queue | Select a queue to execute the process. By default there is only a single simple process execution queue, which imposes no execution restraints. You can configure additional queues as required. |
| Now | Sets the selected process to run as soon as you click |
| Once | Sets a future date and time to run the selected process. Use the calendar to select a date or enter it manually; enter the time manually in the format displayed in the field. |
| Cron schedule | Allows you to build a cron expression (a trigger), either manually or with the Cron Editor, to schedule the specified process for repeated executions. You can also schedule a future single execution using the Cron Editor. |
Understanding the cron expression builder
You can create a cron express by 1) manually entering the expression or 2) using the cron expression builder:
Note that if you use the builder, upon completion RapidMiner displays the settings in the cron expression language.
Once your expression is complete, you can use the Start and End selectors to set a start or end time for the trigger to be applicable.
Rules for manual expressions
RapidMiner uses the Quartz job scheduler to create scheduling triggers. This tutorial provides the syntax and examples for using cron. This utility provides a visual tool for creating syntax.
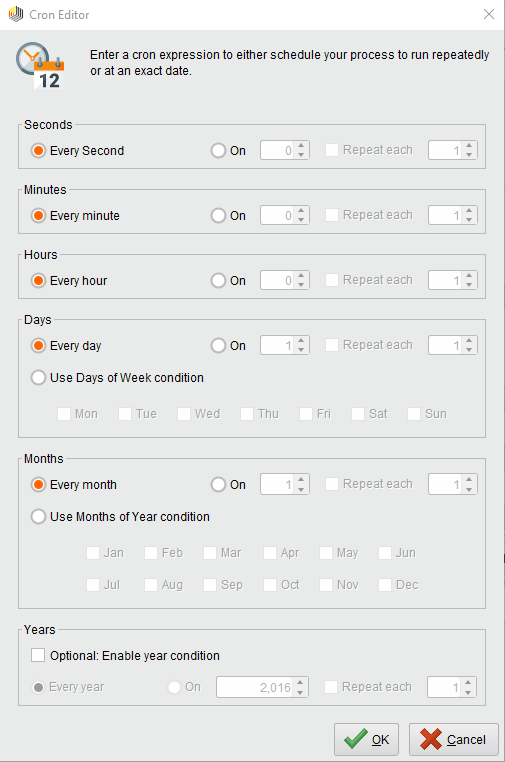
Using the Cron Editor
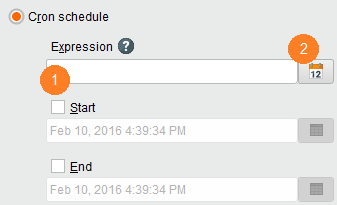
Using the built-in Cron Editor, you can build cron expressions without knowing the cron utility's syntax. To use the editor, click the ![]() icon.
icon.
The Cron Editor uses the date format dd-mm-yyyy and the time format hh:mm:ss. When Seconds, Minutes, or Hours is set to On with a value, it sets the ss, mm, and hh at which the trigger fires. This time is in conjunction with the other settings. For example, setting the Seconds field to 15 fires the trigger at hh:mm:15, not every 15 seconds.
Note: If Seconds is left in the default position Every Second, the trigger fires once a second (this is strongly discouraged). It is best to set the field to On with a value. Usually, this is true for the Minutes field as well.
The following table describes each field in the Cron Editor:
| Setting | Description | Values |
|---|---|---|
| Seconds | Sets the seconds (ss) field for the trigger, expressed as hh:mm:ss. Optionally, set the offset in seconds to repeat from the initial ss. | 0-59 |
| Minutes | Sets the minutes (mm) field for the trigger, expressed as hh:mm:ss. Optionally, set the offset in minutes for repeating from the initial mm. | 0-59 |
| Hours | Sets the hour (hh) field for the trigger, expressed as hh:mm:ss, in 24-hour clock format. Optionally, set the offset in hours for repeating from the initial hh. | 0-23, where 0 is midnight |
| Days | Sets the day(s) on which the trigger fires. Options for setting the day are: Every Day: fires the trigger every day at the specified time, month(s), and year(s). On: fires on day dd, and optionally repeated every number of days. Use Days of Week Condition: fires on the selected days at the specified time, month(s), and year(s). | 1-7, where 1 is Sunday |
| Months | Sets the month(s) in which the trigger fires. Options for setting the month are: Every Month: fires the trigger every month at the specified time, day(s), and year(s). On: fires in month mm, and optionally repeated every number of months. Use Days of Week Condition: fires in the selected months at the specified time, day(s), and year(s). | 1-12, where 1 is January |
| Years | Sets the year(s) in which the trigger fires. Options for setting the year are: Every Year: fires the trigger every year at the specified time, day(s), and months(s). Enable Year Condition: fires in the selected year, and optionally repeats every number of years specified. | From current year to current year + 100 |
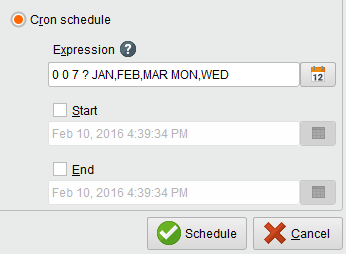
The following illustrates the setting for a process that is to run every Monday and Wednesday at 7am local time for the first quarter of the year:
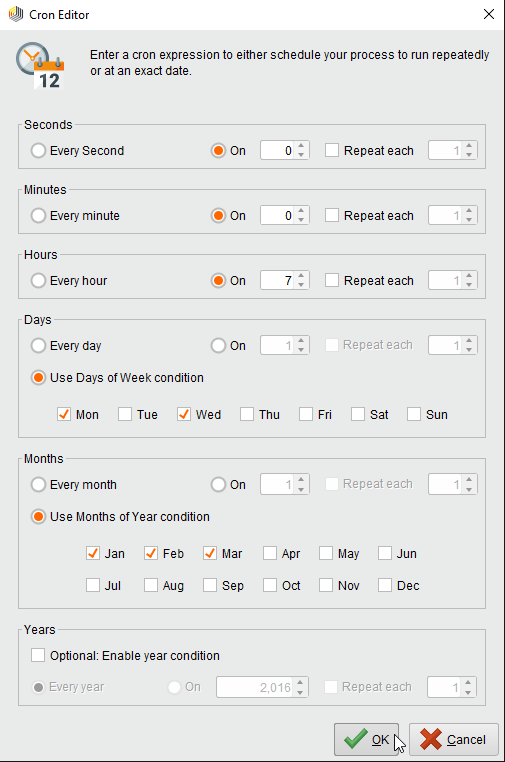
When you click ![]() Ok, the Cron Editor translates your selections to a cron expression:
Ok, the Cron Editor translates your selections to a cron expression: