You are viewing the RapidMiner Studio documentation for version 9.5 - Check here for latest version
Using the Google Cloud Services Connector
This guide targets the new Connection Management introduced with RapidMiner Studio 9.3.
For the old Legacy Google Cloud Storage Connections see the 9.2 documentation
The Google Cloud Services Connector allows you to access your Google Cloud Storage directly from RapidMiner Studio, or query data that you have stored in Google BigQuery (the latter requires the ![]() In-Database Processing Extension, which you can download from the Marketplace)
In-Database Processing Extension, which you can download from the Marketplace)
For Google Cloud Storage, both read and write operations are supported. You can also read from a set of files in a Google Cloud Storage directory, using the ![]() Loop Google Storage operator. This document will walk you through how to:
Loop Google Storage operator. This document will walk you through how to:
Connect to your Google Cloud Storage account
RapidMiner’s use and transfer of information received from Google APIs to any other app will adhere to Google API Services User Data Policy, including the Limited Use requirements.
Before you can use the Google Cloud Storage connector, you have to configure a new Google Cloud Services Connection. For this purpose, you will need the connection details of your account. This includes a project ID and either an access token, or a private key for a service account.
In RapidMiner Studio, right-click on the repository you want to store your Google Cloud Services Connection in and choose
 Create Connection.
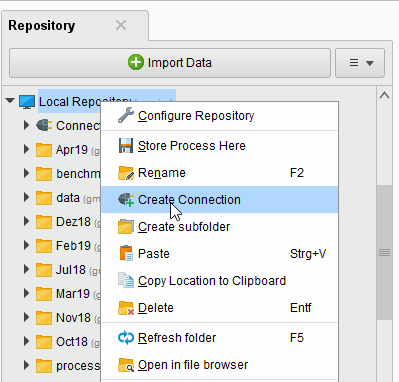
You can also click on Connections > Create Connection
and select the repository from the dropdown of the following dialog.Give a name to the new Connection, set Connection Type to
 Google Cloud Services, then click
  Create:
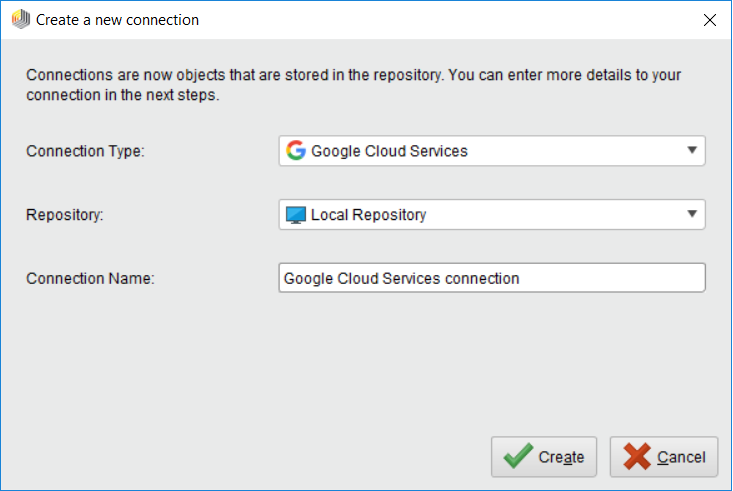
On the Setup tab, fill in the connection details of your Google Cloud account. You have two alternative options for that, see the next two steps for details.
You may use an access token that you get after you allow RapidMiner to access your Google Cloud account on a consent screen. This is the default option. Leave Use Service Account unchecked and follow the steps below.
To the right of the Access Token field, click the
 button to select services a.k.a. access scopes to be used with the access token.
Select the services you would like to use with this connection. If you have installed the
 In-Database Processing Extension, Google BigQuery will show up here as an option.
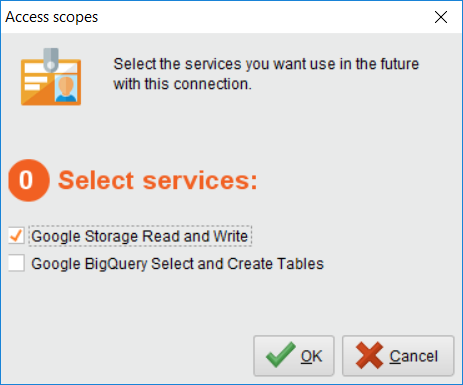
Click on Request access token
 to open the Google website in your browser. If you are not already logged into your Google Cloud account, you will have to do so now. You can manually copy the URL by clicking on Show URL instead.
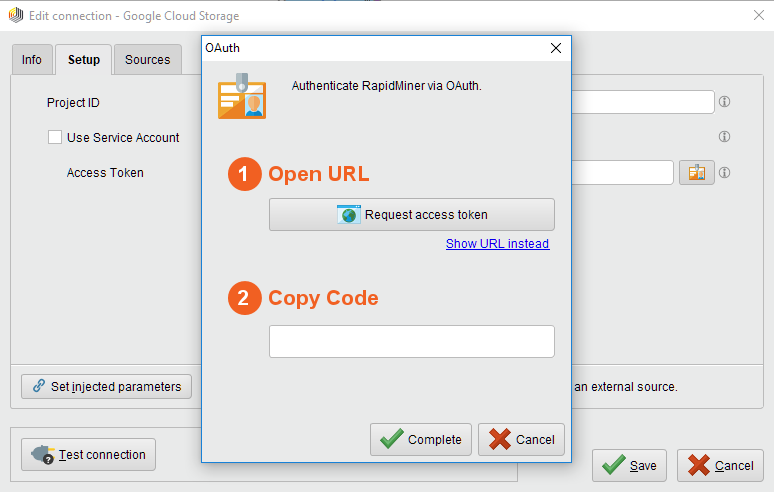
Click Allow to give RapidMiner access to your Google Cloud account and to generate a token. This will bring you to a page where you can see the access token. Copy the code shown on the screen.

Return to RapidMiner Studio, enter the access token, and click
Complete: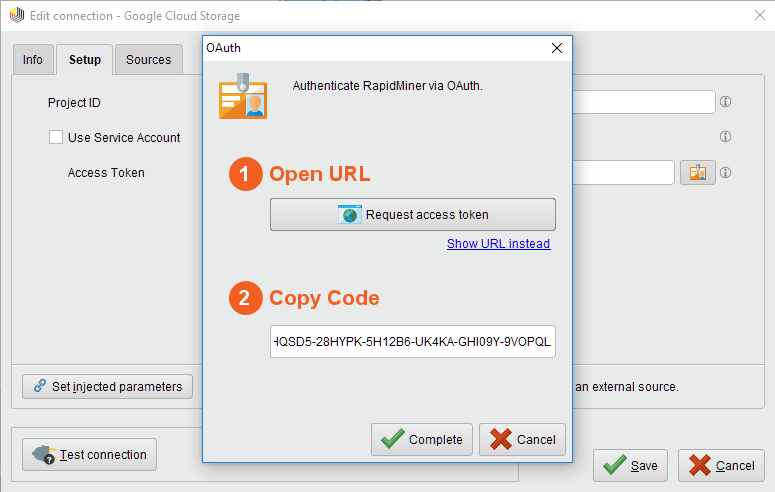
Specify the Project ID for the Connection as well.
Alternatively, you may setup a Service account for your project. In this case, check Use Service Account flag and follow the steps below.
After setting up the Service account, create and download a JSON key for it. Use the file chooser button
 next to the Private Key File Content field to select the JSON file containing the key.
Alternatively you can paste the entire JSON file content (e.g. using a text editor and the clipboard) into the Private Key File Content field.
next to the Private Key File Content field to select the JSON file containing the key.
Alternatively you can paste the entire JSON file content (e.g. using a text editor and the clipboard) into the Private Key File Content field.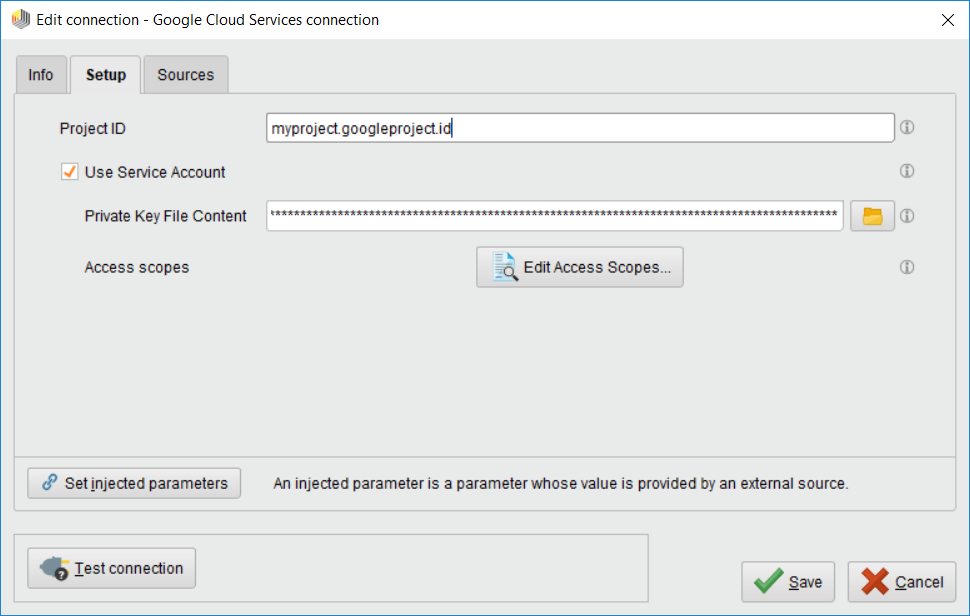
Click the
 Edit Access Scopes... button and select the services you would like to use with this connection. If you have installed the In-Database Processing Extension, Google BigQuery will show up here as an option.
Specify the Project ID for the Connection as well.
While not required, we recommend testing your new Google Cloud Services Connection by clicking on the
 Test connection button.
If the test fails, please check whether the details are correct. Please note that if you have multiple Google Cloud services selected for this connection, the test will succeed if we can establish a successful connection to at least one of the selected services.
Test connection button.
If the test fails, please check whether the details are correct. Please note that if you have multiple Google Cloud services selected for this connection, the test will succeed if we can establish a successful connection to at least one of the selected services.Click
Save to save your Connection and close the Edit connection dialog. You can now start using the Google Cloud Storage operators.
Read from Google Cloud Storage
The ![]() Read Google Storage operator reads data from your Google Cloud Storage account.
The operator can be used to load arbitrary file formats, since it only downloads and does not process the files.
To process the files you will need to use additional operators such as Read CSV, Read Excel, or Read XML.
Read Google Storage operator reads data from your Google Cloud Storage account.
The operator can be used to load arbitrary file formats, since it only downloads and does not process the files.
To process the files you will need to use additional operators such as Read CSV, Read Excel, or Read XML.
Let us start with reading a simple csv file from Google Cloud Storage.
Drag a Read Google Storage operator into the Process Panel. Select your Google Cloud Services Connection for the connection entry parameter from the Connections folder of the repository you stored it in by clicking on the
button next to it: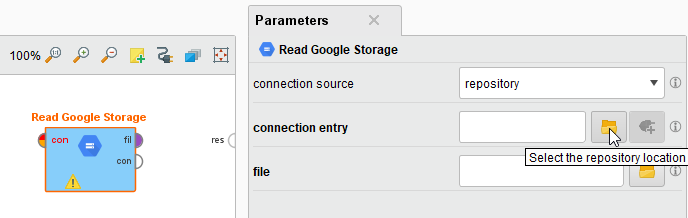
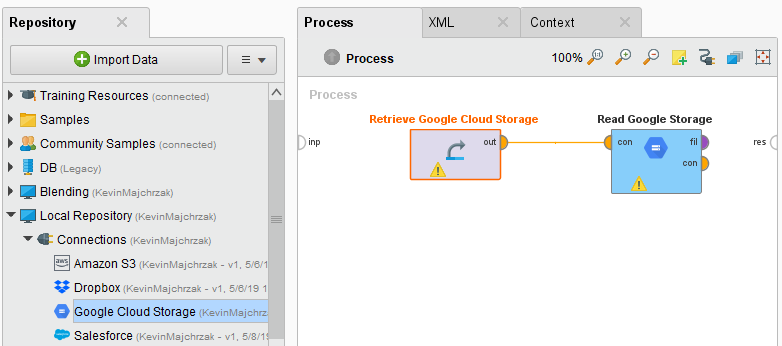
Alternatively, you can drag the Google Cloud Services Connection from the repository into the Process Panel and connect the resulting operator with the Read Google Storage operator.
Click on the file chooser button
to view the files in your Google Cloud Storage account.
Select the file that you want to load and click Open.
Note that you need storage.buckets.list permissions on the project to be able to list the buckets and use the file chooser.
If you do not have that permission, please type the path from which you want to read directly into the parameter field.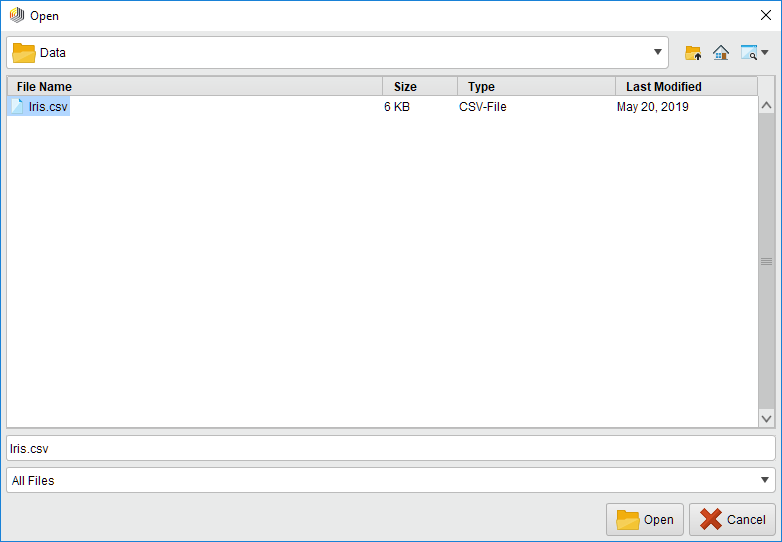
As mentioned above, the
 Read Google Storage operator does not process the contents of the specified file.
In our example, we have chosen a csv file (a comma separated values file).
This file type can be processed via the Read CSV operator.
Read Google Storage operator does not process the contents of the specified file.
In our example, we have chosen a csv file (a comma separated values file).
This file type can be processed via the Read CSV operator.Add a Read CSV operator between the
Read Google Storage operator and the result port.
You may set the parameters of the Read CSV operator - such as column separator -, depending on the format of your csv file: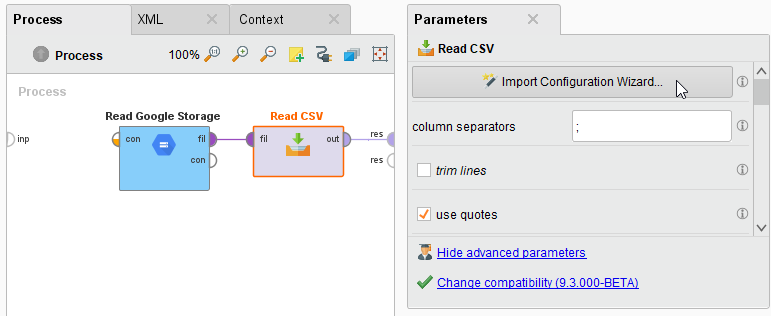
Run
 the process! In the Results perspective, you should see a table containing the rows and columns of your choosen csv file:
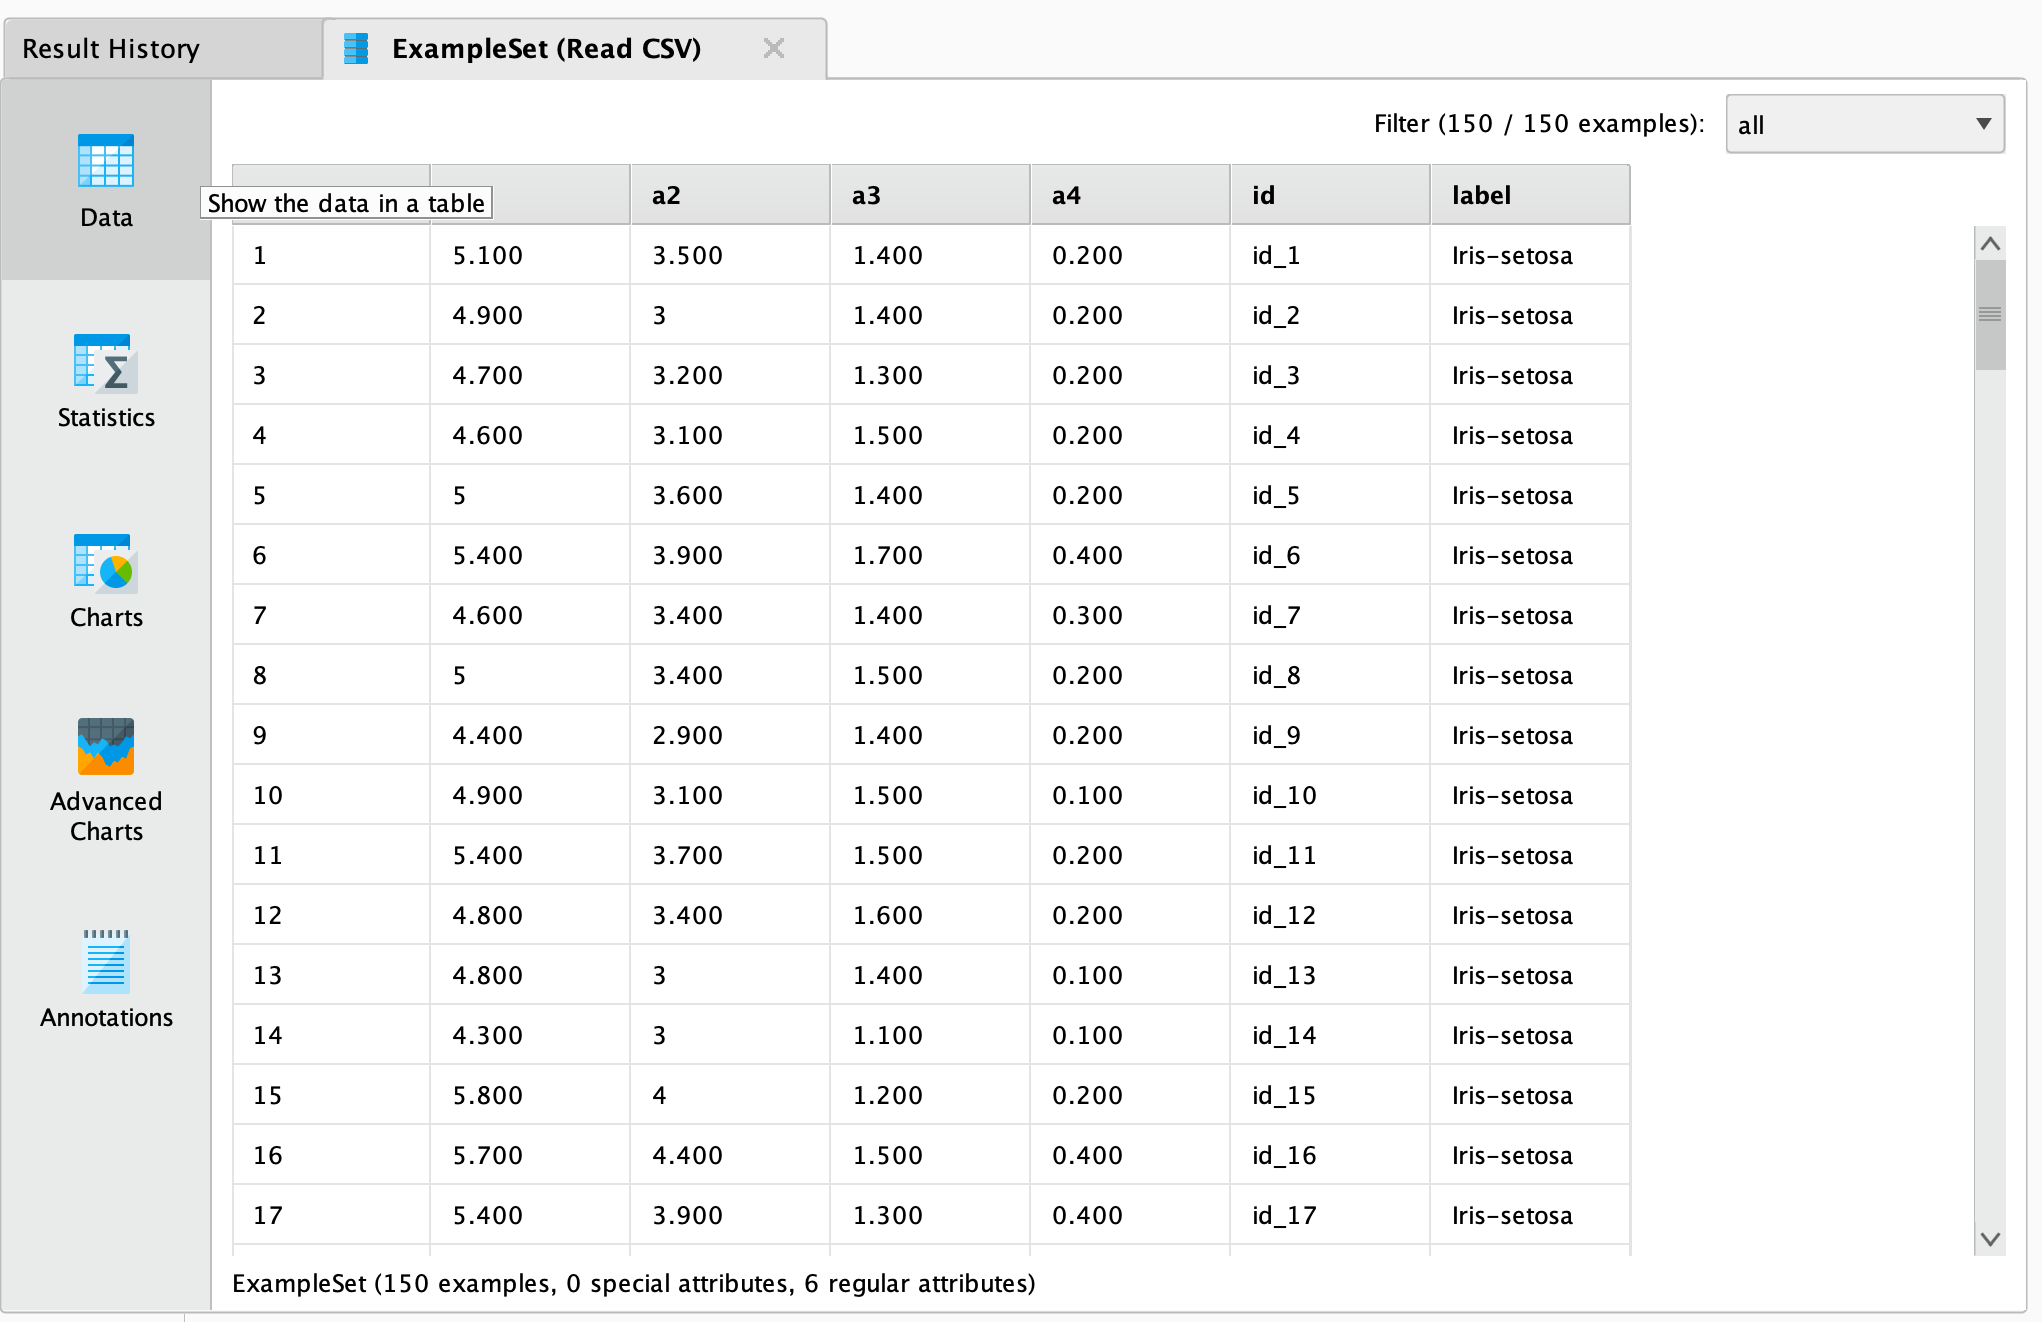
You could now use further operators to work with this document, e.g., to determine the commonness of certain events.
To write results back to Google Cloud Storage, you can use the ![]() Write Google Storage operator.
It uses the same Connection Type as the
Write Google Storage operator.
It uses the same Connection Type as the ![]() Read Google Storage operator and has a similar interface.
You can also read from a set of files in a Google Cloud Storage directory, using the
Read Google Storage operator and has a similar interface.
You can also read from a set of files in a Google Cloud Storage directory, using the ![]() Loop Google Storage operator.
For this you need to specify the connection entry and the folder, which you want to process, as well the steps of the processing loop with nested operators.
For more details read the help of the
Loop Google Storage operator.
For this you need to specify the connection entry and the folder, which you want to process, as well the steps of the processing loop with nested operators.
For more details read the help of the ![]() Loop Google Storage operator.
Loop Google Storage operator.