You are viewing the RapidMiner Radoop documentation for version 9.8 - Check here for latest version
Hadoop Data View
RapidMiner Radoop's Hadoop Data view is an easy-to-use client for managing data on your Hive server. From the view you can browse (with the Hadoop Data browser), manage database objects, execute SQL statements, fetch data samples from objects or query results, and plot data using advanced plot charts.
Note: This view, as well as the RapidMiner Radoop process, can connect to and work with Impala in the same way as with the Hive server. You may find the Impala connection to be faster than Hive.
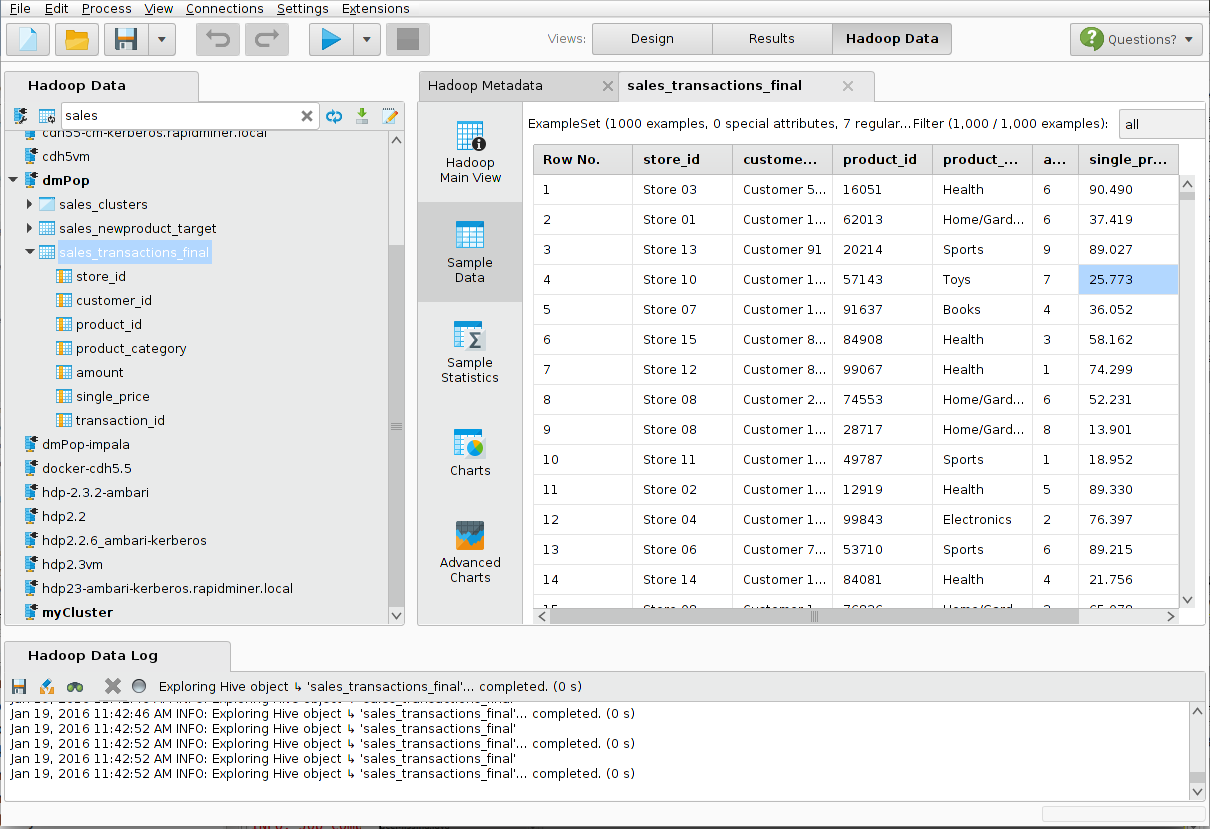
The following illustrates the three main panels in the Hadoop Data view— the Hadoop Data Panel (Hive Objects), the Hadoop Data Log, and the Hadoop Metadata panel:
The Hadoop Data Panel
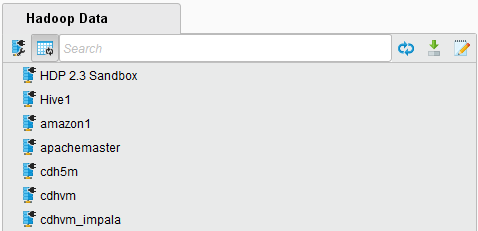
The Hadoop Data Panel is a panel that becomes available when you install RapidMiner Radoop. Use it to browse files, tables and views, processes, and connections:
The functions described here are available as buttons in the Hadoop Data panel and/or by right-clicking on a connection, Hive object, or the empty space in the Hadoop Data panel. Use SHIFT or CTRL while using the mouse buttons or arrow keys to select multiple objects or connections.
Button actions
The following buttons are available in the top of the Hadoop Data panel:
Test
| Button | Name |
|---|---|
| Connect | |
| Auto describe | |
| Refresh | |
| Import Data | |
| SQL Query |
Menu actions
The following menu actions are available by right-clicking on a connection, a Hive object, or the empty space in the Hadoop Data panel:
| Menu item |
|---|
| Connect |
| Manage Connections |
| Refresh Connection List |
| Refresh Objects |
| Clean Temporary Data |
| Execute Query |
| Import |
| Create Process |
Note: The Connect and Clean Temporary Data actions are only available when a connection or object is selected.
Connection actions
The following actions provides tools for working with your table or view.
Connect action
With the Hadoop Data panel, you can connect to multiple clusters at the same time. Use the ![]() connection button to add new connections or modify connection settings. In the menu, use the Manage Connection action to add or edit connections. Active connections are displayed in bold in the Hadoop Data Panel.
connection button to add new connections or modify connection settings. In the menu, use the Manage Connection action to add or edit connections. Active connections are displayed in bold in the Hadoop Data Panel.
To browse the database objects of your Hive instance, double click on the selected connection name or right-click and select Connect from the popup menu. Radoop first tests the connection, and after a successful test, retrieves the metadata (object list) from Hive. The tables and views appear in the Hadoop Data panel where you can explore, query, rename, or delete any of the objects.
Auto describe action
After you connect to a cluster, RapidMiner Radoop retrieves the Hive object list. If ![]() Auto describe mode is enabled, the client immediately retrieves the details of all objects. Because this can be time-consuming if you have many Hive objects, the default Auto describe setting is disabled. You can enable it with the button to the left of the filter text field. When disabled, object list fetching is very fast, but the type and attributes of a Hive object are only visible if you expand the object or right-click it to open the action menu.
Auto describe mode is enabled, the client immediately retrieves the details of all objects. Because this can be time-consuming if you have many Hive objects, the default Auto describe setting is disabled. You can enable it with the button to the left of the filter text field. When disabled, object list fetching is very fast, but the type and attributes of a Hive object are only visible if you expand the object or right-click it to open the action menu.
Search action
The search function is available in the Hadoop Data panel (not the menu). Hive tables and views are shown together with their attributes in the Hive Object Browser. You can expand and collapse the connection entries as well as the Hive objects. Enter a search term in the filter field to show only matching objects; clear the filter with the icon to the right of the entry field. The filter applies to all connections.
Refresh Objects action
The Refresh Objects action or ![]() button clears, then refreshes, the object list and the metadata of the objects from the selected Hive server connection(s) or object(s). If no connection is selected, the action refreshes objects of all active connections. To refresh just the connection list, use the menu's Refresh Connection List action.
button clears, then refreshes, the object list and the metadata of the objects from the selected Hive server connection(s) or object(s). If no connection is selected, the action refreshes objects of all active connections. To refresh just the connection list, use the menu's Refresh Connection List action.
Reload Impala Metadata action
For Impala connections only. In contrast to the single Hive server, there are usually multiple Impala daemons. Each change to objects using the Impala connection is immediately reflected in Hive. However, changes through the Hive connection (the Hive server) are not immediately visible through the Impala connection. You must explicitly call the Reload Impala Metadata action to update Impala with the metadata in the Hive Metastore Server. After the action completes, every Hive object is available in Impala.
Import action
Import data to the cluster with the ![]() Data Import Wizard button or the Import... action. You can select a text file on your local file system, on the HDFS, or on Amazon S3 and import its contents into a Hive table on the cluster. You can define the column separator, encoding, and other settings as well as the target attribute types and table name. The wizard is basically the same as the wizard for the Radoop Read CSV operator, but with this standalone importer you do not create a process for the operation. If the import is a recurring task, however, consider creating a process.
Data Import Wizard button or the Import... action. You can select a text file on your local file system, on the HDFS, or on Amazon S3 and import its contents into a Hive table on the cluster. You can define the column separator, encoding, and other settings as well as the target attribute types and table name. The wizard is basically the same as the wizard for the Radoop Read CSV operator, but with this standalone importer you do not create a process for the operation. If the import is a recurring task, however, consider creating a process.
Execute query... action
With this action (menu) or button (![]() ) you can:
) you can:
execute a valid SQL (HiveQL) statement against a selected Hive instance. If the statement is a query, Radoop fetches a data sample from the result to the client's memory.
examine and plot the data using the graphical interface.
change the default data sample size (limit) before executing the query.
execute valid DDL or DML statements.
Additionally, you can open the ![]() Hive Expression Editor dialog for an easy-to-use expression builder that creates an expression for a column in a SELECT statement. The editor contains numerous Hive functions and operators with their argument lists and short descriptions. It is good practice to validate your more complex queries with the
Hive Expression Editor dialog for an easy-to-use expression builder that creates an expression for a column in a SELECT statement. The editor contains numerous Hive functions and operators with their argument lists and short descriptions. It is good practice to validate your more complex queries with the ![]() Check Expression button before sending it to the Hive instance with the
Check Expression button before sending it to the Hive instance with the ![]() Run Query... button. (Of course, a successful check does not guarantee query success.)
Run Query... button. (Of course, a successful check does not guarantee query success.)
You can write multiple SQL statements to the query text field. Separate each by a semicolon; Radoop selects (validates or executes) the statement under the cursor. Both the ![]() Run Query... and
Run Query... and ![]() Check Expression actions apply on the single statement under the cursor. To run multiple statements (separated by
semicolons), use the
Check Expression actions apply on the single statement under the cursor. To run multiple statements (separated by
semicolons), use the ![]() Run All Statements... button. This action assumes that the last statement is a query, and, if it returns a result set, the action displays it.
Run All Statements... button. This action assumes that the last statement is a query, and, if it returns a result set, the action displays it.
During query execution, you can cancel the query run with the ![]() Cancel Query button. This sends a kill command to the cluster, stopping all jobs that the query initiated.
Cancel Query button. This sends a kill command to the cluster, stopping all jobs that the query initiated.
See the Hive Language Manual for complete documentation of the SQL-like Hive Query Language.
Create Process: Retrieve action
This action, available only through the menu, is a good starting point for process design. It creates a simple Radoop process, inserting a Retrieve operator inside a Radoop Nest. You can then continue designing your process using the data in this table or view.
Clean Temporary Data action
During the run of a process, Radoop creates temporary Hive tables and views. These temporary objects are prefixed with the string that you define in the Radoop Nest table prefix parameter (Radoop_ by default) or the table.prefix setting. The objects are deleted by the end of the process if you set the Radoop Nest cleaning parameter to true (default value). However, due to breakpoints or errors, some temporary objects can remain on the cluster even when cleaning is set to true. To clean all temporary data, use the menu's Clean Temporary Data action. The pop-up dialog will ask how many days to "look back," meaning that it only considers objects older than this interval. The action is described in more detail in the Operation and Maintenance section of the installation guide.
You can also easily delete from the Hadoop Data panel. Use the filter field to show only the temporary objects matching a particular prefix, then use the SHIFT key to select them all. Remove the selected objects with the DEL button or the Drop Objects action in the right-click popup menu.
Explore objects
The following actions help you to work with a Hive table or view. To access them, right-click the table or view in a connection.
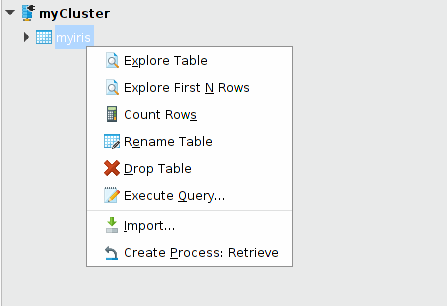
Explore
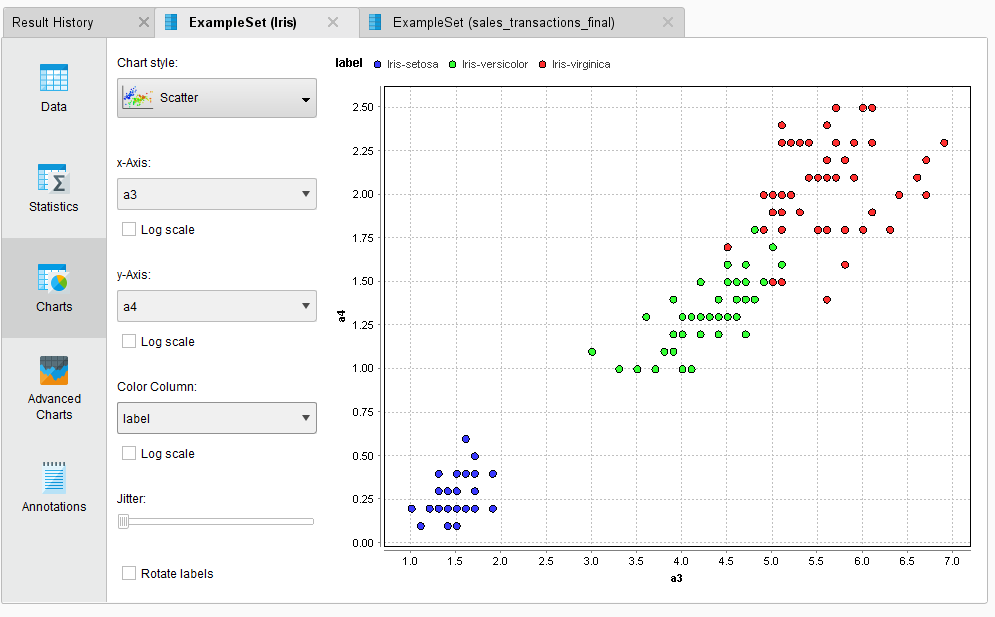
When exploring a Hive table, Radoop fetches a data sample from the selected table (or view) to the client's operative memory and displays it in tabular format. (This format should be familiar to you from Studio's Results view, where you explore ExampleSet process output.) The action also allows you to plot the data and create advanced charts from the sample. You can control the data sample (maximum) size or use the Explore first N rows action and define the number of rows explicitly.
Visualize your data (sample) with a few clicks:
Show query (for Hive views only)
A Hive view is a stored SQL query based on other tables or views. You can examine this query using the Show query action. Exploring a Hive view is similar to fetching data from a Hive table. The difference is that the server first executes the query of the view (the required time depends on the query complexity) before reading the data sample to the client machine. Examine the results in the same way as you would examine a data sample from an ordinary Hive table.
Count Rows
Counts the number of rows in a Hive table or view. Note that this may take some time to complete. The results are shown in a small popup window.
Drop and Rename
With these actions you can easily drop or rename a Hive table or view. You can also rename an attribute of a Hive table. Note that dropping a Hive object cannot be undone.
Hadoop Metadata Panel
The Hadoop Metadata panel provides basic information about the cluster that you selected in the Hadoop Data panel, including links to the cluster's monitoring pages.
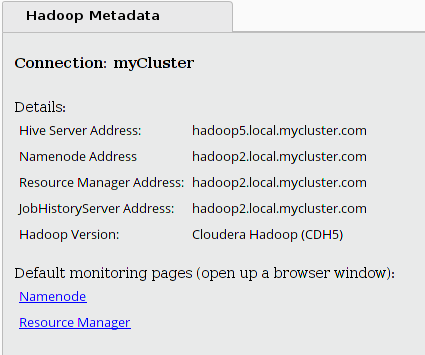
If you are not connected to the cluster, the links point to the default monitoring pages (port 8088 for the Resource Manager and port 50070 for the NameNode web interface). If you are connected, the links point to the actual web interfaces that are configured for your cluster.
Hadoop Data Log panel
The Hadoop Data Log panel shows information about ongoing operations. You can search and save the log text the same way as you save a process log.
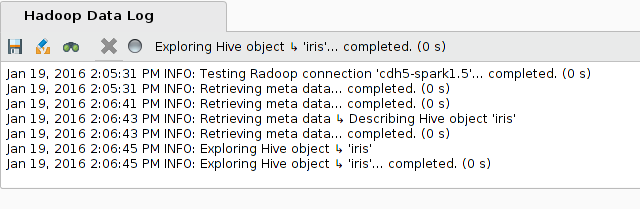
You can cancel any action using the Cancel button. Hitting this button attempts to stop (kill) all running remote operations on the cluster. Note that this may take a moment to complete.