Create an endpoint
Previous: Create a process
Our purpose is to run the process ScoreIrisData, submitting our input data
via the endpoint URL and obtaining the result of the process as output.
To do so, we need to create an endpoint.
There are two methods, depending on your endpoint infrastructure.
Note that a Web API agent is a smart scoring agent. It communicates with Altair AI Hub to learn about project updates, and it is subject to load-balancing within its Web API Group.
Use Altair AI Hub's built-in Web API agent
If in doubt, you're probably using the built-in Web API agent. The advantage of using the built-in agent is clear during development: the processes connected to your endpoint URL can be automatically updated every time you update your project.
Moreover, since you're still working within the context of Altair AI Hub, you benefit from all the infrastructure it provides, for example:
- all kinds of access control, including connections with injected parameters
- user-defined Python environments for notebooks
Use an external scoring agent, independent of Altair AI Hub.
This method requires more effort, both because you have to install the endpoint infrastructure and because the endpoint processes are not updated automatically. Any time you want to update the endpoint, you have to:
- download a deployment ZIP from Altair AI Hub,
- upload the ZIP file to your external endpoint infrastructure,
- place the ZIP in the deployments folder, and
- restart the scoring agent.
However, the benefit is also clear. You can have your endpoint anywhere you like: on your laptop, on a remote server, or on your Raspberry Pi! You no longer depend on Altair AI Hub.
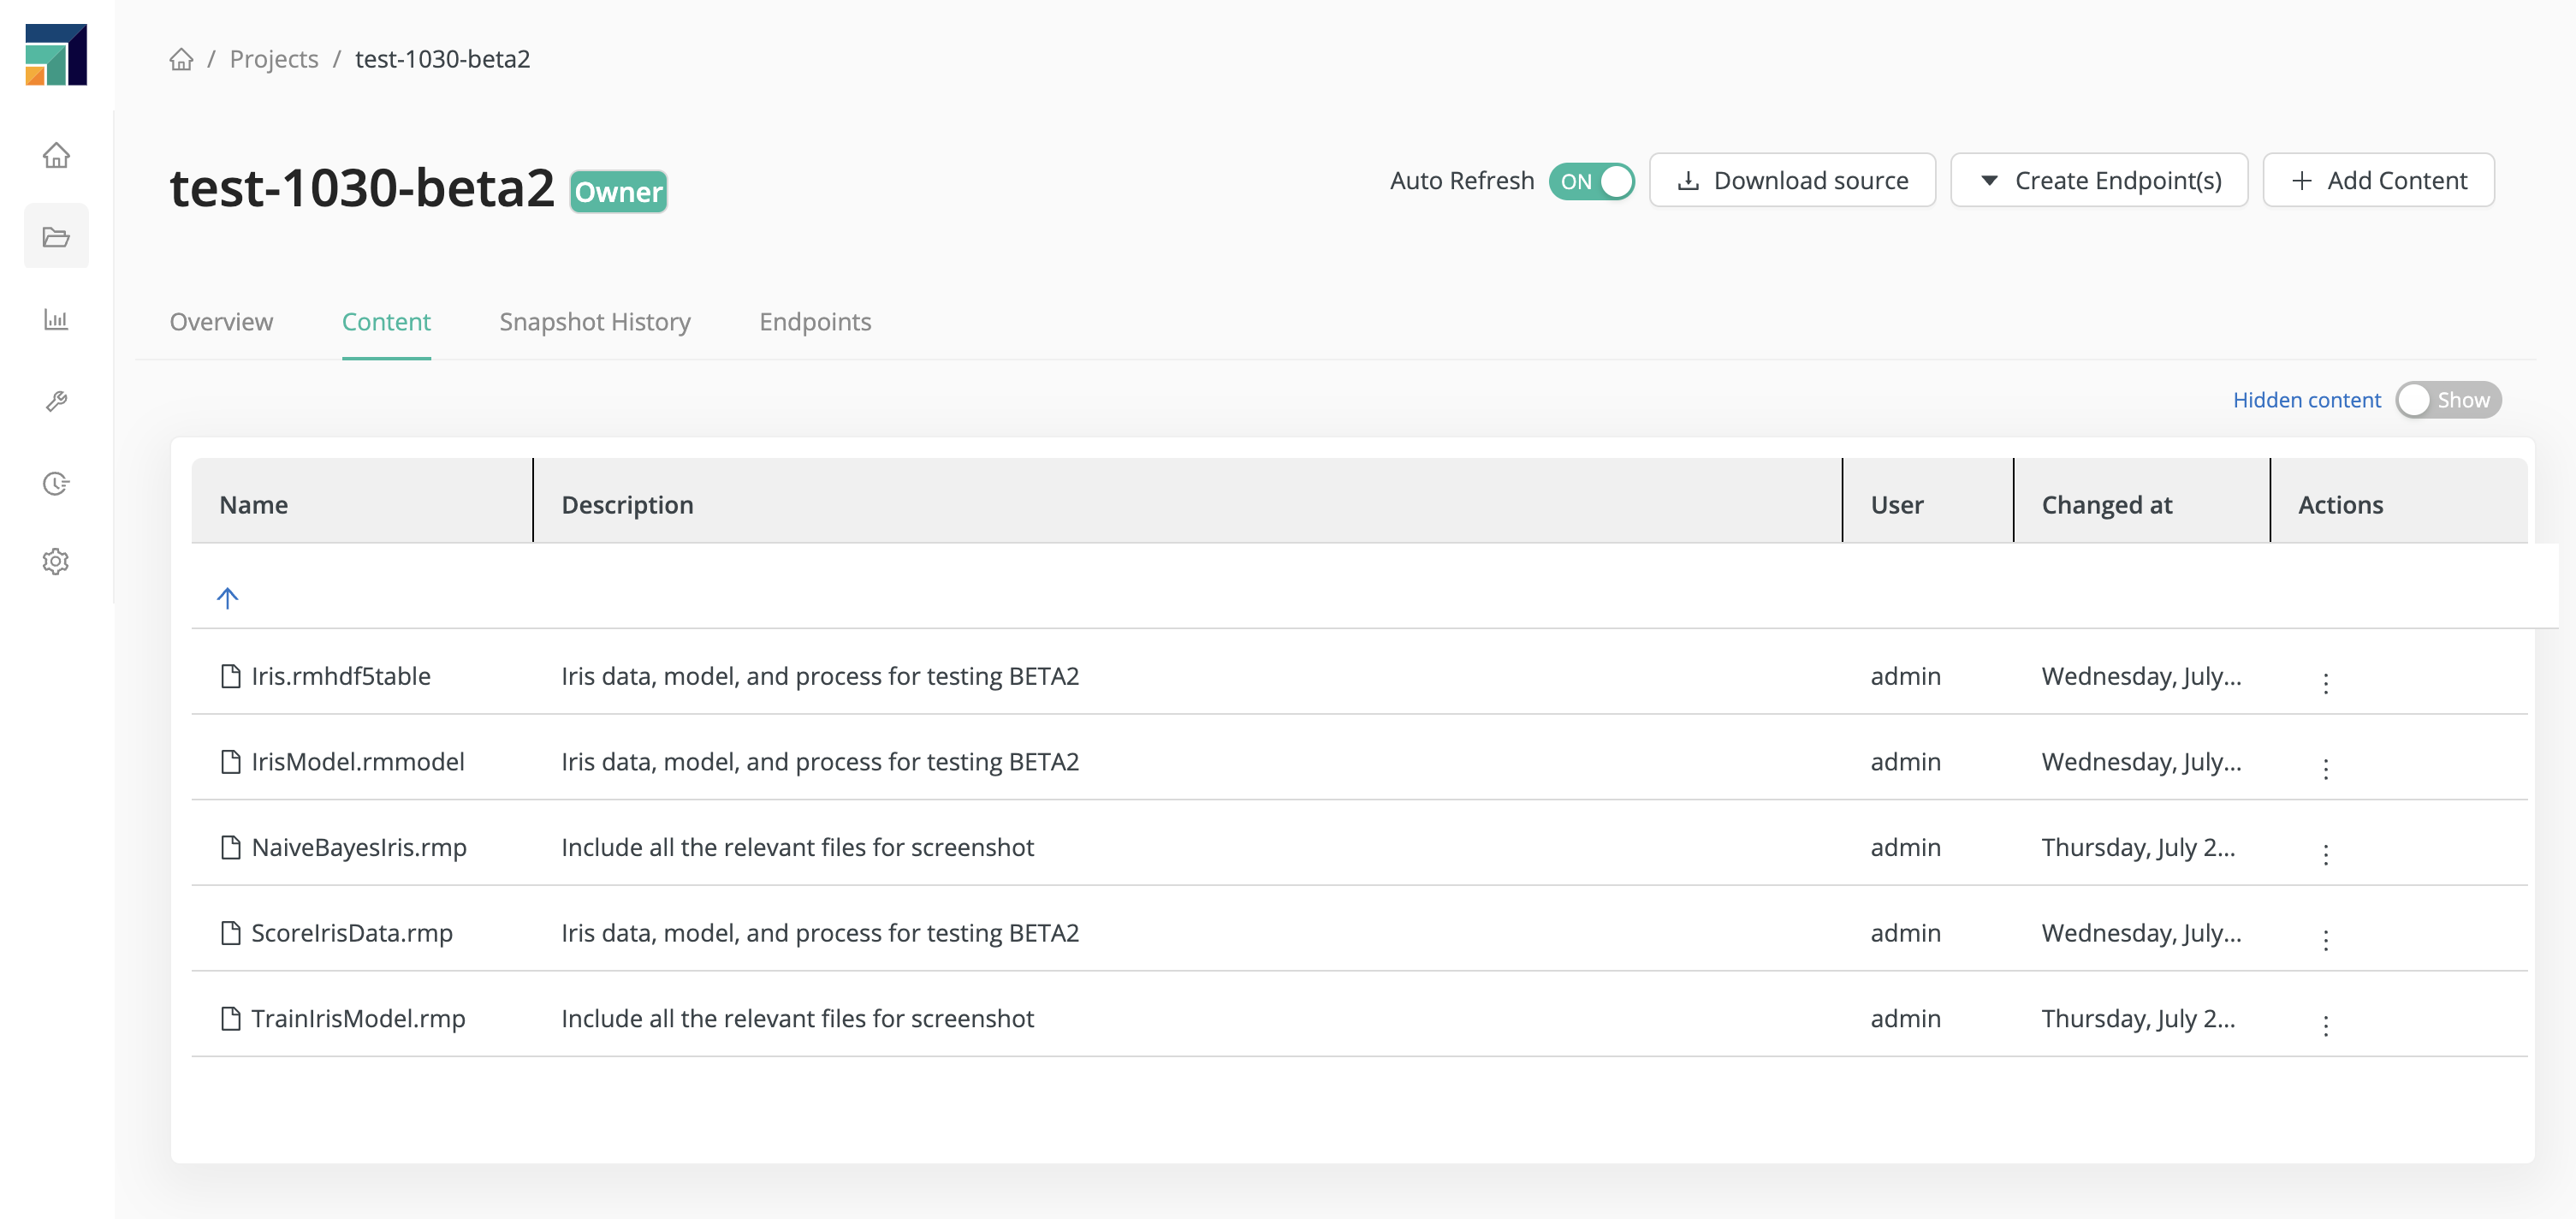
No matter how you want to create your endpoint, start by going into the
projects user interface of Altair AI Hub.
In the screenshot below, you can see the contents of the Iris folder,
in the test-1030-beta2 project, as described in Create a process.
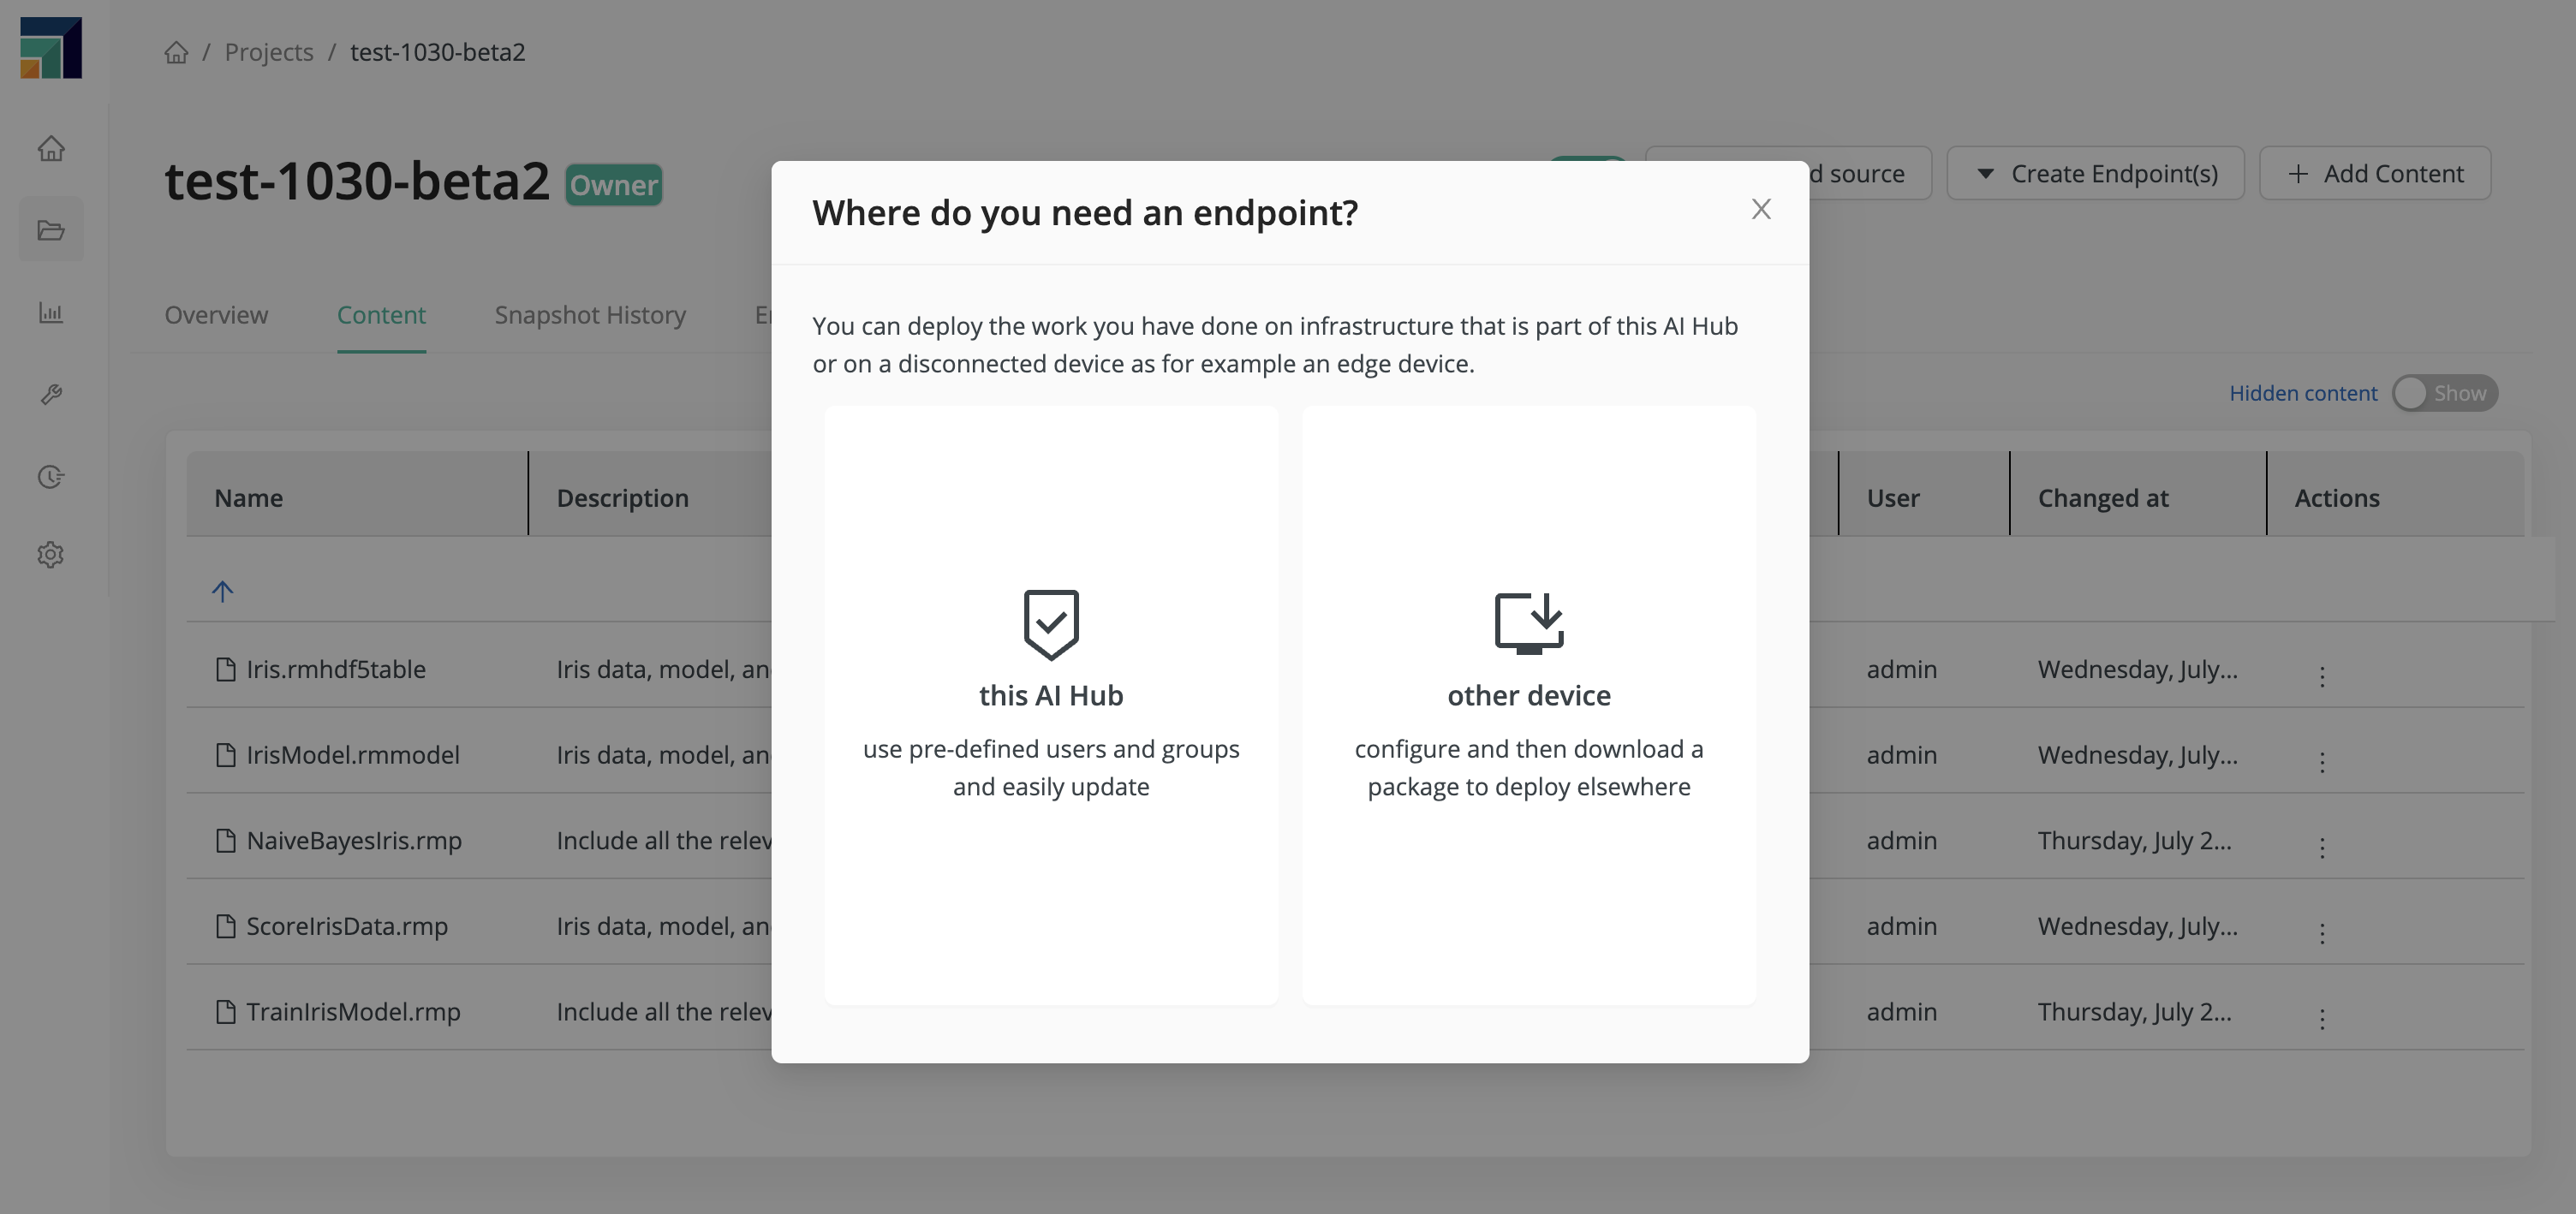
Where do you need an endpoint?
Click on Create Endpoint(s).
At this stage, you must make a choice, depending on your endpoint infrastructure:
this AI Hub - if you are using Altair AI Hub's built-in Web API agent,
other device - if you are using an external scoring agent, independent of Altair AI Hub
this AI Hub: deployment settings
use pre-defined users and groups and easily update
Click this AI Hub. A configuration dialog opens, and you have to define your deployment settings. Note that in this context, a deployment is a collection of endpoints with the following shared settings. Once you define the deployment settings, you can create one or more endpoints.
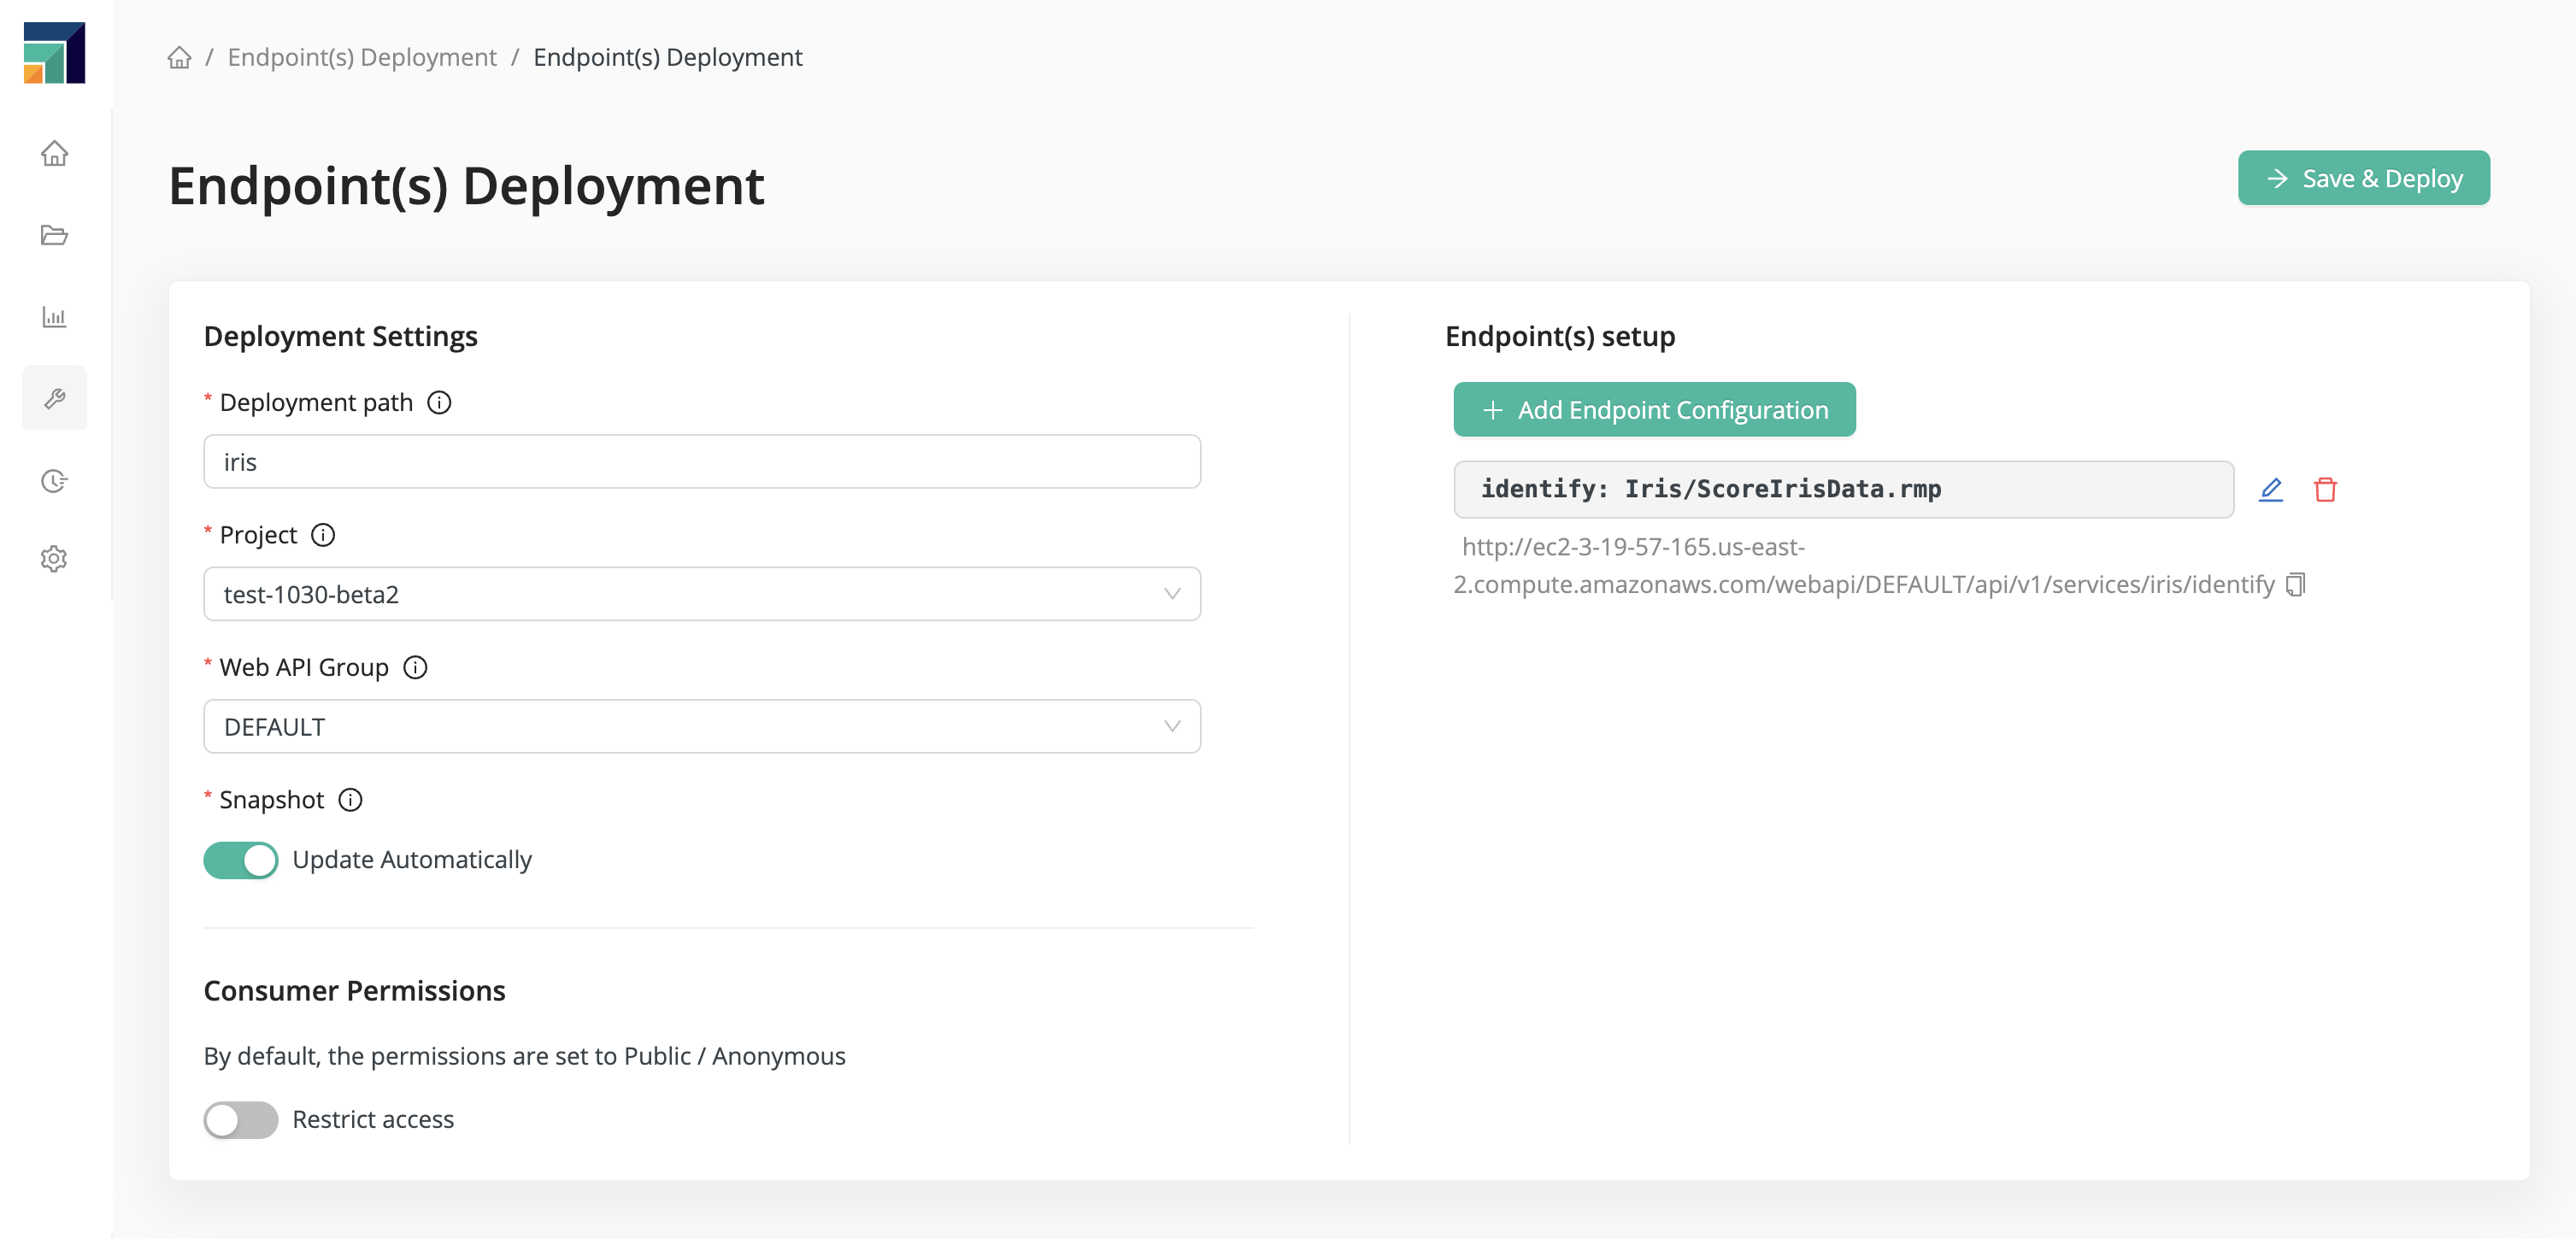
Deployment path - We choose the value
iris, and this value will appear in the endpoint URL as$deployment_path. All endpoints belonging to the same deployment include the same$deployment_path.Project - Assuming that you triggered the dialog from within the Content tab of the project, your Project name is pre-filled. Otherwise, select a project from the dropdown list.
Web API Group - Assuming that you triggered the dialog from within the Content tab of the project, your Web API Group is pre-filled. There always exists a DEFAULT Web API Group, but the user may choose any Web API Group to which he or she has access. The
$Web_API_Groupappears in the endpoint URL.Update automatically - If your context is development, you probably want to check the setting Update automatically, so that your endpoint process will be updated automatically whenever the project is updated. If not, choose the project snapshot that is relevant to your endpoint.
Consumer Permissions - pertain to the people or programs that will access your endpoint URL in search of a result. By default, the permissions are set to Public / Anonymous, but if you toggle the switch to Restrict access, you will see the following options:
- Basic authentication - create users and passwords (set it via
Authorization: Basic <encodedCredentials>header) - AI Hub permissions - grant access to users or groups that have been pre-defined on AI Hub (set it via
Authorization: Bearer <OAuth2 Access Token>header) - Long-living API token - create a token and select an expiration date / time (set it via
Authorization: apitoken <Token>header)
- Basic authentication - create users and passwords (set it via
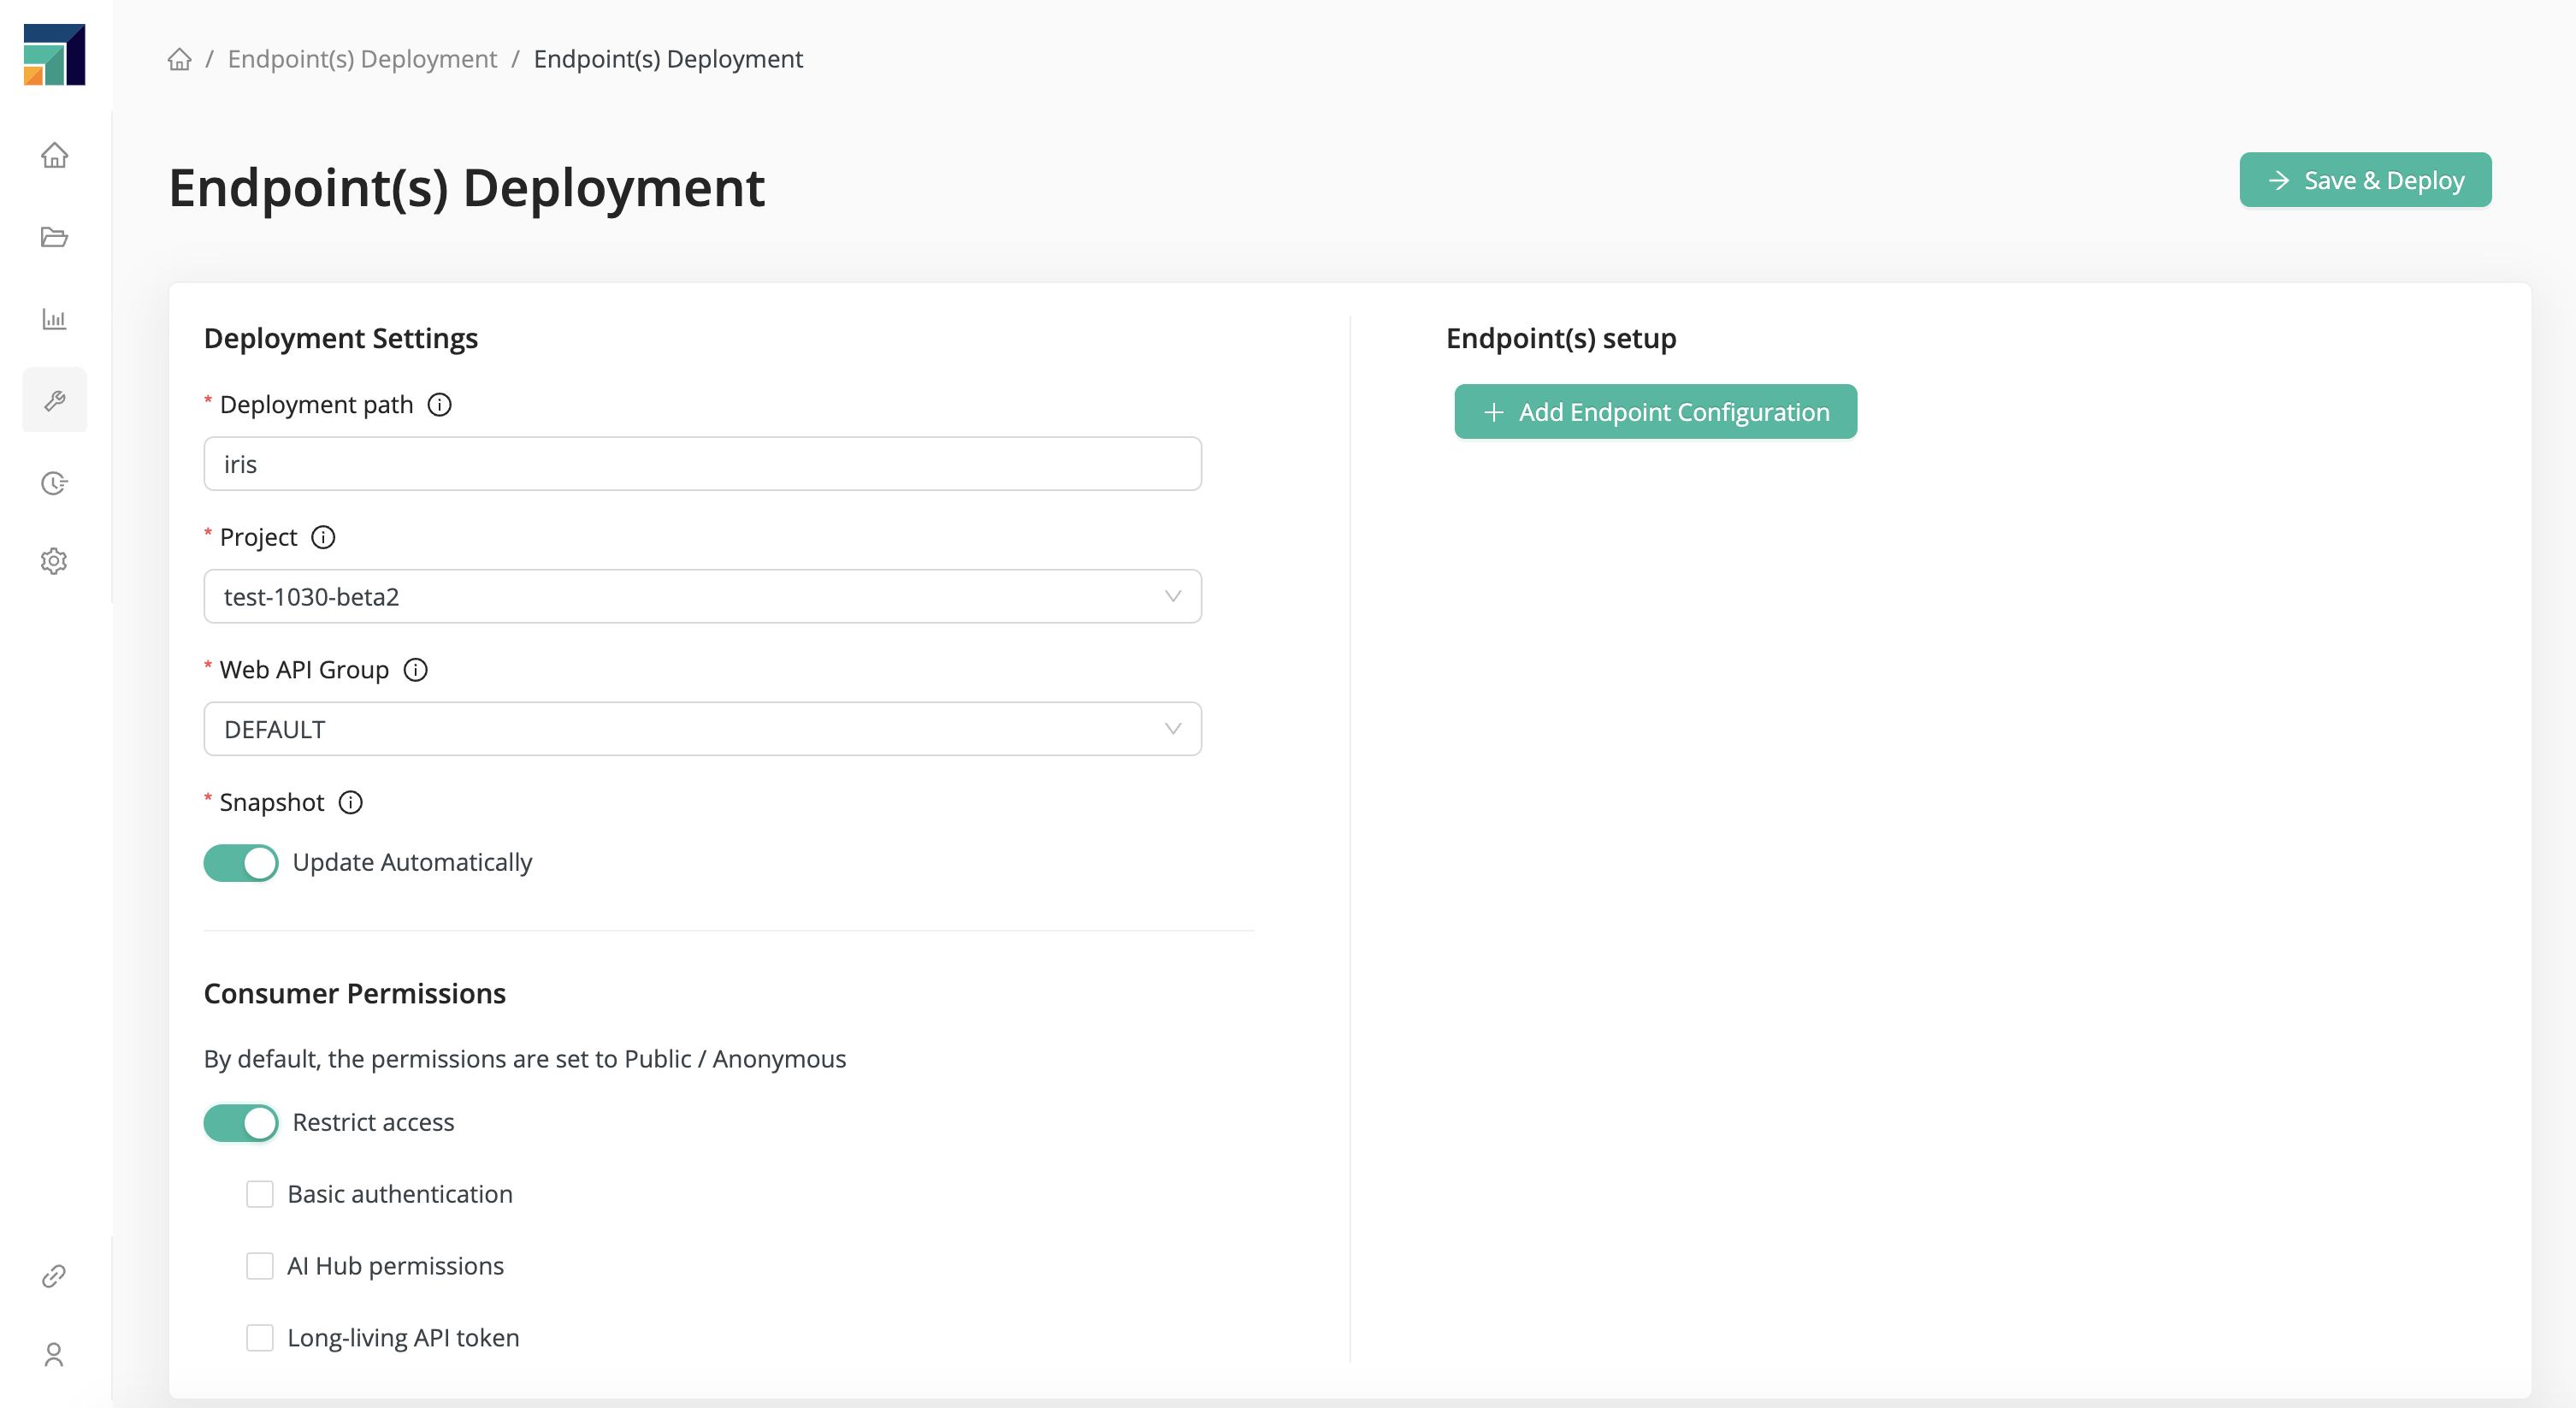
Add Endpoint Configuration
A deployment as described above is intimately connected to a project via a Web API agent that keeps track of project updates, and in general, that project can have multiple processes and multiple endpoints.
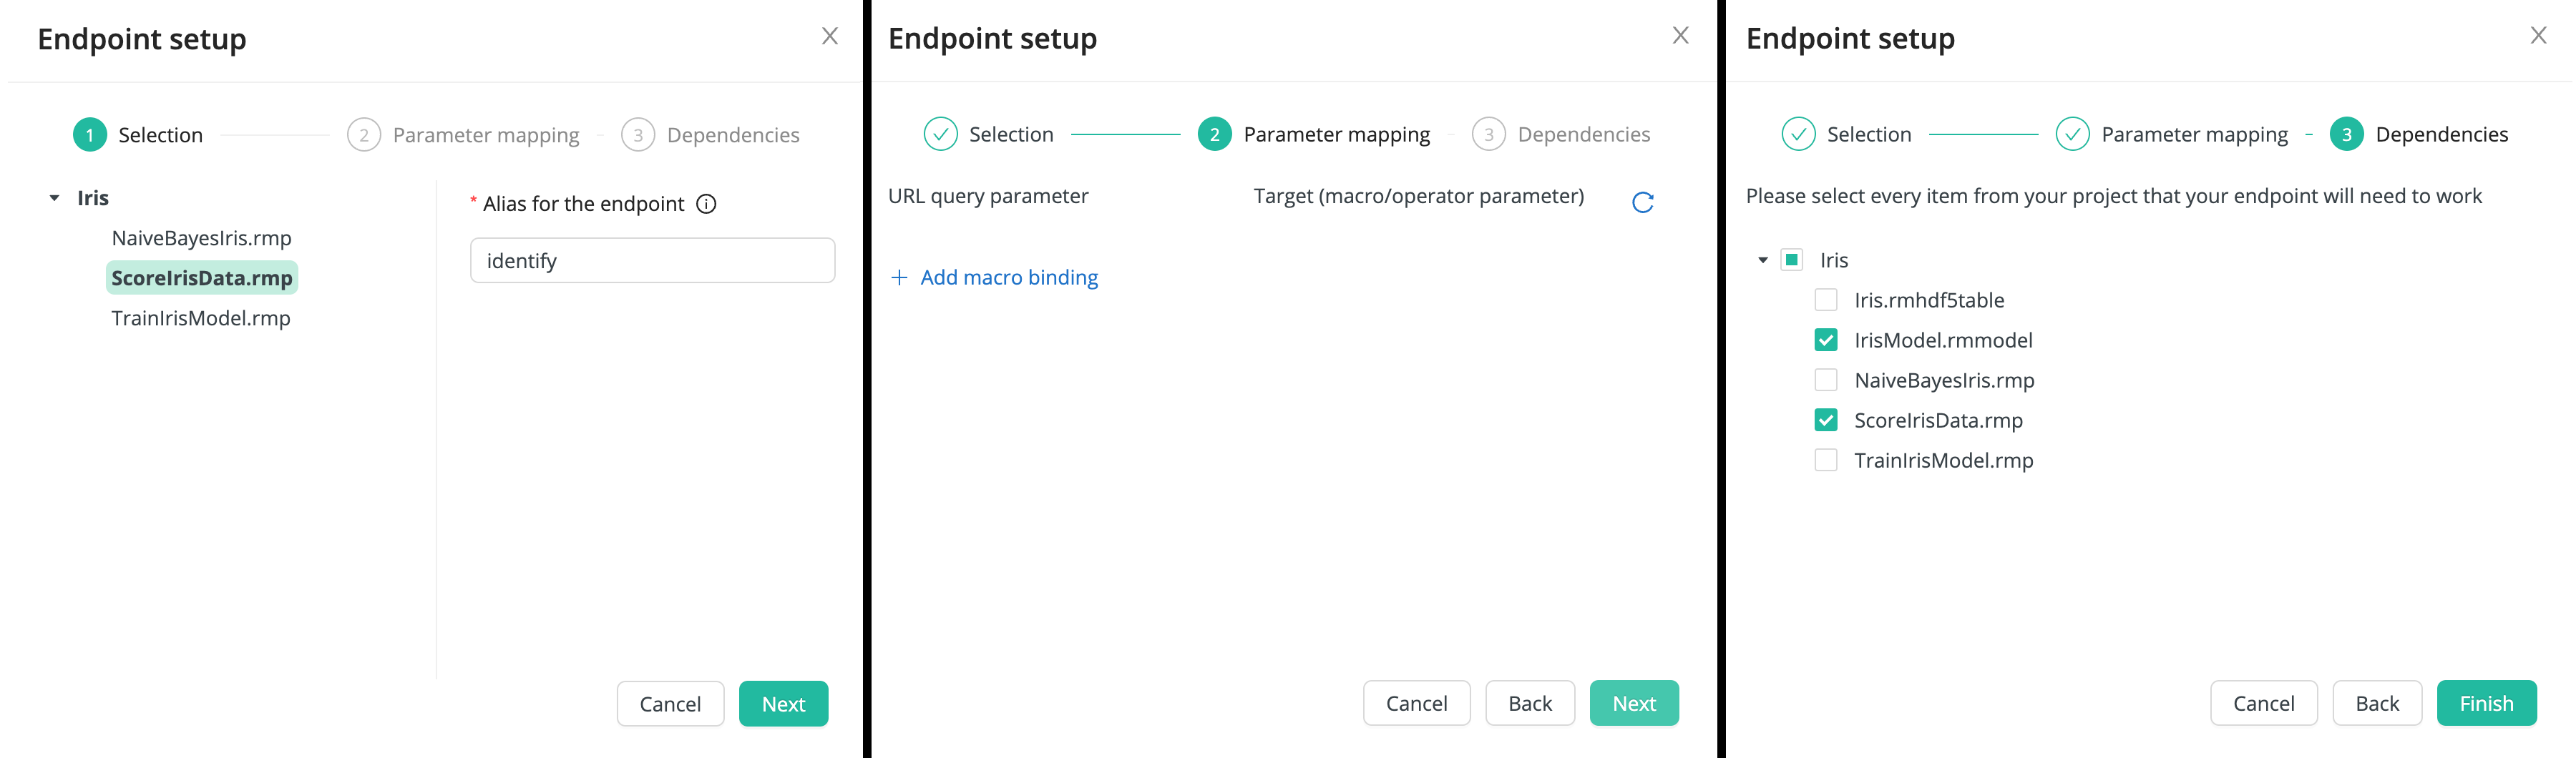
In what follows, we show how to configure each individual endpoint. There are three steps:
- Choose the endpoint process
- Configure any macros
- Include all dependencies
Zoom the screenshot below to see the details more clearly.
Choose the endpoint process
In the first step, click on Add Endpoint Configuration, and select
the process you want to have executed by the Web API agent.
Notice that in this step, only processes (.rmp) are displayed.
In addition, choose an alias for the endpoint.
This alias could be the name of the process or any other name --
the $alias will appear in the endpoint URL.
Here we choose the alias identify for the process ScoreIrisData.rmp.
Configure any macros
If you have a macro in your process, you can map its name to the URL query parameter that will appear in the endpoint URL.
Include all dependencies
Finally, you need to include all the dependencies of your process.
In our example with ScoreIrisData, we need both the process
and the model IrisModel.
Don't forget to include any connections needed by your process.
Click Finish, and your endpoint configuration is displayed, including both the alias and the endpoint URL.
If you wish to configure any additional endpoints, click Add Endpoint Configuration and repeat the process. If there are no additional endpoints, click Save and Deploy to complete the process.
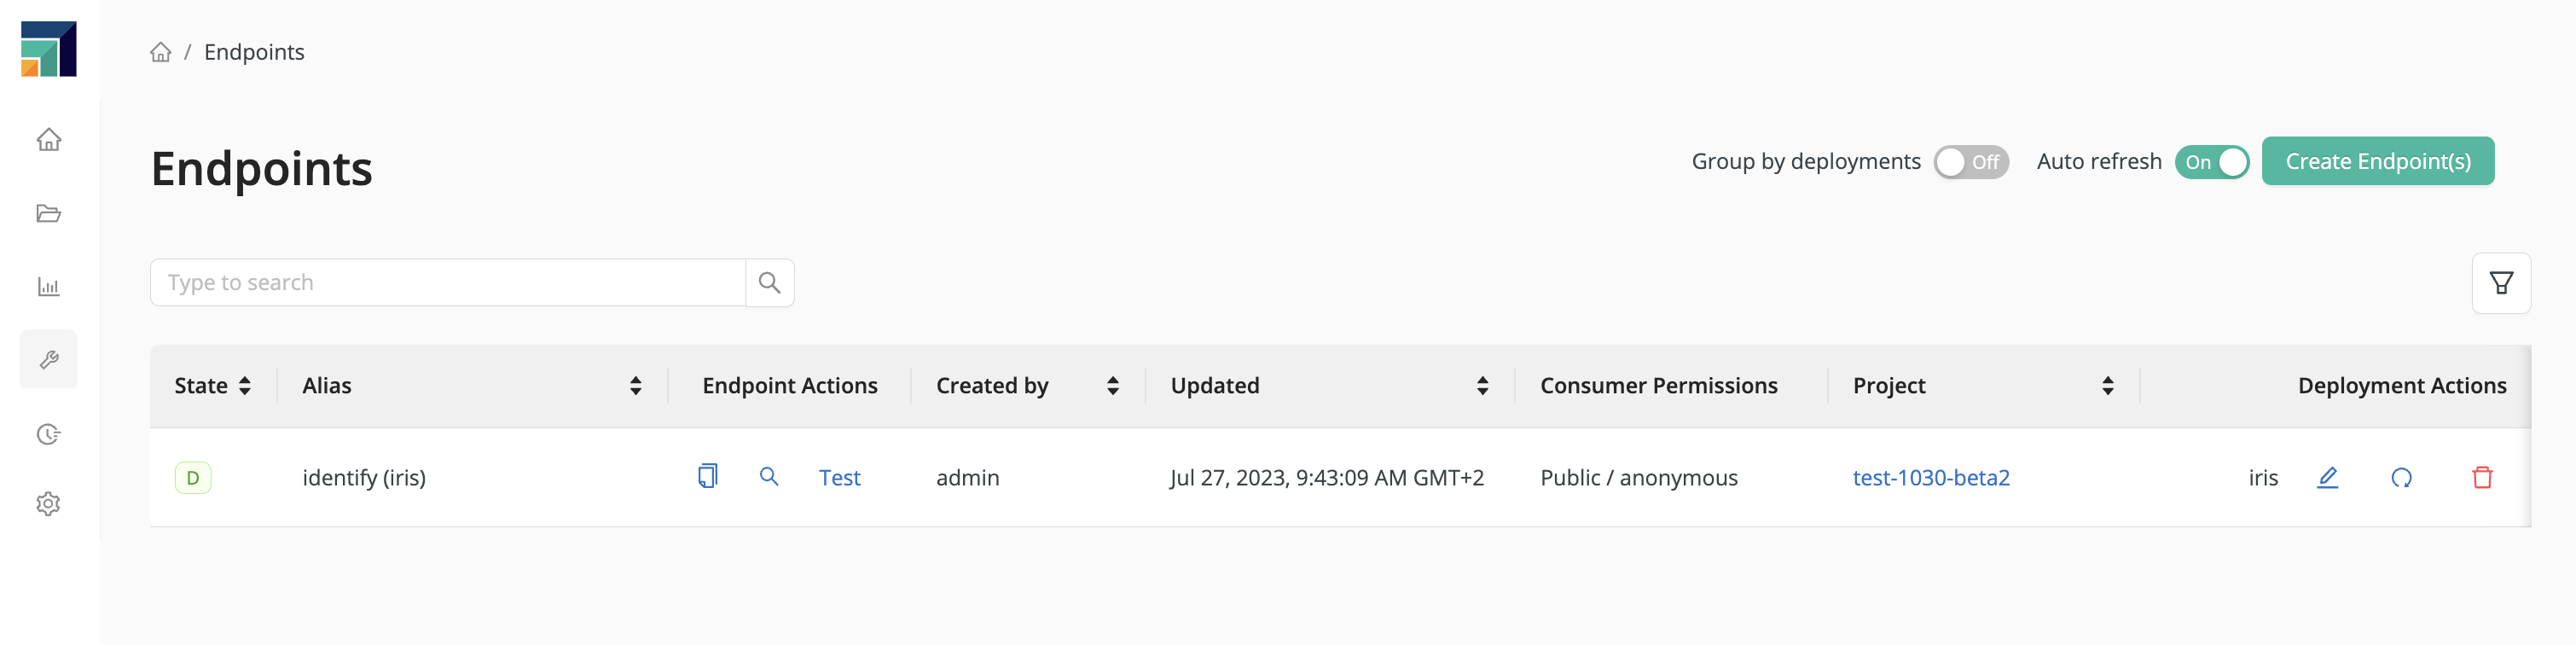
The available endpoints are visible in two places in the Altair AI Hub interface: under Endpoints and under Projects > project_name > Endpoints.
When an endpoint is available for queries, a check mark appears beside its name.
Next: Request results