Notebooks
Notebooks are available as part of the Altair AI Hub. This product enables data science teams of all disciplines (both coders and non-coders) across the enterprise to effectively collaborate on data science projects.
On this page, you will learn how to get started with Notebooks, and gain an understanding of its more advanced features.
Get started with Notebooks
Notebooks ships as part of the Altair AI Hub. This ensures a tight integration with RapidMiner repositories and projects, as well as a single sign-on experience across the platform.
To access Notebooks, navigate to the AI Hub landing page and click on Notebooks.
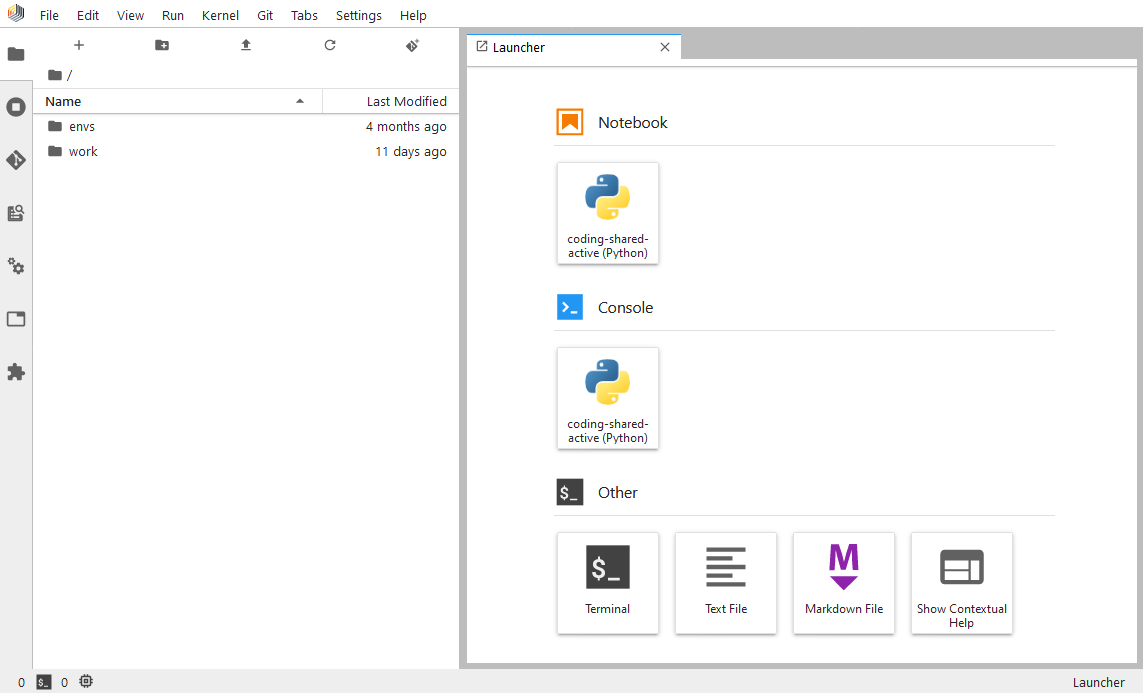
To start a new notebook, on the Launcher tab shown above, click on the tile representing the kernel of your choice in the Notebook section. All new notebooks you start have a link to our tutorial notebook, which explains how to use the key features of Notebooks. We will only cover some of these features on this page, as the tutorial notebook should provide all the help and context needed.
Environments and kernels
Notebooks comes with a pre-provisioned Jupyter kernel based on a Python environment, containing the most commonly used Python libraries for data science projects (e.g. pandas, numpy, scipy, sklearn, etc.), as well as the library rapidminer which implements the integration towards other parts of the Altair AI Hub. This environment is centrally managed and is available also for execution in Altair AI Hub (when Python code is embedded into RapidMiner processes, see the chapter Call Python from RapidMiner for more details).
The centrally managed environments cannot be modified in your notebook instance. To extend the list of kernels available for you, you have two options, depending on your needs:
- If you are in early stages of development and only need a private kernel for development and experimentation purposes, you should create a local custom kernel.
- If you want to use a kernel which will be used by others on your team, or it will go into production, you should create a centrally managed environment.
Creating a centrally managed environment
To create a centrally managed environment, you need the right privileges for the Platform Administration tool in Altair AI Hub. Follow the steps there to learn how to manage coding environments.
To be able to use a centrally managed environment as a Jupyter kernel inside Notebooks, it has to contain the relevant kernel library (i.e. ipykernel for Python based kernels, irkernel for R based kernels).
Once the coding environment is installed, it will show up in Notebooks. No restart is necessary, just allow a few minutes for the environment to get synced and picked up by your notebook instance.
Creating a local custom kernel
As stated above, local custom kernels are only available for the user who created them. The only way to share them is to export their definition file and creating a centrally managed environment based on them (see instructions above).
To create a local custom kernel, open a new Terminal from the Launcher in Notebooks. The terminal will contain instructions on how to clone the existing active environment and go from there, but you can also create a blank new one if you need to start from scratch.
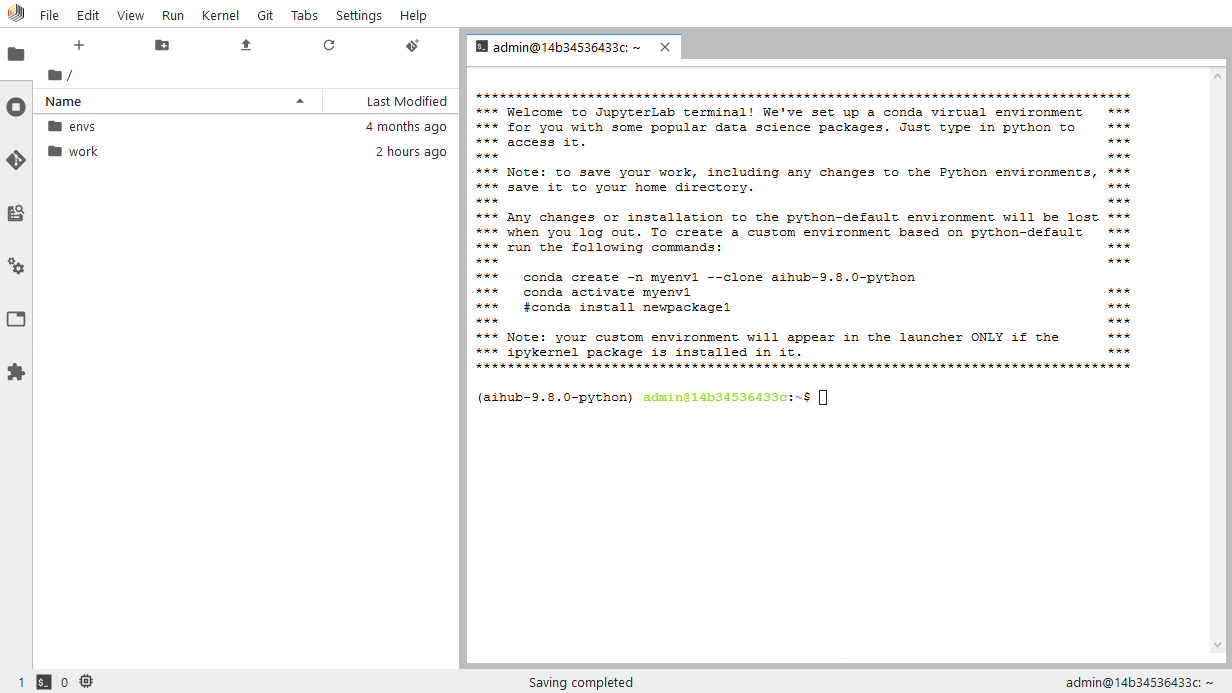
To be able to use your new environment as a kernel inside Notebooks, it has to contain the relevant kernel library (i.e. ipykernel for Python based kernels, irkernel for R based kernels).
The kernel will be picked up automatically and become available as one to choose in your notebooks.
Collaboration
The primary method of collaboration we offer in Altair AI Hub is via projects. When using Notebooks, you can access all your projects via the built-in Git integration. (RapidMiner projects are based on Git as a version control and storage system)
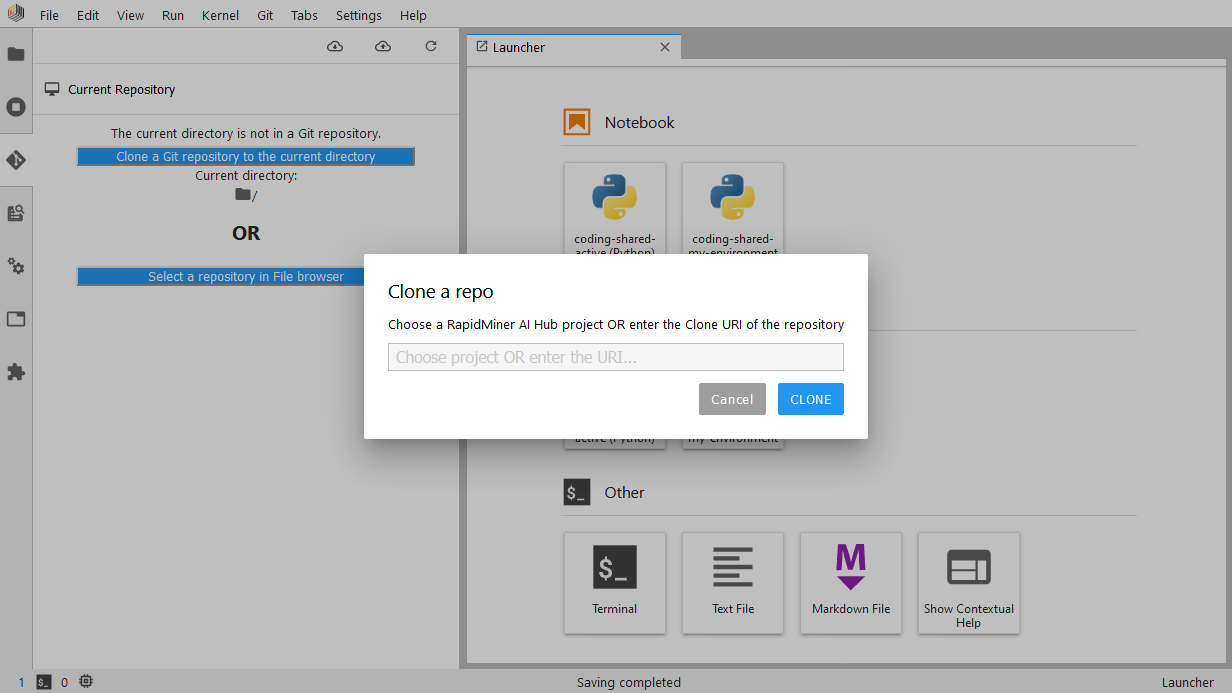
You start by cloning the project into your Notebook workspace. This can be done by clicking the Clone a Git repository in the current directory button, located on the Git panel (you can find it on the left side). On the Clone a repo dialog, you can choose from a list of projects available in your Altair AI Hub, or alternatively, provide the clone URI of the repository.
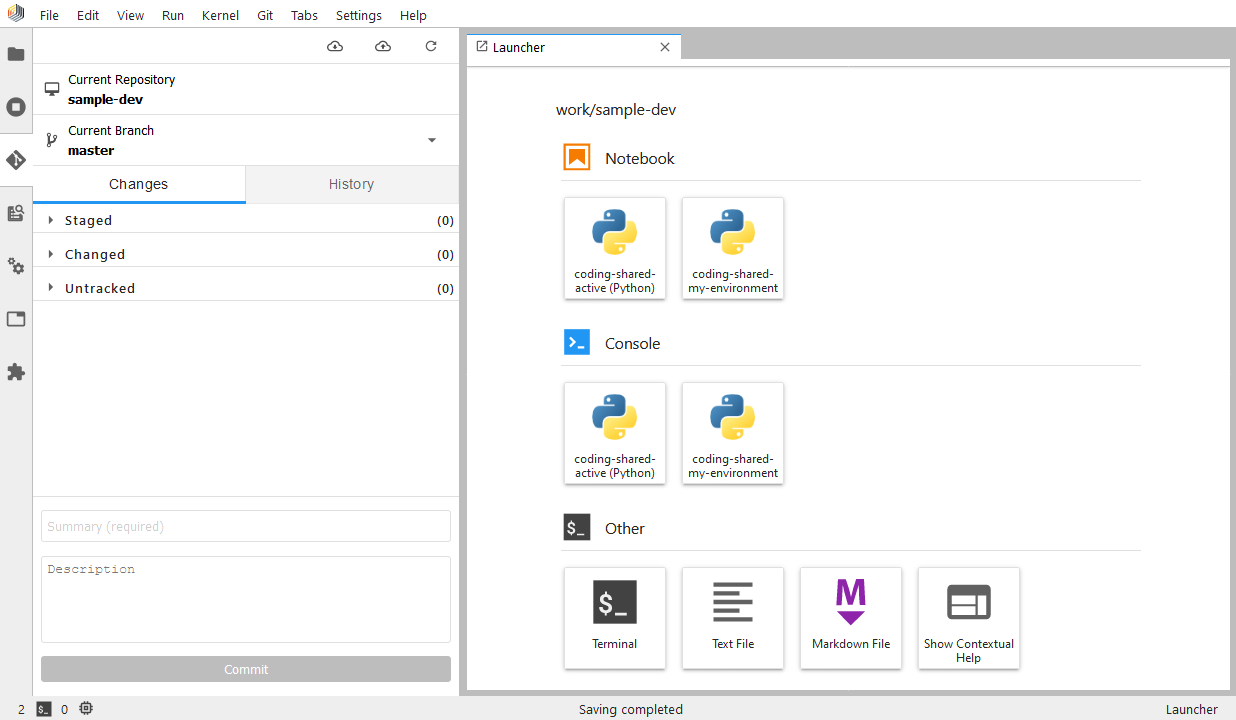
Once the clone operation is completed, the project's contents will be available as a local copy in your Notebook workspace. When you have prepared a change that you would like to share with others and store it in the project's history, you need to:
- click on the Git panel
- select any Untracked files you may have (these would be new files you added), hover over them and click on the plus icon to track them
- stage all changed files by hovering over them and clicking on the plus icon to Stage changes. You can also click the Stage all changes button next to the Changed dropdown.
- double-check that all the changes you wish to share with others now show up in the Staged dropdown
- add a descriptive message describing your changes into the Summary textbox located at the bottom of the Git panel, and an optional Description.
- click Commit
At this point, your changes are stored as a commit in the local copy of your project. To share it with others on your team, you need to push these changes by clicking on the Push committed changes button located in the top right corner of the Git panel.
To refresh your local copy with the newest changes others have made, click on the Pull latest changes button located in the top right corner of the Git panel.
Deployment
Once you're happy with what your code is doing, you will want to deploy it in some way, like a scheduled execution or a web service.
Currently we only support deploying code via RapidMiner processes, then using Altair AI Hub's deployment features to manage the scheduling or the web service deployment.
If you haven't already done so, you will need to alter your code to adhere to the necessary conventions to get executed in an Execute Python operator.
Architecture
This section describes the underlying architecture of Notebooks. This can prove useful in understanding its inner workings and limitations.
Under the hood, in each Altair AI Hub deployment, there is a JupyterHub instance running. JupyterHub is responsible for managing the lifecycle of each user's notebook container, as well as authentication and user management. User containers are configured to run with JupyterLab by default, but a fallback to classic Jupyter Notebooks is also available.
To provide a Single Sign-On experience across Altair AI Hub, the deployment of Notebooks is already pre-configured to use the deployed KeyCloak instance as its identity store. This means that there will never be a need for a second authentication when a user starts up Notebooks.
User notebook containers are only available in interactive sessions, meaning they are started when the user opens Notebooks, and are stopped when they log out.
There is a single notebook container image used as a template to start each user's own notebook container. The home folder of that container is persisted to a volume, meaning all code, data and private kernels can be stored there and will be available when the users logs back in another session. These volumes are private to the user and are not shared across multiple users.
Each user's notebook container is allowed to consume a preset amount of CPU cores and memory on the host or cluster which is running the Altair AI Hub. See the image reference on how to change the resource limit for users. The setting applies to all users of Notebooks in that Altair AI Hub deployment, and cannot be changed per user.
We ship our images with some Jupyter plugins installed and enabled. Currently, users cannot change what plugins are installed in their notebook containers. If you need additional plugins enabled, please contact our support team.