Altair AI Hub on Amazon AWS
Marketplace
There are two different links on Amazon AWS, depending on whether you bring your own license (BYOL) or pay as you go.
For details of the installation, continue reading.
The Altair AI Hub AMI
Altair AI Hub on Amazon AWS - Altair RapidMiner Documentation
Please follow these steps to start an Altair RapidMiner AI Hub Amazon EC2 Instance:
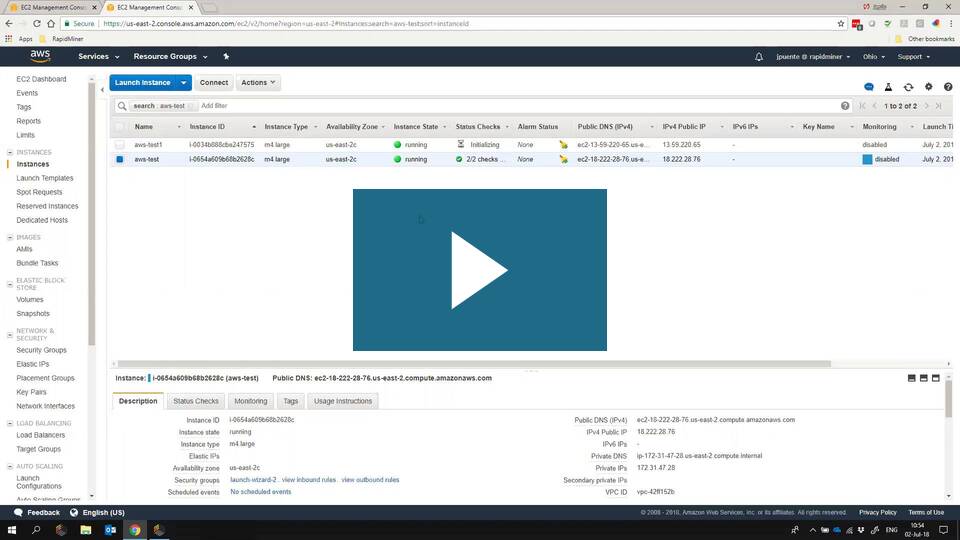
- Log in to your Amazon account and select the EC2 console.
- Click on the Launch Instance button.
- Select AWS Marketplace in the left menu and search for "Altair RapidMiner".
- Select the required version of the Image (we always recommend the latest).
- Continue with the Launch Wizard by selecting the Instance type. We recommend using at least 32 GB of RAM for Altair RapidMiner AI Hub.
- Configure the Instance Details by selecting the networking parameters. Make sure you enable public IP or consult your network administrator about your Amazon VPC configuration.
- Configure Storage and Instance tags. For basic usage the default settings are enough.
- Check the Security group settings and ensure that ports 8080 and 1081 are open for Altair RapidMiner AI Hub and 22 for SSH.
- Finally review and launch your instance with your SSH key.
Log in to Altair AI Hub
After the instance is available, continue with the following steps:
- Using a browser connect to the instance's port
8080. (e.g.http://public.ip:8080) or consult your network administrator about how to access your instance. - Check your instance id on the EC2 web console.
- On the login screen please use the username
adminand use the instance ID (e.g.i-0abcde567884e6bc70) as password. - If you chose a pay-as-you-go AMI, that’s all you need to do. You can already connect to it from a browser or from your Altair AI Studio. If you chose a bring-your-own-license AMI, then you’ll be presented with a page where you need to paste your license. After that, you’ll need to restart the VM.
Next: the image architecture