You are viewing the RapidMiner Applications documentation for version 2024.1 - Check here for latest version
AX Migration Assistant User Guide
The AX Migration Assistant extension helps you to convert your Alteryx workflows into Altair AI Studio workflows.
- The Installation Guide describes how to install the extension.
- This document describes how to use the extension.
- Custom Operators describes custom operators that you can use when Altair AI Studio does not have an operator with functionality similar enough to the original Alteryx tool.
Table of Contents
Step 1: Build a Simple Migration Process
Step 2: Set Parameters
- Step 3: Run Migration Assistant
- Step 4: Import a migrated process
Appendix A: Terminology
Appendix B: Special Cases
Appendix C: Pre-loaded custom operators
Getting Started
Step 1: Build a Simple Migration Process
Once you have installed the AX Migration Assistant and AX Toolbox extensions, you can begin using them to migrate Alteryx workflows to AI Studio processes. We recommend you build a new process in AI Studio so you can re-use the migration assistant again when needed.
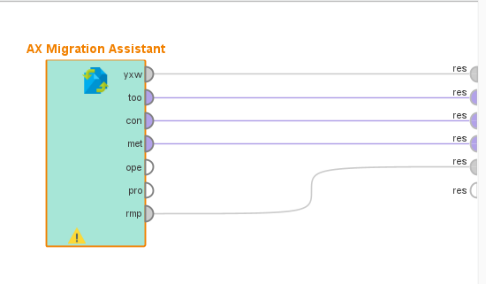
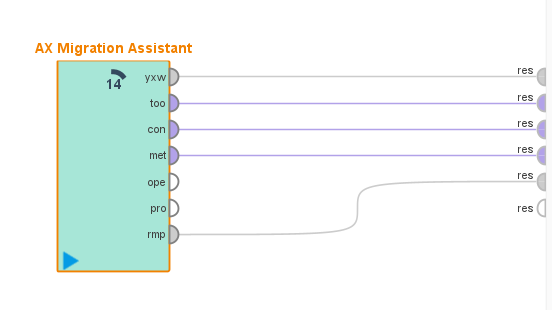
Drag-and-drop the main AX Migration Assistant operator (It is in the Extensions folder in the Operators panel) into a new, blank AI Studio process.
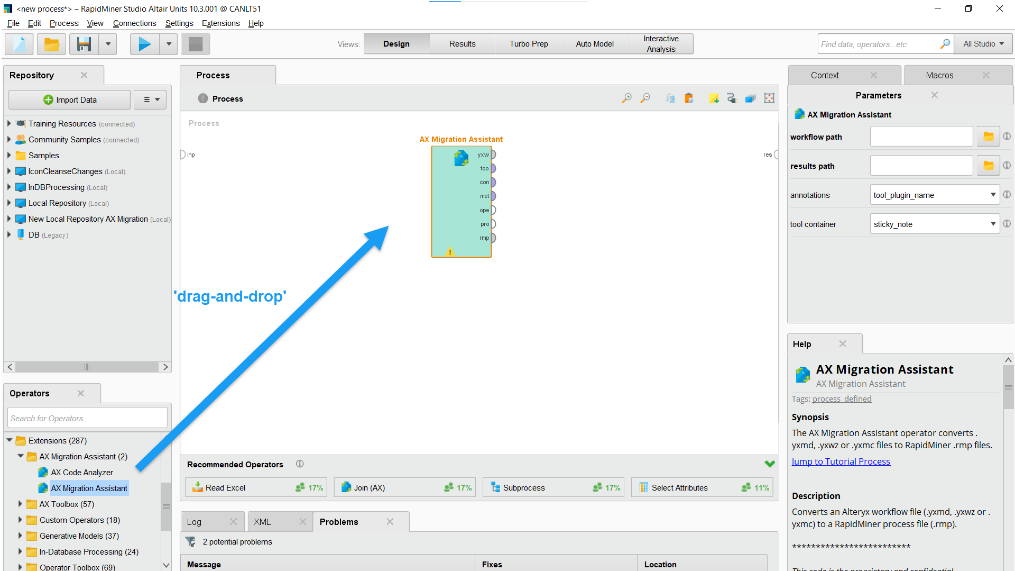
Connect the output ports (i.e., anchors in Alteryx) to the result ports on the right side of your process.
Go to the File menu, select Save Process as..., and save your new migration process in the processes folder inside your Local Repository.
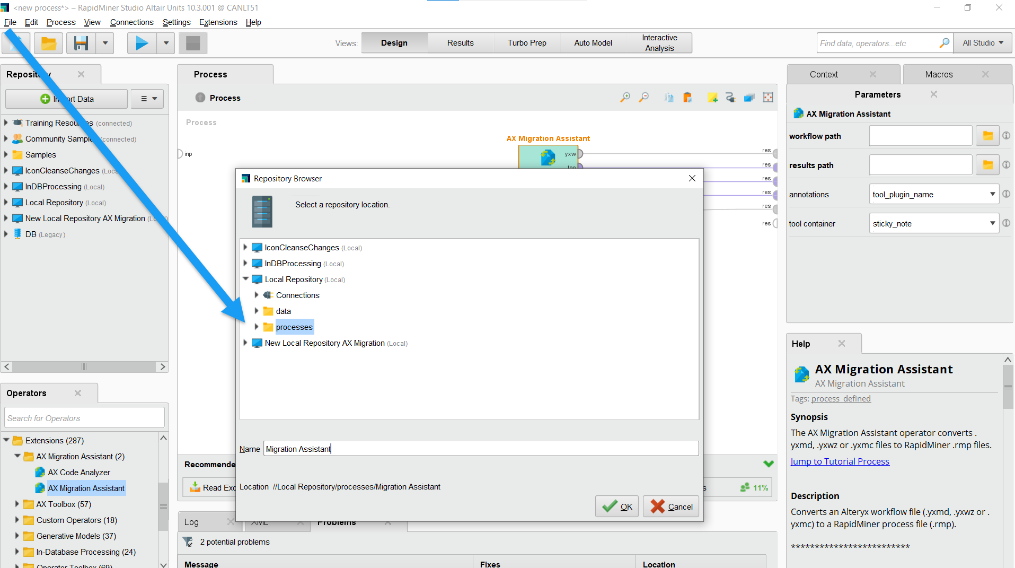
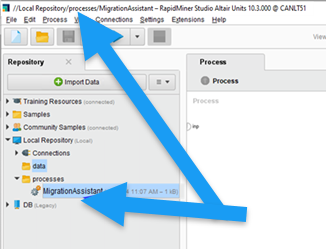
If you are successful, you should see a new AI Studio process in the Repository panel on the left side of your screen, and the file path is now shown on the top of the application window.
Step 2: Set Parameters
Now let's set the parameters so that the migration assistant works in the way that is most useful to you. Click once on the operator in the center of your screen. On the right, your Parameters panel should show the options available.
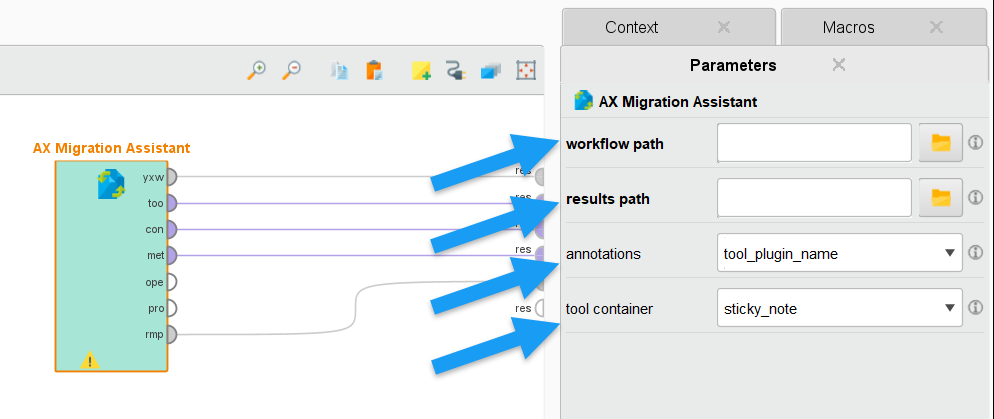
Let’s look at each of these options in turn.
workflow path
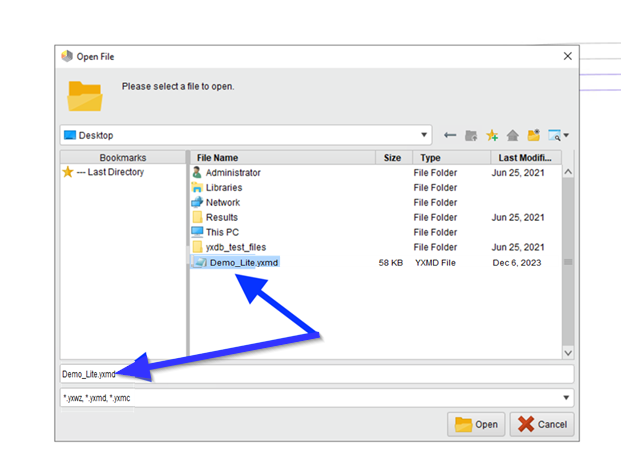
Click the folder icon to the right of the workflow path parameter and navigate to the location of your existing Alteryx workflow. Click Open when finished.
Note that only the following file formats are supported: .yxmd / .yxwz / .yxmc
results path
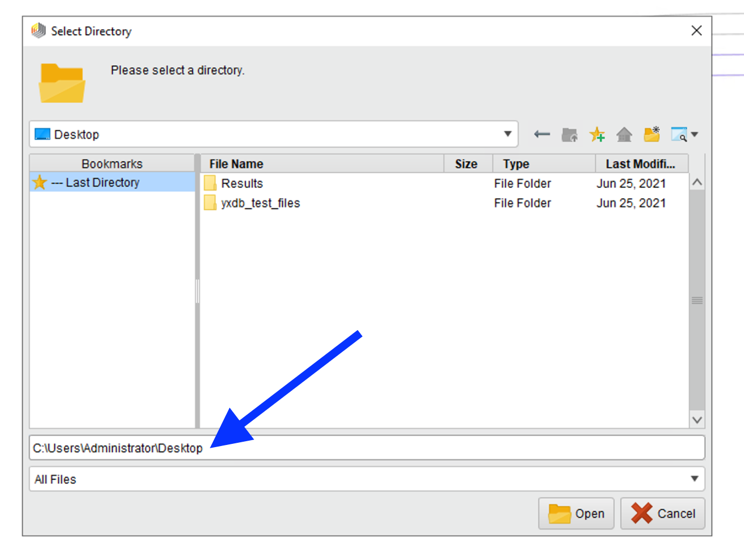
The migration assistant will store two files when it has finished: a new AI Studio .rmp process file, and an Excel sheet with a summary of the conversion. The location of these files needs to be specified in the directory. Click on the folder icon to the right of the results path parameter and navigate to a location on your PC where you’d like these files to be saved. Click Open when finished.
annotations
The migration assistant has three parameter options for how to annotate each operator (you may know them as Tools in Alteryx) after the migration. You can choose between:
| Annotation Option | Function | Example |
|---|---|---|
| tool_plugin_name | each operator will be annotated with its former Alteryx tool name | 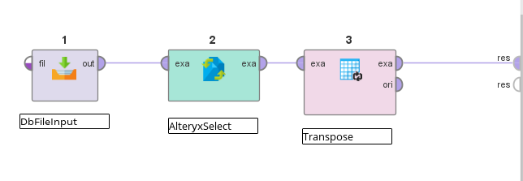 |
| tool_plugin_id | each operator will be annotated with its former Alteryx tool ID | 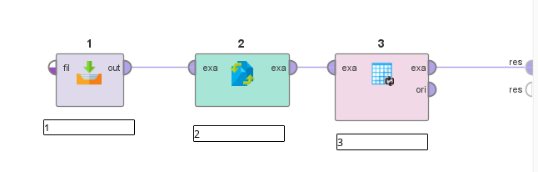 |
| default_annotation_text | each operator will be annotated with whatever text was used to annotate the tool in the original Alteryx workflow (if there was no annotation text, the name of the tool will be used instead) |  |
tool container
The concept of a Tool Container in Alteryx is different in AI Studio, and hence you must decide how you want the migration assistant to handle any tool containers in your Alteryx workflows. You can choose between:
| Tool Container Option | Function | Example |
|---|---|---|
| ignore | ignore all tool containers in the workflow | 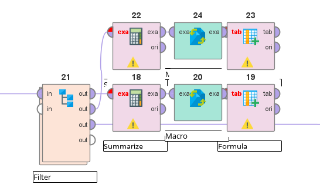 |
| sticky_note | convert all tool containers to 'sticky notes' | 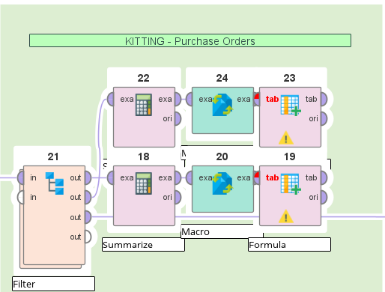 |
Step 3: Run Migration Assistant
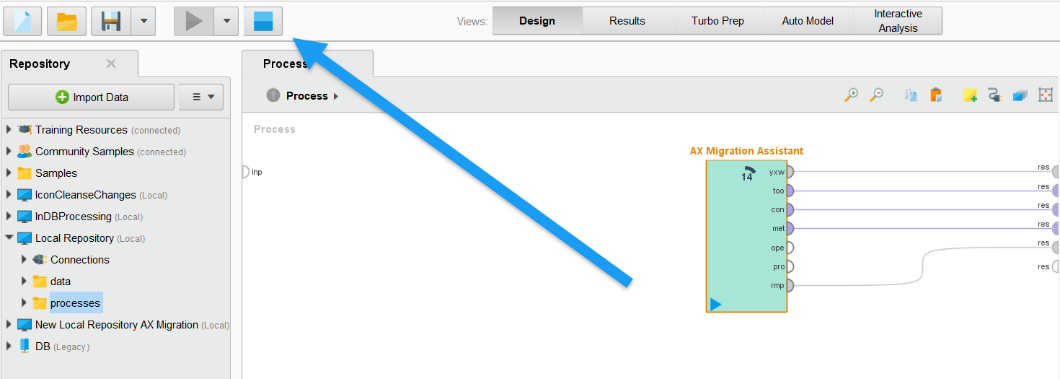
Once the parameters are set, you can run your process. Simply click the blue triangle in the upper left corner of your screen.
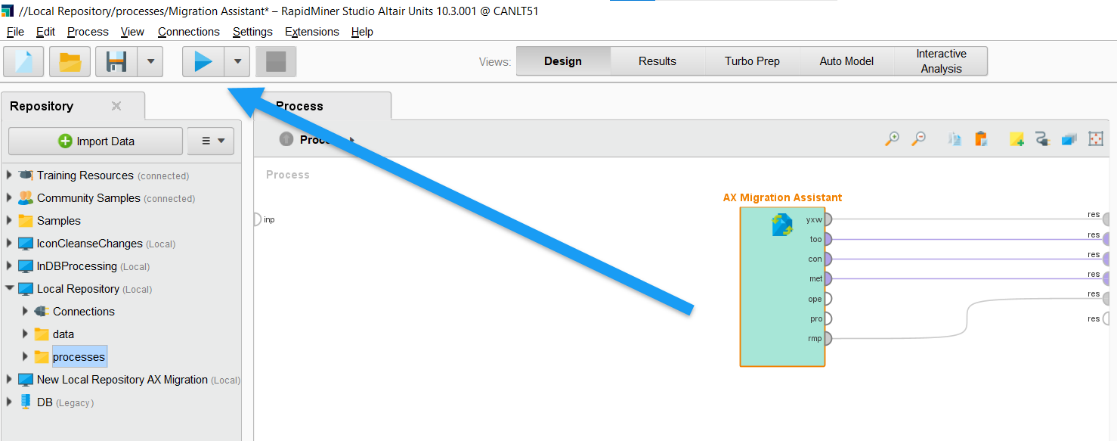
The migration process can be as quick as a few seconds or can take longer depending on the size of the original Alteryx workflow. You can get a sense of the conversion progress via the % completion wheel in the center of the operator.
To stop a migration process before it finishes, click the blue square in the upper left corner of your screen next to the triangle.
Step 4: Import a migrated process
Once the migration finishes, AI Studio will automatically switch to the Results view and show the final converted AI Studio process XML (you will see pink-colored text on top, and the exact same text in black on the bottom).
To open the migrated process:
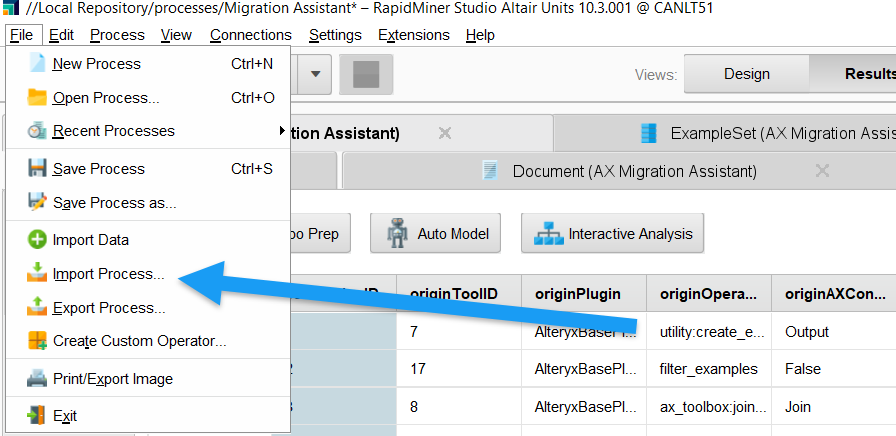
In the top menu, go to File > Import Process...
In the window, navigate to your Results folder (see instructions above for the results directory parameter – it is exactly the same as here) and select your converted .rmp process. It should be named exactly the same as the original Alteryx workflow but with an additional .rmp file suffix.
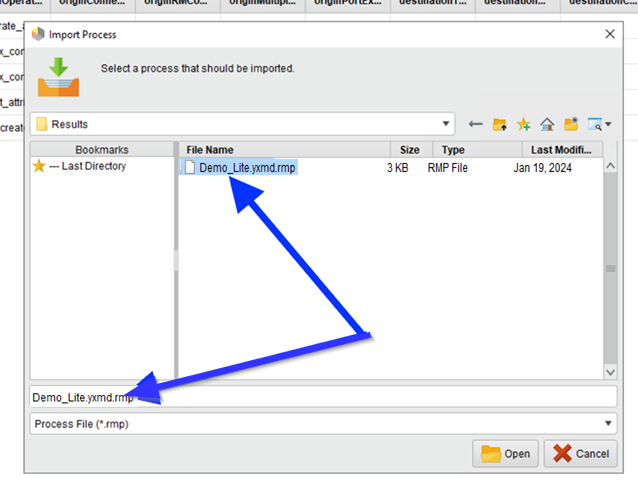
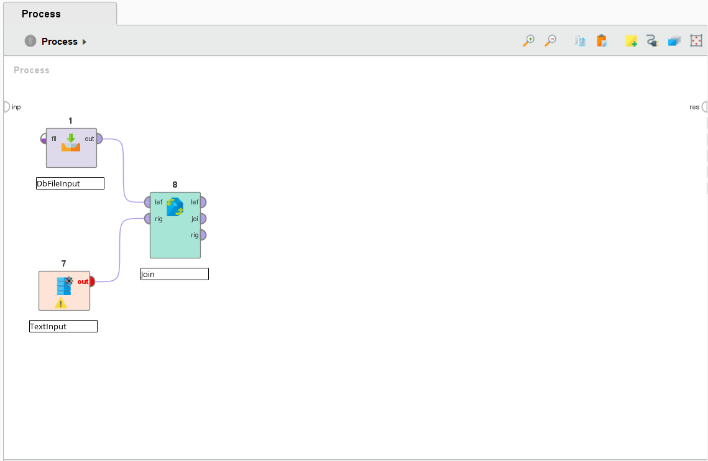
Once you have selected the file, click Open. If the migration was successful, you should see a new AI Studio process that looks very similar to the original Alteryx workflow:
Step 5: Inspect and run a migrated process
It is very tempting to just press "GO" on this newly migrated process, but we would highly advise that you go through the process and ensure the migration succeeded in replicating your original Alteryx workflow. Some quick checks to perform are:
- Click on each operator and examine its parameters in the Parameters panel.
- If you had any DBFileInput tools in your Alteryx workflow that pulled from databases, you will need to create connection objects for each of them.
Now you can try running the process: press that blue triangle on the upper left. Most likely you will get a series of error messages that are small conversion tweaks that again need to be remedied. However, if you don’t receive any errors, your newly converted process will run and you will see your results in the Results panel. Be sure to save your new process so you can use it again and again.
That's about it. Good luck and please reach out to your Customer Success Manager if you have any questions or concerns.
Appendix A: Terminology
There are some terminology differences between Alteryx and Altair RapidMiner. Most of these differences are purely semantic but there are some substantive ones as well (called Special Cases here). Many of the items here are linked to other pages for further explanation.
General Terms
| Alteryx | Altair RapidMiner | Comments |
|---|---|---|
| anchors | ports | see the list of port abbreviations |
| canvas | process view | see #3 in the UI Overview diagram |
| column | attribute | |
| configuration window | parameters | see #6 in the UI Overview diagram |
| constants | macros | These are global variables |
| macros | subprocesses | |
| row | example | |
| tool | operator | see #1 in the UI Overview diagram |
| workflow | process |
Data Types
See full documentation of Altair RapidMiner's data types for more information.
| Alteryx | Altair RapidMiner |
|---|---|
| Bool | binominal |
| Byte | integer |
| Int16 | integer |
| Int32 | integer |
| Int64 | integer |
| FixedDecimal | real |
| Float | real |
| Double | real |
| String | nominal |
| WString | nominal |
| V_String | nominal |
| V_WString | nominal |
| Date | date |
| Time | time |
| DateTime | date_time |
UI Locations
| Alteryx | Altair RapidMiner | Comments |
|---|---|---|
| Tool Palette | Operator Panel | see #1 in UI Overview diagram |
| XML View in Workflow – Configuration (to enable go to Options > User Settings > Edit User Settings > Advanced > Display XML in Properties Window) | XML View | Menu Bar > View > Show Panel > XML |
Appendix B: Special Cases
Browse
The Alteryx Browse tool will be migrated to the AI Studio Browse tool, part of the AX Toolbox extension.
Note if you want to view data somewhere before the final result, put a breakpoint on the operator where you want the break (by either selecting the operator and hitting F7 on your keyboard, or right-click on the operator and select Breakpoint After). A red arrow will appear on the bottom of the operator. When you run the process, it will pause the process flow at that point and show you the data in the Results view. To continue running the process, click the run button again.
Tool Containers
Alteryx and AI Studio have different ways of organizing a process (workflow). Hence the concept of a "Tool container" does not correspond to one single functionality in AI Studio. Rather there are several ways to replicate the idea of a Tool container in AI Studio:
Sticky Notes
You can insert a note anywhere in a process and re-size it to cover one or more operators. Simply click on the Sticky Note button on the top-right of the Process panel and insert your text.
NOTE: In the AX Migration Assistant extension, you can choose to either migrate Tool Containers to Sticky Notes or ignore them altogether.
Subprocesses
You can take any piece of a process (operators + wires) and insert it into a Subprocess operator. You can do this by selecting the operators (dragging a box around them is usually the easiest) and either (a) right-clicking any one of the selected operators and choosing Move into subprocess, or (b) dragging a Subprocess operator from the Operators panel and cut-and-pasting the operators into the subprocess.
Read more:
- Getting started with processes
- Subprocess in AI Studio
- Subprocess operator
Execute Process
You can save a piece of a process as a new process and then execute it from another process using the Execute Process operator. This is similar to running 'macros' in Alteryx.
Read more:
- Getting started with processes
- Execute Process in AI Studio
- Execute Process operator
Custom Operators
You can save your piece of a process as a new custom operator and then use it as you would any other operator in AI Studio.
Read more: Custom operators extension
Appendix C: Pre-loaded custom operators
As a part of the Alteryx Migration, there is an additional extension called AX Toolbox that comes pre-loaded with a series of custom operators that are applied when the native AI Studio equivalent operators do not have functionality similar enough to the original Alteryx tool. Please refer to the AX Toolbox User Documentation guide for more information and descriptions of these operators.
FAQ
Q: Why did the converter not migrate all of the “rename” field settings in my tools?
A: AI Studio does not have a “rename” feature built into its operators (tools) like Alteryx. Rather there is a separate operator in AI Studio called Rename that performs this function.
Q: So why not just insert a Rename operator after every operator where I renamed fields (attributes) in my original workflow?
A: It would be very confusing to insert a Rename after every single operator that had renaming information from its original Alteryx tool. Therefore, we recommend either modifying the attribute names in your converted process, or insert as many Rename operators as needed to run it.
Q: Some of my tools have renaming of attributes inside of them, how will my process run if AI Studio operators do not have this feature?
A: Yes, it is true that if attributes are renamed inside a tool and these changes are not caught then it would cause the process to fail. To avert this, custom operators for the two most used tools (Join and Select in the AX Toolbox) have been upgraded. These changes can accommodate any renaming or data type changes made inside the original Alteryx Tools and will make the migration smoother.
Q: Is there a separate tool for using Regular Expressions? How AI Studio handles Regular Expressions?
A: There are no separate tools for handling Regular Expressions in AI Studio. However, the regular expression editor is available in couple of tools like Select Attribute, Rename by Replacing, Split, ... which helps you select the matched fields.
Q: Why is the execution order of tools different from what I had in Alteryx? Is there a way to change the execution order of tools?
A: Migration Assistant captures the execution order based on the ToolID order of tools in the XML file of the workflow which could sometimes be different from what the user identifies in Alteryx. To change the execution order of tools, users can click on the Show and alter the order in which operators run ( ) button in the top-right section of the workflow and change the order based on their needs.
Q: Is there a way to run a portion of workflow?
A: Users can put Breakpoints by right-clicking on tools and changing the execution order of tools by using Show and alter the order in which operators run () button in the top-right section of the workflow. Users also can select the portion of interest and right-click on it and put selected items into a Subprocess and then, put a breakpoint on the Subprocess. This would add more modularity to the workflow.