You are viewing the RapidMiner Deployment documentation for version 9.6 - Check here for latest version
Docker Deployment Manager
Introduction
In this document, you will learn how to use the Docker Deployment Manager user interface to monitor and change the status and configuration of the services of your RapidMiner deployment.
The Docker Deployment Manager helps you set up and configure single-machine docker environments (for multi-machine deployments, we recommend the usage of Kubernetes).
Among other tasks, you will read about how to:
- Monitor the state (running/stopped) of the services (configuration database, RapidMiner Server, Job Agents, etc.)
- Restart any service
- Scale up or down the number of Job Agents connected to the RapidMiner Server instance
- Review logs from any individual component
- Update the docker configuration file to:
- Change memory settings
- Scale up or down the number of Job Containers spawned by Job Agents
- In general, re-configure the components
- Manage access control for the Docker Deployment Manager
- Manage certificates (if you have configured https)
The Docker Deployment Manager is available as part of the (containerized) RapidMiner deployment. See the deployment overview on where it fits in.
Logging in and managing users
By default we provide basic HTTP user authentication. If you have additional requirements, you'll have to fine tune the proxy container's configuration and set up an appropriate authentication backend. This topic is out of scope of this documentation.
Initial login
The default URL to access Docker Deployment Manager is on port 5080 of your RapidMiner platform deployment (http://[server host]:5080). If HTTPS is configured, then the port will be 5443.
By default, there's an admin user created. The initial password is dependent on the configuration of infrastructure used. For cloud image based deployments, it's the instance ID for Amazon AWS or the instance name for Microsoft Azure.
Please make sure you change the initially provided password after the first login to ensure a secure operation.
User management and security
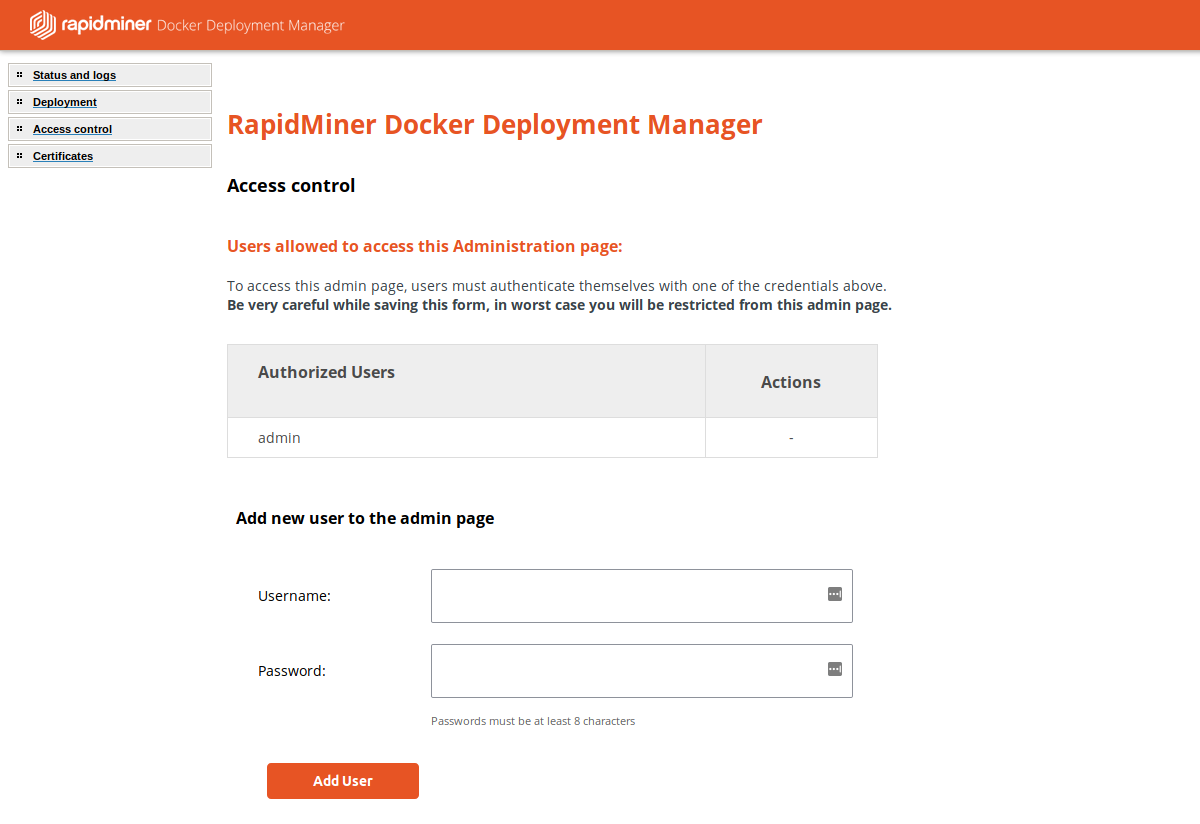
You can add and remove users by visiting the Access Control menu item.
The Docker Deployment Manager has its own user management system, independent of that for RapidMiner Server. Initially, only a user called admin is created. Access to the Deployment Manager is global, no particular roles or permissions are defined.
To add a new user
Use the Add new user to the admin page form
- Type the username of the new user into the Username field
- Type the new password in the Password field
- Click on the Add User button
Passwords can be changed by introducing the old name and new password into the Username and Password fields and clicking on Add User. If you change the password of the logged-in user, it will be immediately logged out and asked to log in again.
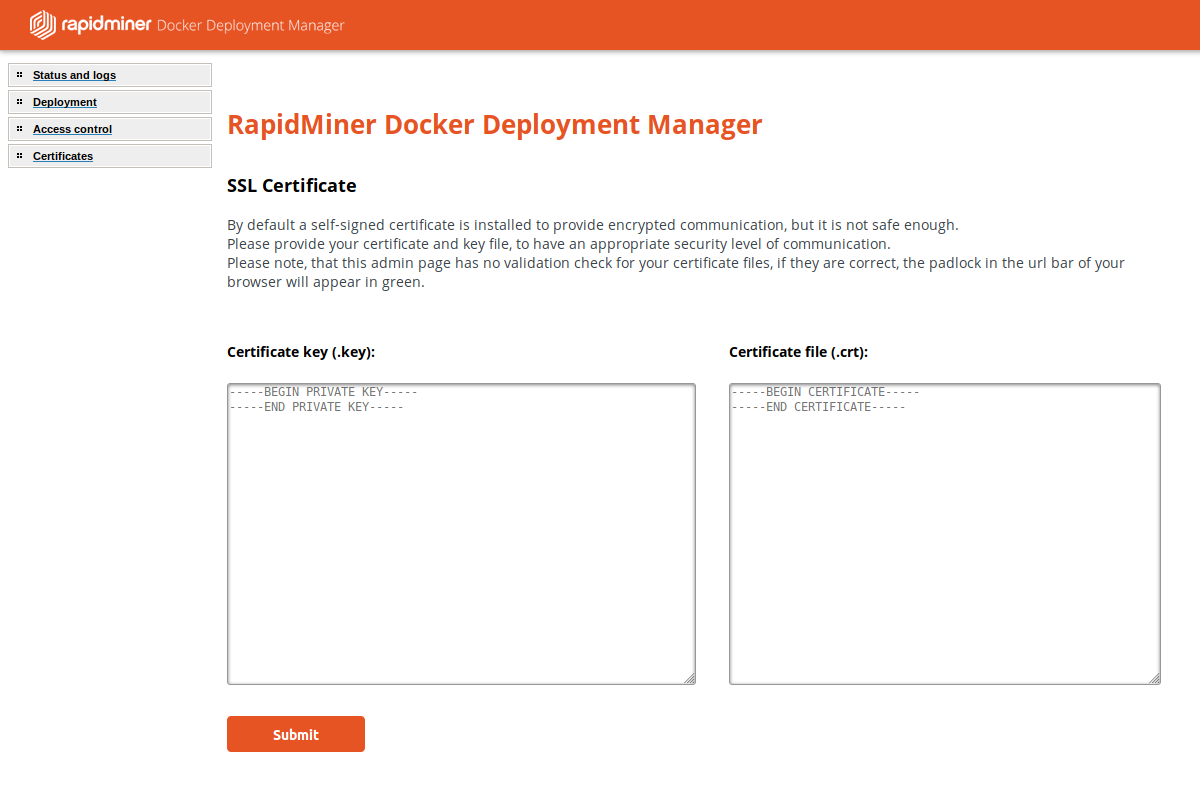
You can also install an SSL certificate to facilitate encrypted communication between the browser and Docker Deployment Manager. Click on the Certificates menu item and provide the certificate and the key.
If you forgot the admin password
If you forget the admin password, you can overwrite the contents of the authentication password file in the following way:
Generate a record with the htpasswd generator tool
Open a shell to your host (EC2 instance)
Run the following command to overwrite the password (replace the <YOUR-PASSWORD> with your password:
docker-compose -f /rapidminer/docker-deployment-manager/docker-compose.yml exec -T webui bash -c "/usr/bin/htpasswd -mbn admin \"<YOUR-PASSWORD>\" > /var/www/html/uploaded/htpasswd_admins/latest_htpasswd_admin"
Monitor the state of the services
Your RapidMiner Deployment includes a number of independent services, which we bundled into a set of deployment templates for convenience:
- The configuration database
- RapidMiner Server
- Job Agents
- And, optionally, additional services, like the Radoop Proxy, the Python Environment Manager, Real-time Scoring Agent, and others
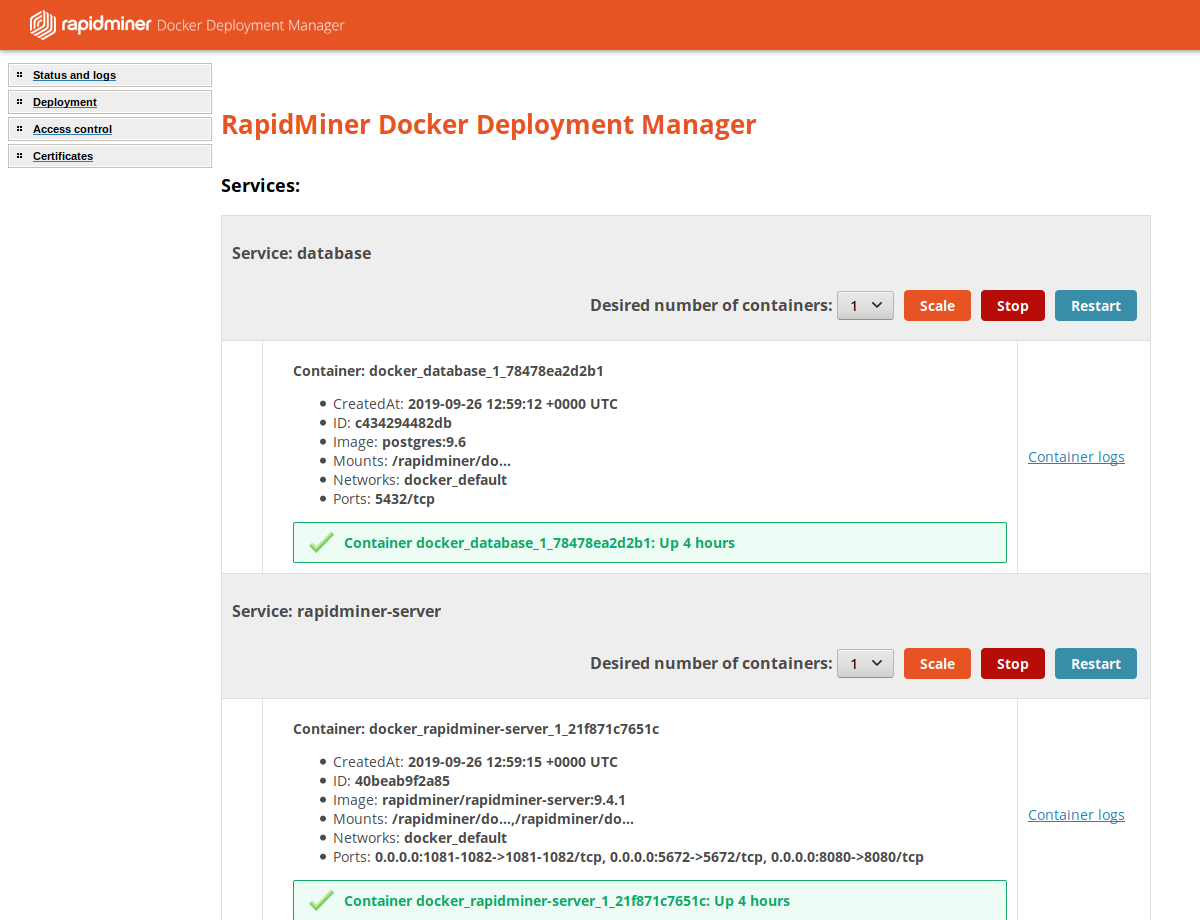
The Status and logs menu item of the Docker Deployment Manager shows the list of the currently running services. The information displayed includes
- container name
- container creation time
- container ID
- container image
- container network name
- container ports
You can stop, start and restart any of them using the buttons to the right of the service name. The output and logs of the commands will be displayed.
It's also possible to scale them (add or remove instances) by selecting the desired number in the drop-down list and clicking on Scale. In most cases, this is only useful for the Job Agent service, as it determines the number of Job Agents connected to the Server.
Remember that the Docker Deployment Manager handles single-machine environments only, so the scaling is always within the limits of the physical or virtual box it was deployed on.
Please notice that this does not affect the number of Job Containers for each Job Agent and, therefore, it doesn't change the parallelization capabilities of existing Job Agents. To configure Job Containers, please check the section below.
For each service, there's also a link Container logs that opens a new tab with the service's logs. You can display as few as 100 lines or as many as the full content of the log file (be aware that a very long file may considerably slow down your browser).
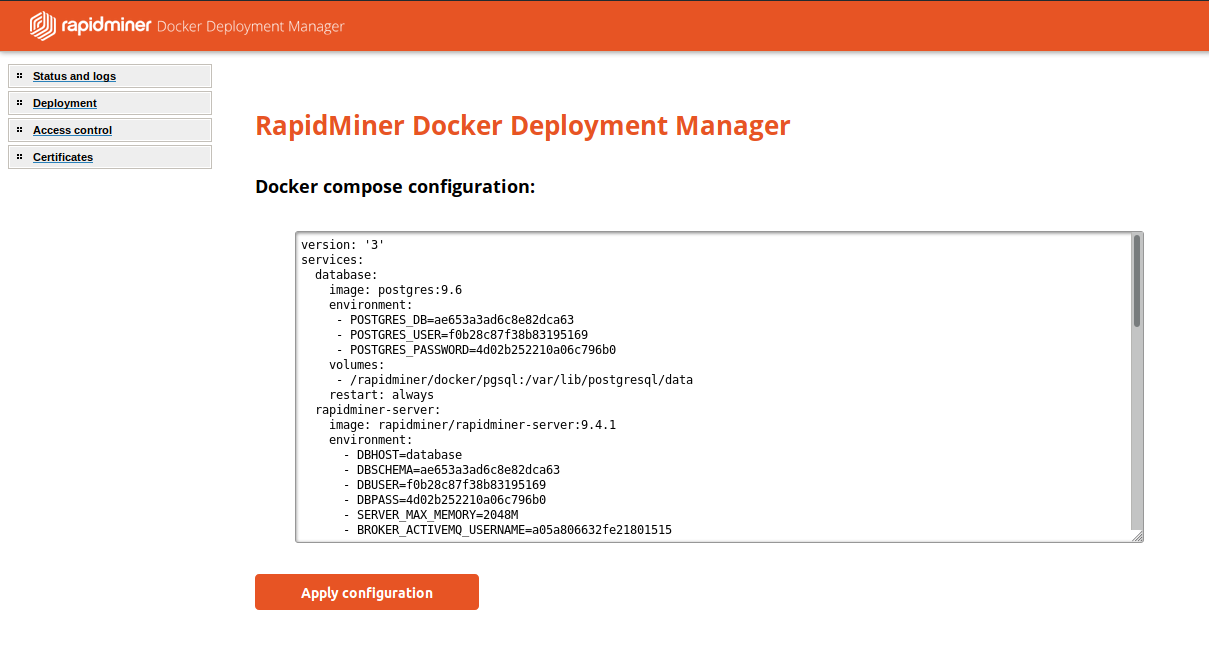
Update the docker configuration
The Deployment menu item allows reviewing and updating the full Docker configuration. This is a very powerful feature, as you can make any change to any configuration of the Docker environment. You could even upload your own configuration and apply it.
The validity of the new configuration will first be tested. If it is invalid, you will receive an error message. If it is valid, the new configuration will be applied, and the command output will be displayed.
Of course, a wrong configuration could disable the whole environment, so please handle with care.
Some typical use cases where configuration changes are useful:
- Change memory settings
- Server memory (
SERVER_MAX_MEMORY) - Job Container memory (
JOBAGENT_CONTAINER_MEMORYLIMIT)
- Server memory (
- The number of Job Containers spawned within the Job Agent service can also be edited (
JOBAGENT_CONTAINER_COUNT).
You can search for those variables within the configuration and replace the existing number with your new preference.
Once you are happy with the new configuration, just press Apply configuration and wait for a while until changes are applied.