The MongoDB connector allows you to connect to instances of the NoSQL database MongoDB directly from RapidMiner Studio. It supports all CRUD operations (Create, Read, Update, and Delete), as well as running more sophisticated database commands. This document will walk you through how to:
Before you can use the MongoDB connector, you have to configure a new MongoDB connection.
For this purpose, you will need the connection details of your database (host name, port, and database name).
If your MongoDB installation requires authentication, you will also need valid credentials.
In RapidMiner Studio, right-click on the repository you want to store your MongoDB connection in and choose Create Connection.
You can also click on Connections >Create Connection and select the repository from the dropdown of the following dialog.
Enter a name for the new connection and set Connection Type to MongoDB:
Click on Create and switch to the Setup tab in the Edit connection dialog.
Fill in the connection details of your MongoDB server:
The preconfigured port is the default port used by MongoDB. Note that MongoDB does not require user authentication by default.
While not required, we recommend testing your new MongoDB connection by clicking the Test connection button.
If the test fails, please check whether the details are correct.
Click Save to save your connection and close the Edit connection dialog.
You can now use the newly created connection with all of the MongoDB operators!
Read from MongoDB
The Read MongoDB operator allows to read data from MongoDB collections.
MongoDB uses the JSON format to represent data and does not use database schemata.
This data format can be converted to RapidMiner Studio's native format via the JSON to Data operator. For the opposite direction, use the Data to JSON operator.
Let us start with reading the raw JSON data without further conversions.
Open a new process in RapidMiner Studio. Drag the Read MongoDB operator into the Process view, and connect its output port to the result port of the process:
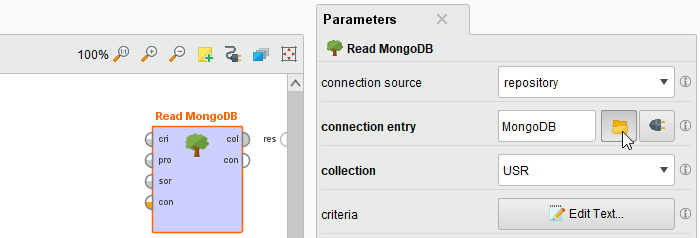
Select your MongoDB connection for the connection entry parameter from the Connections folder of the repository you stored it in by clicking on the button next to it:
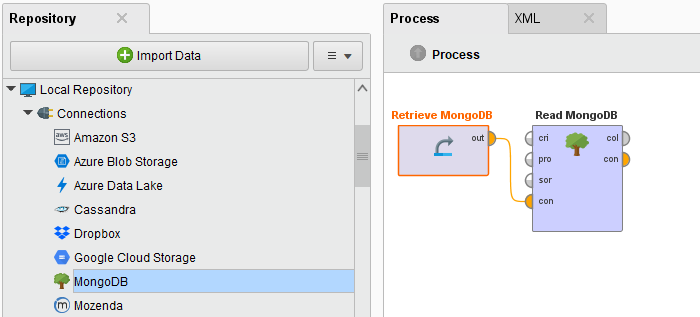
Alternatively, you can drag the MongoDB connection from the repository into the Process Panel and connect the resulting operator with the Read MongoDB operator.
Select your MongoDB connection from the mongodb instance drop down menu in the operator parameters.
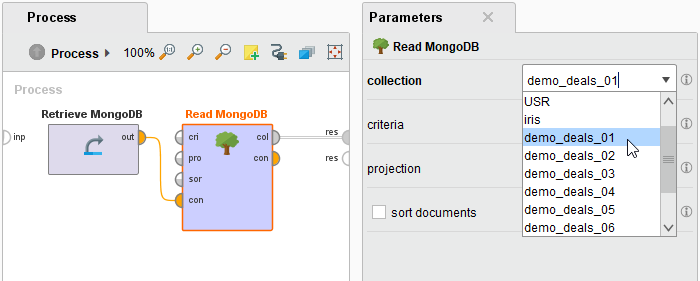
Select a MongoDB collection from the collection drop down menu. It should be populated with the collections available in the configured MongoDB database:
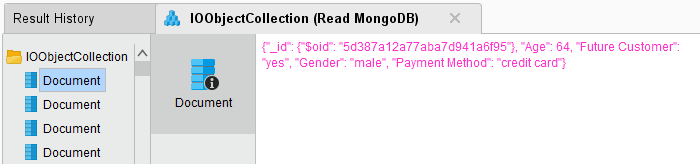
Run the process! In the Result Perspective, you should see a single collection of JSON documents (provided that the selected collection is not empty). In our example, the collection contains RapidMiner Studio's Deals sample data set:
Convert into a single example set
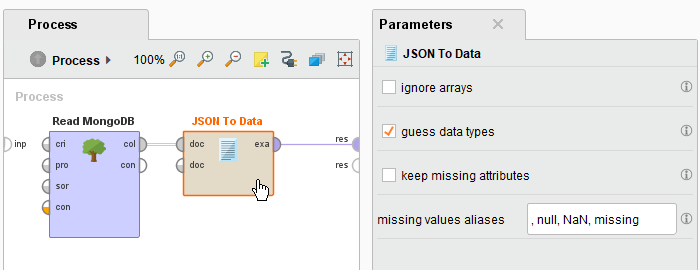
Let us now extend the process to convert this collection of JSON documents into a single example set, i.e., into a format that is compatible with RapidMiner Studio's core operators.
Navigate to the Design perspective and add a JSON to Data operator in between the Read MongoDB operator and the result port:
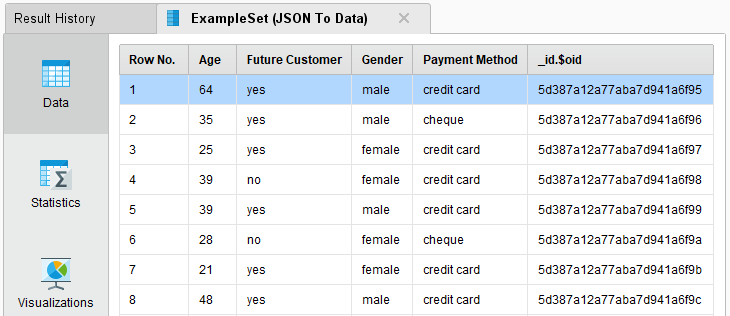
Run the process again! In the Result Perspective, you should see a single example set containing the same data as in the previous run:
You can now work with this example set as you are used to from other data sources.
However, you might wonder how to query specific subsets of a MongoDB collection.
As of now, we have always queried the entire collection.
An introduction to MongoDB's query syntax would be out of the scope of this guide.
Please refer to the official MongoDB documentation for an in depth introduction to MongoDB.
However, to give you an idea, let us modify the process one last time.
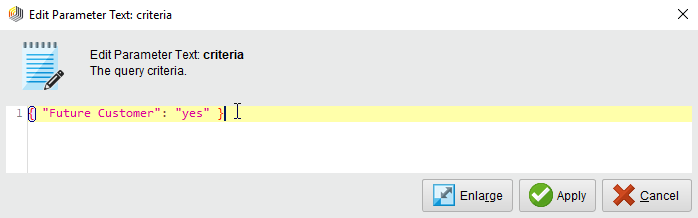
In our example, the JSON documents in our MongoDB collection contain a field named Future Customer. We can specify a simple query criterion that requires the value of this field to be yes (changing the following example to match your own data should be straight forward).
Navigate to the Design Perspective, select the Read MongoDB operator, and edit the operator parameter named criteria.
Enter the following short JSON document (the query criterion):
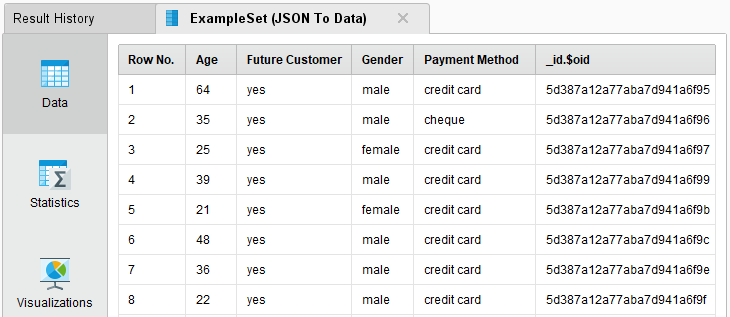
Run the process again. The result set should only contain examples where the value of the attribute Future Customer is yes:
Write to MongoDB
Writing an example set to a MongoDB collection is easy: load the example set, convert it to a collection of JSON documents, and write it to MongoDB.
The following example illustrates how to write one of RapidMiner Studio's sample data sets to a new MongoDB collection.
Open a new process in RapidMiner Studio.
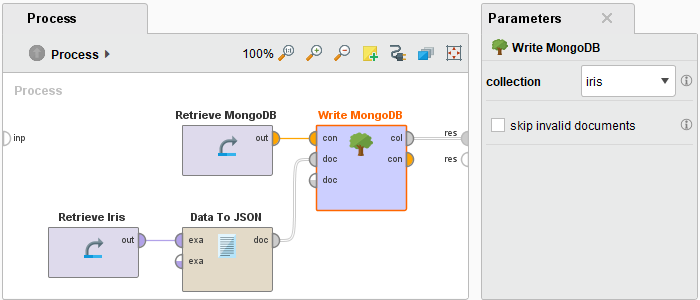
Drag the Iris sample data set, the Data to JSON operator, and the Write MongoDB operator into the Process view and connect the operators as shown in the following screen shot. Select your MongoDB connection and enter a name for the new collection:
Note that you can also select an existing collection. MongoDB would then add the new JSON documents to this collection, regardless of the structure of the documents (remember that MongoDB collections have no static schema).
Run the process!
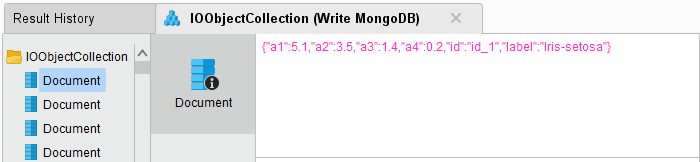
In the Result Perspective, you should see the collection of JSON documents that have been added to the specified MongoDB collection:
Note that MongoDB automatically assigns unique IDs to newly added documents.
As a consequence, running this process multiple times will result in duplicate entries.
 Create Connection.
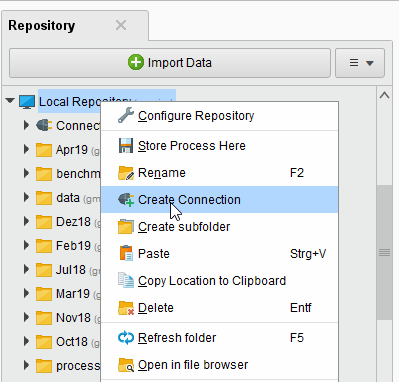
 MongoDB:
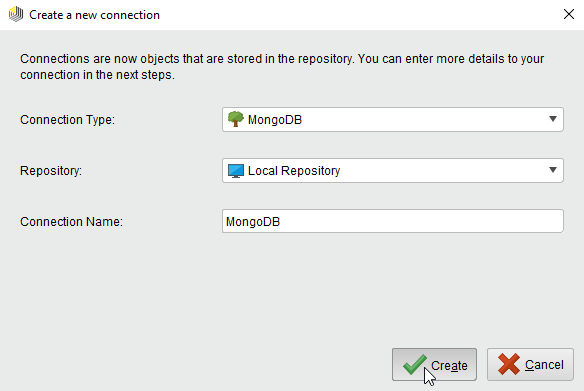
 Create and switch to the Setup tab in the Edit connection dialog.
 Test connection button.
If the test fails, please check whether the details are correct.
Test connection button.
If the test fails, please check whether the details are correct. in RapidMiner Studio. Drag the Read MongoDB operator into the Process view, and connect its output port to the result port of the process:
Select your MongoDB connection for the connection entry parameter from the Connections folder of the repository you stored it in by clicking on the
in RapidMiner Studio. Drag the Read MongoDB operator into the Process view, and connect its output port to the result port of the process:
Select your MongoDB connection for the connection entry parameter from the Connections folder of the repository you stored it in by clicking on the  button next to it:
 the process! In the Result Perspective, you should see a single collection of JSON documents (provided that the selected collection is not empty). In our example, the collection contains RapidMiner Studio's Deals sample data set: