You are viewing the RapidMiner Applications documentation for version 2024.1 - Check here for latest version
Altair® AI Edge™ Device Installation
The Altair® AI Edge™ device is designed to be installed easily and safely in an industrial environment.
Physical Mounting
The solid aluminum enclosure has several standard 'tripod' mount points (1/4" x 20 female screw) to allow users to mount it in a variety of ways. Only one mount point is needed for safe installation.
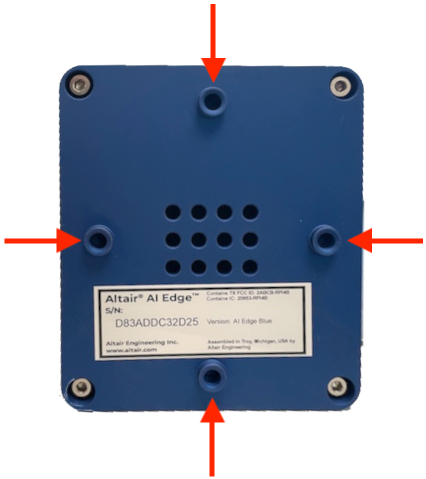
The four mounting standoffs on the back of the device are designed to ensure that air flows out from the back of the device even if the device is mounted flush to the back.
Power and Networking
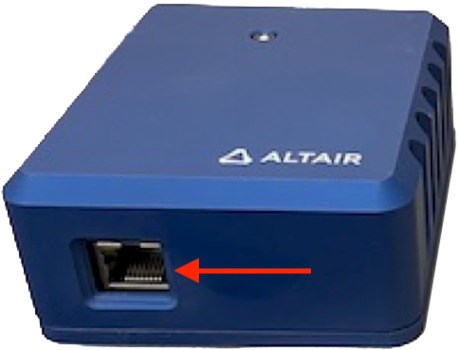
The Altair® AI Edge™ device has a single RJ45 Ethernet jack for both network and power. It requires standard PoE or PoE+ with at least 15W of PoE power.
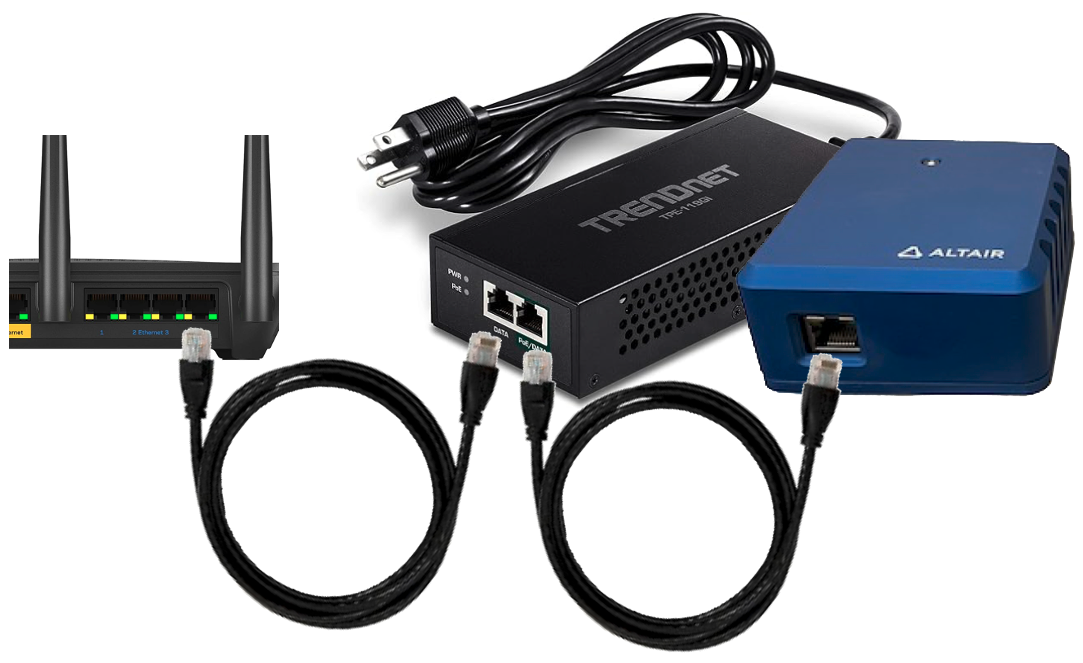
Most installations will take advantage of modern network switches with PoE injection. If you need to power the device without a PoE switch, you can use a standalone PoE injector for power.
If you need to retrieve the device IP (e.g. it has been assigned an IP via DHCP), add the "get-node-ip" action and event to the cluster thing schema - see IoT docs page
Altair® AI Edge™ devices boot immediately when power is supplied via PoE; there is no on/off switch.
First Boot
Altair® AI Edge™ devices ship with only minimal software; the rest is downloaded when booting for the first time. Hence when you power up an Altair® AI Edge™ device for the first time, it will immediately try to connect to Altair IoT Studio (either our SaaS tenant or your on-premise installation) and, once it has established connectivity, will start downloading and installing software via IoT Studio EdgeOps. You should see telemetry coming from the device in IoT Studio after a couple of minutes.
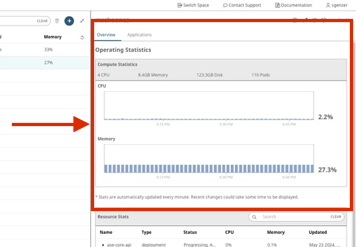
Note: this initial installation download is large. Please wait at least 10 minutes for the device to appear on IoT Studio's EdgeOps Fleet Management screens.
Camera Setup with the Media Streamer App
There is an app in the Altair IoT Studio Marketplace called Raspberry Pi Media Streamer that comes preinstalled on Altair® AI Edge™ devices. It streams live video from the camera to get the correct setup orientation during installation.
To view the stream, go to your local device IP in your browser at port 32432: http://<my-device-ip>:32432/cam/
Note: The Media Streamer app is turned off by default. You must scale down the Media Streamer before using the camera with AI Edge Toolbox operators!
Scaling the Media Streamer Up/Down
There are several ways to scale the Media Streamer up/down.
Scaling the Media Streamer Up/Down via AI Studio with the AI Edge Toolbox extension
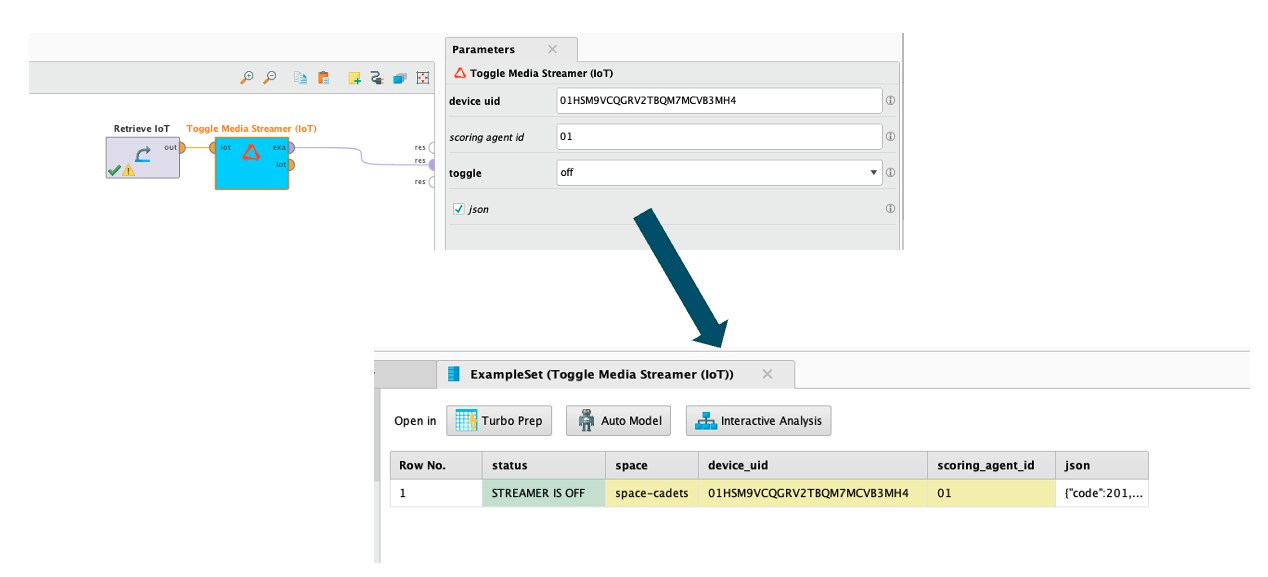
You can use the Toggle Media Streamer (IoT) operator in AI Edge Toolbox to scale the Media Streamer up or down. See the accompanying tutorial process inside AI Studio for details.
Scaling the Media Streamer Up/Down via IoT Studio
To scale the Media Streamer up/down via IoT Studio, go to AnythingDB → device → Actions/Events
- action ==
manage-deployment - command ==
scale - correlationId ==
abcdefg - parameters → deployment ==
ase-media-streamer - parameters → namespace ==
ecp - parameters → replicas == 0 (scale down) or 1 (scale up)
- event ==
manage-deployment
OR
You can use the "send-kubectl" action to run the equivalent of:
kubectl -n ecp scale --replicas=0 deployments/ase-media-streamer
or in array format:
["-n","ecp","scale","--replicas=0","deployments/ase-media-streamer"]
OR
You can use the send-kubernetes-api directly (quicker response, bypasses cli):
PATCH
/apis/apps/v1/namespaces/ecp/deployments/ase-media-streamer
[{"op":"replace","path":"/spec/replicas","value":0}]
[{\"op\":\"replace\",\"path\":\"/spec/replicas\",\"value\":0}]
This is the preferred method. (No need to add the "manage-deployment" action.)