You are viewing the RapidMiner Applications documentation for version 2024.1 - Check here for latest version
IoT Studio
Altair® IoT Studio™ is the communication bridge between Altair® AI Edge™ devices and the outside world.
space
A space is a similar concept as a project in AI Studio / AI Hub: a permission-controlled environment that will contain all the information needed to work with your AI Edge devices.
To find your space, go to Space Settings on the left sidebar and select General. Note that whenever you need the name of your space with AI Edge tools, it is the space ID, not necessarily the space name, that should be used. Space IDs are always lowercase with no spaces or special characters, e.g. my-space-name.
device_uid
Every AI Edge device will have a unique device_uid associated with it in IoT Studio. In IoT Studio, this device_uid is called a "thing id" as you can have many different types of "things" in its AnythingDB database besides AI Edge devices.
To find your AI Edge's device_uid:
- Log into Altair IoT Studio
- Go to Fleet Management → Assets → [click on your device] → [click on icon on top right that looks like a box with an arrow in it + has a tooltip that says "View Thing"] → Overview.
The device_uid is labeled as uid in the panel. Device uids are always alphanumeric all-caps and no spaces, e.g. 01ABCDEFGHIJKLMNOPQRSTUVWXY.
Note: Starting with AI Edge Toolbox 2.0.0, you will no longer need to insert a
device_uidto run operators; the newer version has dynamic field entry where you can query your space for all available devices and select yours by itsdevice_name(known as atitlein IoT Studio).
Connecting IoT Studio to AI Studio
AI Studio communicates with IoT Studio via an Altair IoT Connector connection IOObject. Once created, an IoT connection provides the credentials needed to use all operators in the AI Edge Toolbox.
Communication with AI Hub in AI Studio is done using the Admin Tools extension.
How to create an IoT connection IOObject in AI Studio
First start in IoT Studio:
1) Log into Altair IoT Studio, enter your space, and on the left sidebar, go to Access Control → Apps.
2) Click on button on the blue button on the top right labeled + New App.
3) Enter a name for this app with the following format: <username>-app.
4) Select the scopes of your app (choose Select visible), and ensure the Type is Client Credentials.
5) Click the blue save disk icon on the top right.
You should now be viewing a right sidebar with the word “Authorization” highlighted in blue
6) Complete the Roles section by choosing a role that allows you access to necessary resources.
If there is no role available in your space, create a new one with these resource permissions. See the Roles section of IoT Studio documentation for more information.
7) Complete the Policies section:
- Click the circle/plus sign icon on right. An
Add Policypopup should appear. - For Section, please choose
All - For Resource Type, please choose
All - For Action, please DESELECT
deleteso that onlyread,create, andupdateare in bold - Click the blue Add Policy button
8) Click the blue save disk icon on the top right.
9) At the top of this sidebar, click on the Details tab (next to Authorization).
You should now see a section at the bottom called “Security Info”.
10) Open a temporary Notepad / TextEdit text file on your computer and Copy the Client ID to your text file. It should be a long key e.g. ef102f48-fdf9-48f8-a279-ee74044013b0.
11) Click the blue “Reset Client Secret” button.
You should see a popup warning you about resetting your client secret.
12) Click the orange “Reset” button.
13) Copy the Client Secret to your text file. It should be another long key e.g. 2Co3VeBqceN1UNVTi8SxVBPbIsi9vX.
Now go to AI Studio:
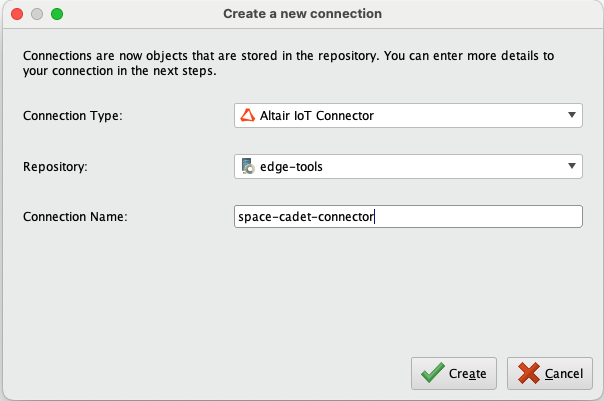
14) At the top, go to Connections → Create connection.
- Connection Type:
Altair IoT Connector - Repository:
<your-AI-Hub-repository> - Connection Name:
<your-space-name-or-similar>
then click Create.
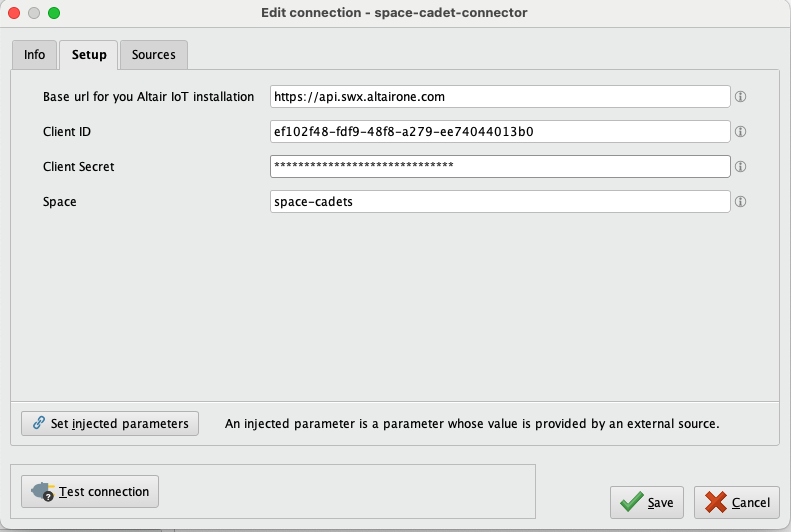
15) Enter the information on the popup. You will need the Client ID and Client Secret you copied to Notepad / TextEdit from steps 10-13:
- If you are using the SaaS IoT Studio, the base url is
https://api.swx.altairone.com.
If your IoT Studio is hosted on a private cloud tenant or is an on-prem installation, your base url will be different. Ask your IT administrator for this information if you do not have it.
- Client ID is from step 10 above
- Client Secret is from step 13 above
- Space is
your-space-name