You are viewing the RapidMiner Applications documentation for version 2024.1 - Check here for latest version
Image Inferencing using ML Models on Altair® AI Edge™ Devices
One of the most common use cases with Altair® AI Edge™ devices is scoring (inferencing) an image with a machine learning model. The two most common types of inferencing are:
- Image Classification: categorizing the whole image based on a pre-trained model
- Object Detection (also known as Bounding Box Detection): locating a rectangular region of an image which contains an object.
For example, suppose your Altair® AI Edge™ device takes a picture like this:

If you provided this image as input to an image classification model where the possible categories were "day" or "night", it would most likely return the result "day":
{"class": "day"}
Note that it would make no reference to "sky" or "bird" because, in this example, the model was only trained to classify images as either "day" or "night".
If you provided this image as input to an object detection model that was trained on detecting birds, it would likely return a label "bird" along with bounding box coordinates (in pixels) of a rectangle enclosing the bird in the picture:
{"class": "bird", "x": 988, "y": 464, "width": 1436, "height": 1936}
Latency
One of the most important metrics to keep in mind when you start scoring images (or video) on Altair® AI Edge™ devices is latency, the time between when you make a request and when you receive a response. Altair® AI Edge™ devices currently are designed only for high-latency use cases – typically 30 seconds or greater. Later versions of Altair® AI Edge™ will be able to reduce this latency to less than 1 second.
Tutorial: Object Detection on an Altair® AI Edge™ Device using YOLOv10
The easiest way to get started image inferencing is to use a pre-trained model. We will use the standard open-source YOLOv10 single-shot object detection model. It finds one or more objects from the standard COCO Dataset.
In order to follow this tutorial, please first ensure that your Altair® AI Edge™ is online and connected to IoT Studio, and you have the AI Edge Toolbox extension successfully installed on AI Studio.
Note: this is a long tutorial. Get yourself a bag of Haribo Goldbears and reward yourself for each step you accomplish. You will be more successful and have an amazing sugar high when you're done!
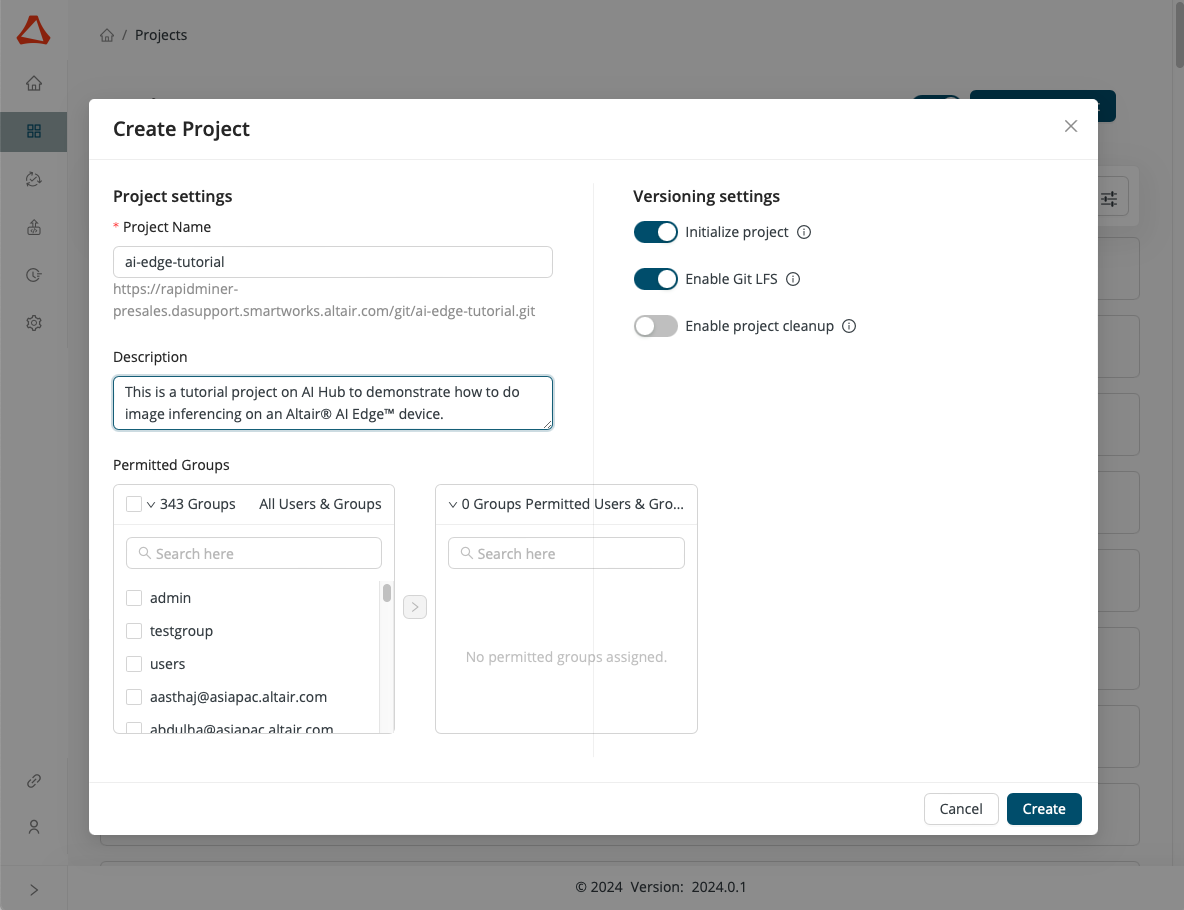
1) Create a new AI Hub project called ai-edge-tutorial.
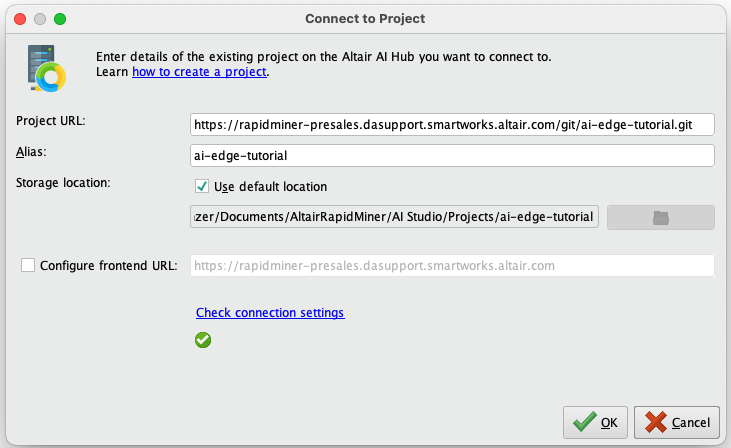
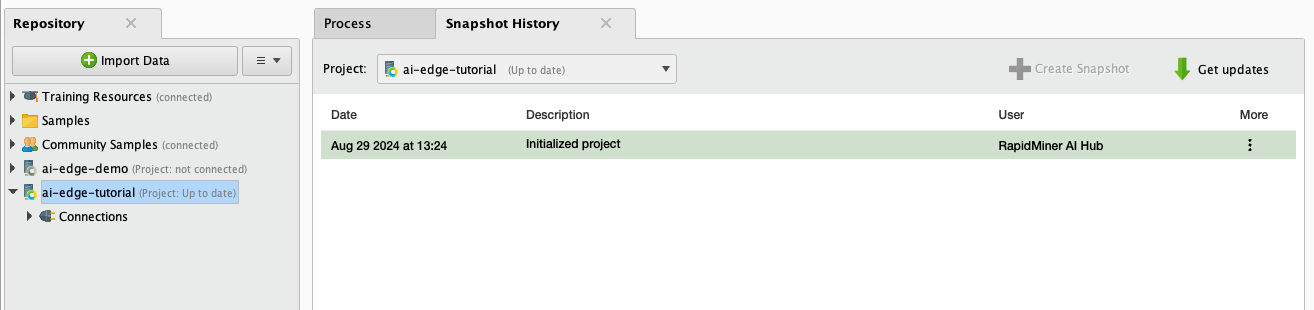
2) Open AI Studio and connect to the new ai-edge-tutorial project.
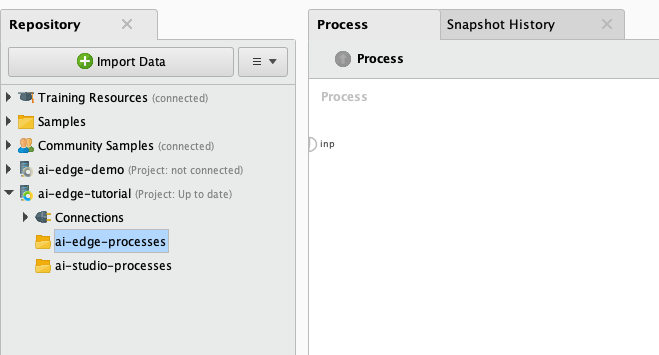
3) Create two new folders in the project repo ai-edge-tutorial:
ai-edge-processes- where you will save processes that will eventually reside on your Altair® AI Edge™ deviceai-studio-processes- where you will save processes that will be used locally in AI Studio to communicate with your Altair® AI Edge™ device
4) Open a new AI Studio process, copy the process XML below to your clipboard, and paste it into your new process in AI Studio.
See the Sample Process XML for Altair® AI Edge™ Image Inferencing
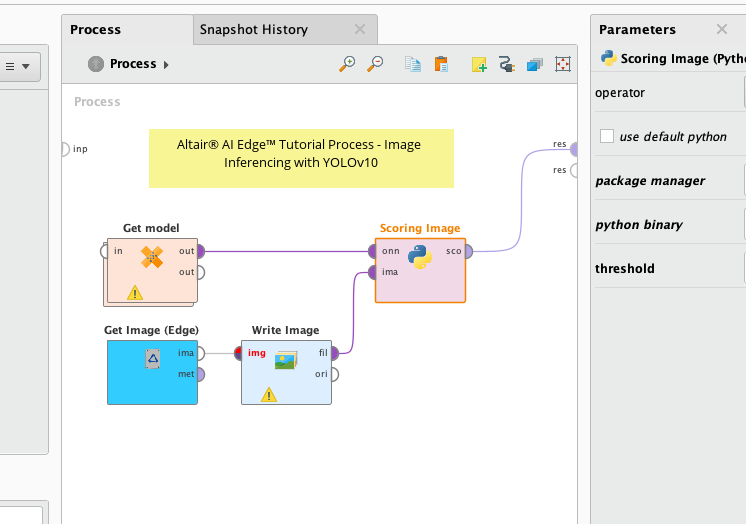
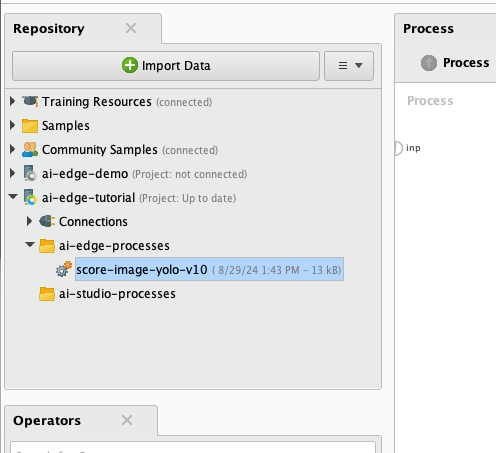
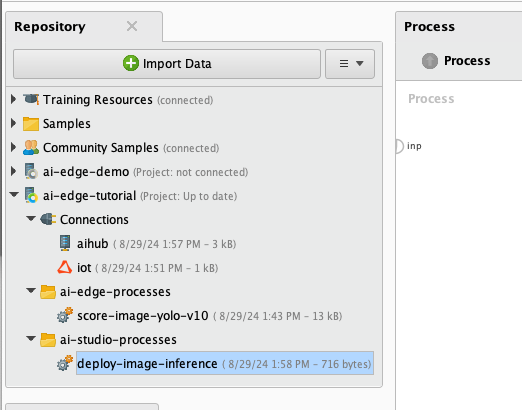
5) Save this process as score-image-yolo-v10 in the folder ai-edge-processes.
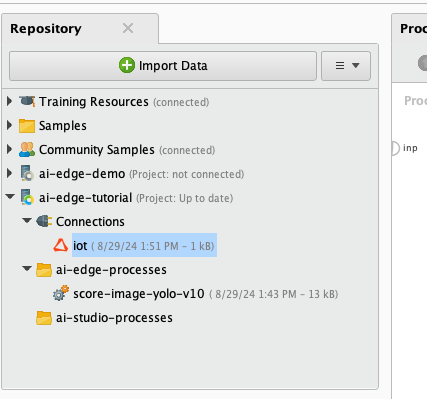
6) Create a new IoT Connector connection IOObject called iot and save it in your project's Connections folder.
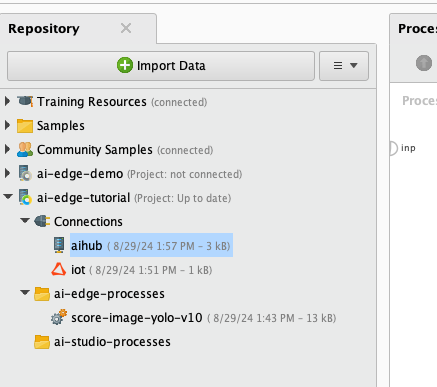
7) Create a new AI Hub connection IOObject called aihub and save it in your project's Connections folder.
8) Create a new process called deploy-image-inference in AI Studio and save it in the folder ai-studio-processes.
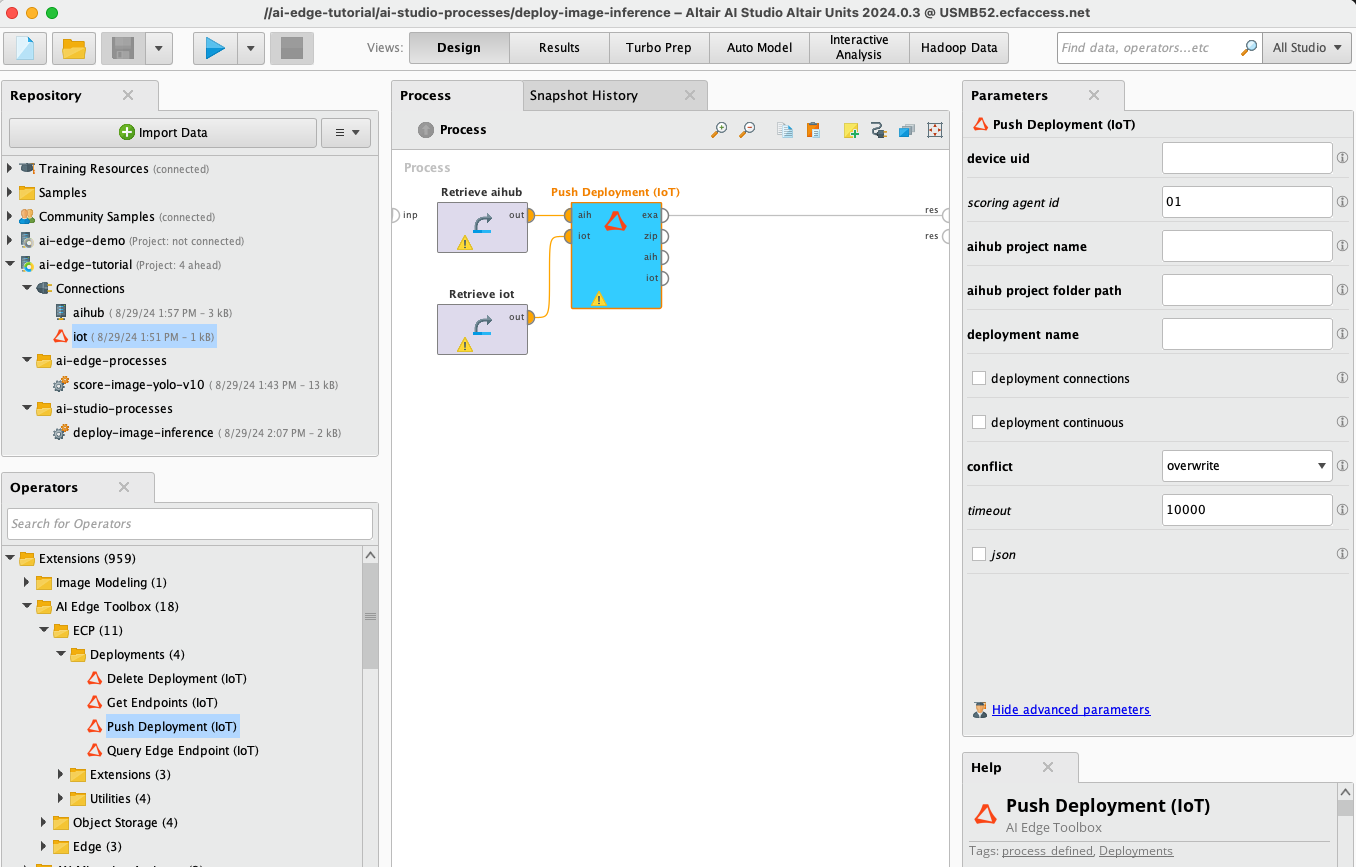
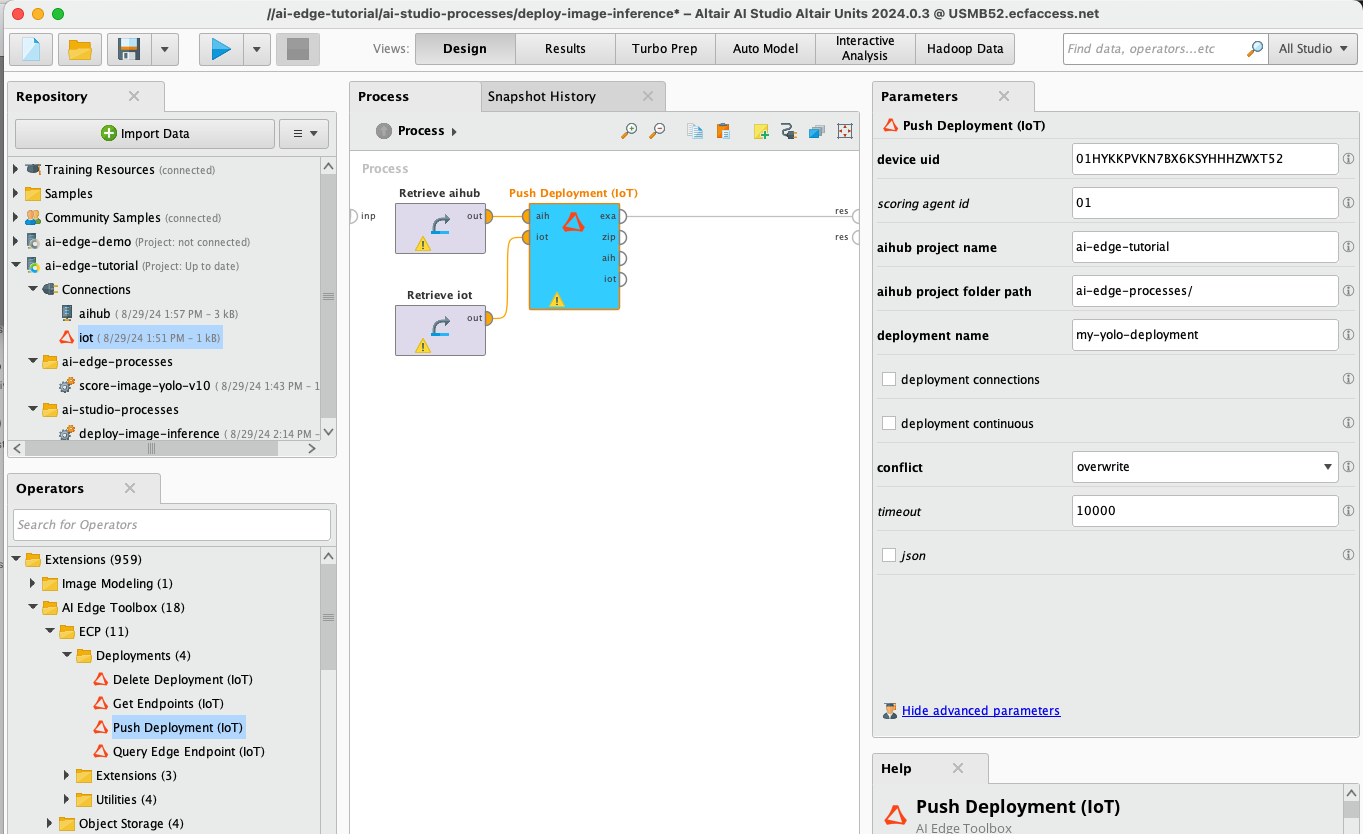
9) Drag-and-drop your aihub, your iot connection, and a Push Deployment (IoT) operator from the AI Edge Toolbox extension onto your process canvas and wire it as shown. Save your process.
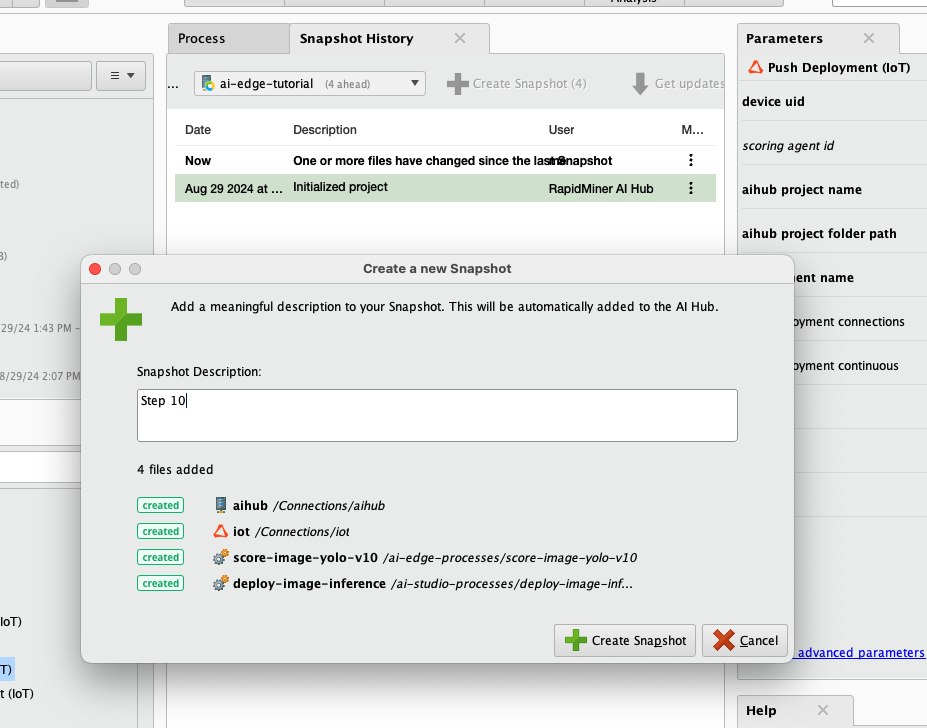
10) Snapshot your project to synchronize with AI Hub.
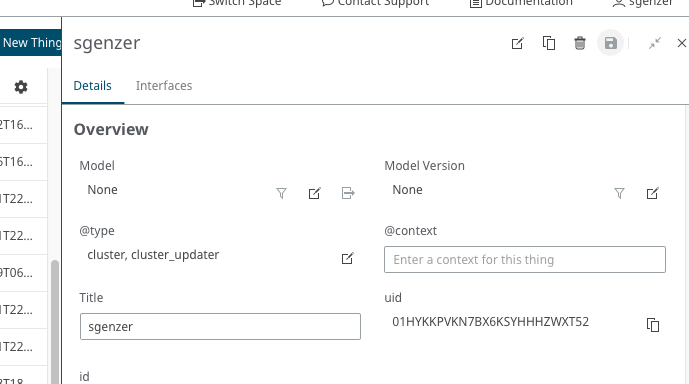
11) Go to your space in IoT Studio, find your device uid, copy it to your clipboard, and paste it into the parameter called device uid. It will be different than the one shown in the screenshot below.
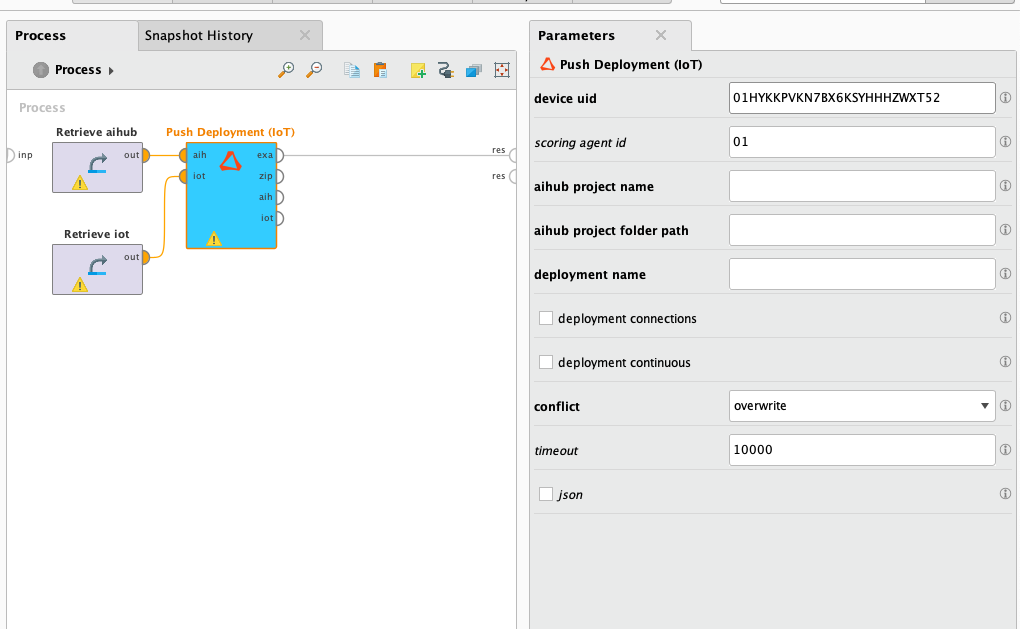
12) Fill in the rest of the parameters for the Push Deployment (IoT) as shown below.
Note: the entries for the
aihub project nameanddeployment nameparameters are completely arbitrary.Note: pay attention to the syntax of the
aihub folder path nameparameter - don't forget the / at the end!
13) Ensure that your result says "ENDPOINT DEPLOYED". This means that the process score-image-yolo-v10 has been successfully pushed down to your Altair® AI Edge™ device.

Note: it may take you several tries to successfully complete this step the first time you do it. It requires the correct syntax, two successfully-created connection objects, a live AI Hub, and a live IoT Studio space to reach the end. If you get an error message, follow its instructions. Examining the Log panel in AI Studio can also be helpful.
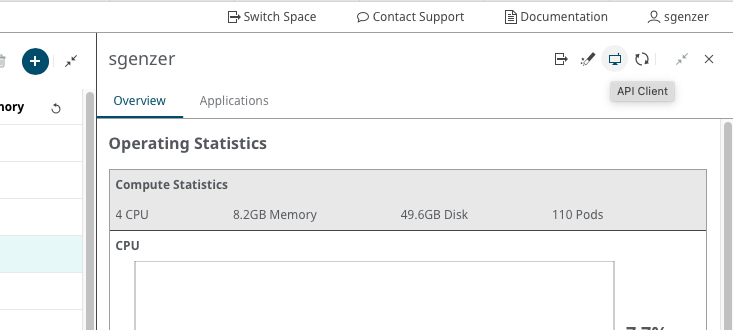
14) In your browser, go to IoT Studio → Edge Ops → Fleet Management → Asset Management → <your-device> and click on the API Client icon in the upper right.
15) Download and push the onnxruntime_v01 Python environment down to your Altair® AI Edge™ device:
- Method:
POST - Href:
/support/rapidminer/scoring-agents/01/python-environments - Body:
{
  "file": "https://altair-ai-edge.s3.amazonaws.com/rapidminer/python-environments/onnxruntime_v01.tar.gz",
  "name": "onnxruntime_v01.tar",
  "auth": {
    "type": "omit"
  }
}
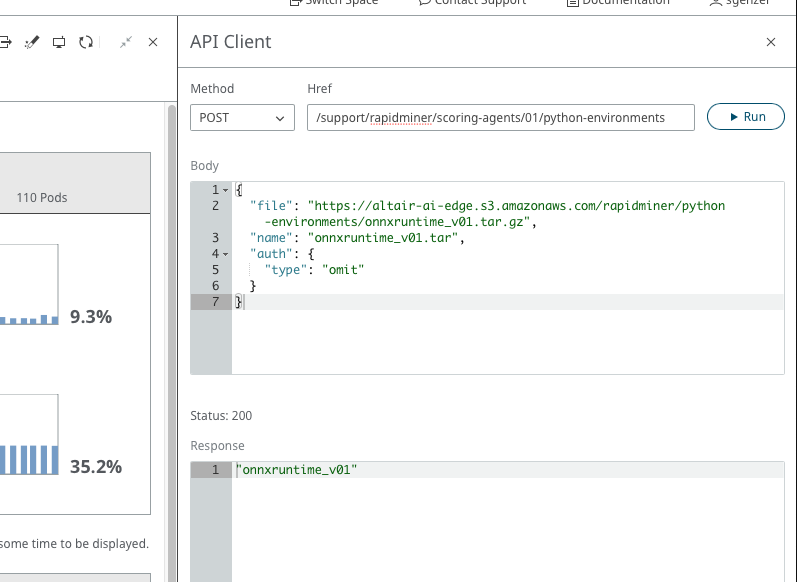
Note: this can take several minutes to complete. You may see one or more error messages appear at the bottom of the screen. Ignore them. Wait until you see a response at the bottom of the screen before proceeding.
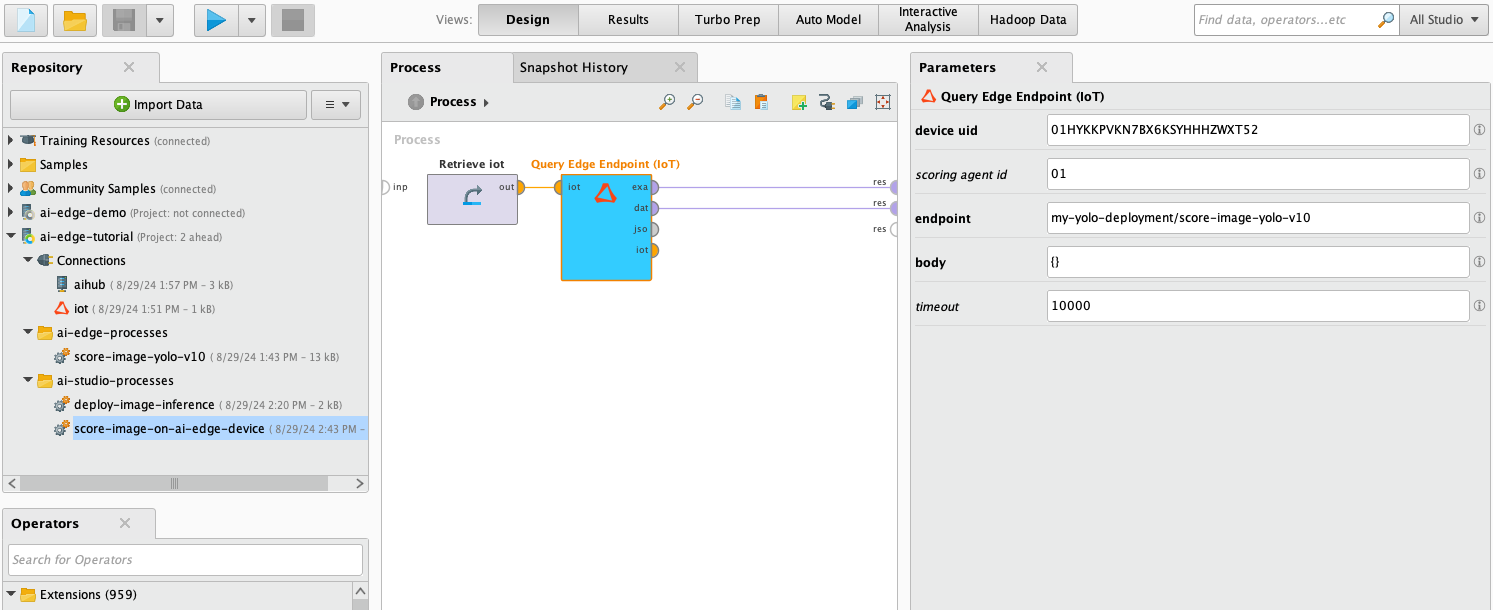
16) Create a new process in AI Studio called score-image-on-ai-edge-device.
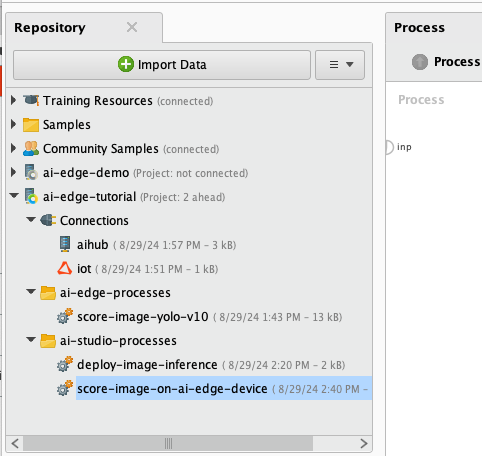
17) Build and run the process shown below with your own device uid. The first time it runs, it will take longer than normal because your Altair® AI Edge™ device first has to download the YOLOv10 model. Afterwards it will run faster.
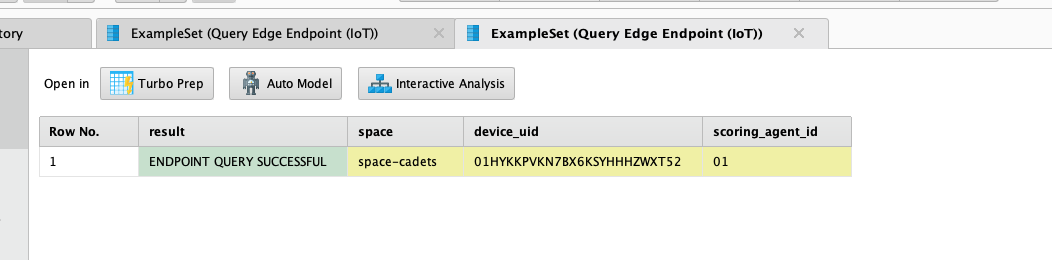
18) There are two ExampleSets shown in the Results panel: one with information about your query, and the other with the result of the inferencing. In this case it found a car (class_id = 2 in the COCO dataset), with a bounding box whose upper left corner is at coordinates (1095, 1543), a height of 1046px, and a width of 2228px. The model's confidence of this score is 0.926.
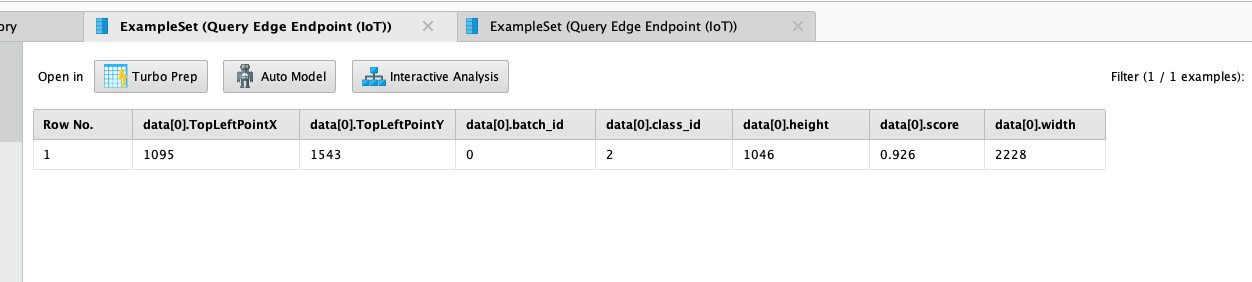
If you do not have an object contained in the COCO dataset in your device's field of view, it will return an empty ExampleSet.
Sample Process XML for Altair® AI Edge™ Image Inferencing
<?xml version="1.0" encoding="UTF-8"?><process version="10.4.003">
<context>
<input/>
<output/>
<macros>
<macro>
<key>threshold</key>
<value>0.2</value>
</macro>
<macro>
<key>model_name</key>
<value>hustvl/yolos-tiny</value>
</macro>
</macros>
</context>
<operator activated="true" class="process" compatibility="10.4.003" expanded="true" name="Process">
<parameter key="logverbosity" value="init"/>
<parameter key="random_seed" value="2001"/>
<parameter key="send_mail" value="never"/>
<parameter key="notification_email" value=""/>
<parameter key="process_duration_for_mail" value="30"/>
<parameter key="encoding" value="SYSTEM"/>
<process expanded="true">
<operator activated="true" class="handle_exception" compatibility="10.4.003" expanded="true" height="82" name="Get model" width="90" x="45" y="136">
<parameter key="add_details_to_log" value="false"/>
<process expanded="true">
<operator activated="true" class="open_file" compatibility="10.4.003" expanded="true" height="68" name="Open File" width="90" x="179" y="34">
<parameter key="resource_type" value="file"/>
<parameter key="filename" value="%{tempdir}/yolov10b.onnx"/>
</operator>
<connect from_op="Open File" from_port="file" to_port="out 1"/>
<portSpacing port="source_in 1" spacing="0"/>
<portSpacing port="sink_out 1" spacing="0"/>
<portSpacing port="sink_out 2" spacing="0"/>
</process>
<process expanded="true">
<operator activated="true" class="open_file" compatibility="10.4.003" expanded="true" height="68" name="Open File (3)" width="90" x="112" y="34">
<parameter key="resource_type" value="URL"/>
<parameter key="url" value="https://altair-ai-edge.s3.amazonaws.com/rapidminer/models/yolov10b.onnx"/>
</operator>
<operator activated="true" class="write_file" compatibility="10.4.003" expanded="true" height="68" name="Write File" width="90" x="246" y="34">
<parameter key="resource_type" value="file"/>
<parameter key="filename" value="%{tempdir}/yolov10b.onnx"/>
<parameter key="mime_type" value="application/octet-stream"/>
</operator>
<connect from_op="Open File (3)" from_port="file" to_op="Write File" to_port="file"/>
<connect from_op="Write File" from_port="file" to_port="out 1"/>
<portSpacing port="source_in 1" spacing="0"/>
<portSpacing port="sink_out 1" spacing="0"/>
<portSpacing port="sink_out 2" spacing="0"/>
</process>
</operator>
<operator activated="true" class="ai_edge_toolbox:get_image_edge" compatibility="1.3.006" expanded="true" height="82" name="Get Image (Edge)" width="90" x="45" y="238">
<parameter key="file_name" value="img.png"/>
<parameter key="file_handling" value="delete from temp directory"/>
<parameter key="autofocus" value="true"/>
<parameter key="lens_position" value="1.0"/>
</operator>
<operator activated="true" class="image_processing:write_image" compatibility="0.5.000" expanded="true" height="82" name="Write Image" width="90" x="179" y="238">
<parameter key="file_type" value="jpg"/>
</operator>
<operator activated="true" class="python_scripting:python_transformer" compatibility="10.1.002" expanded="true" height="82" name="Scoring Image" width="90" x="313" y="136">
<parameter key="editable" value="true"/>
<parameter key="operator" value="{ "name": "Custom Python Transformer", "dropSpecial": false, "parameters": [ { "name": "threshold", "type": "real" } ], "inputs": [ { "name": "onnx", "type": "file" }, { "name": "image", "type": "file" } ], "outputs": [ { "name": "scores", "type": "table" } ] }.import pandas as pd import numpy as np import cv2 import onnxruntime as ort from typing import Tuple, Optional def pre_process(image_object: str, max_dimension: int) -> Tuple[np\.ndarray, np\.ndarray, float, Tuple[int, int]]: # image_object is the image as an input file IOObject # max_dimension is the width/height of the image required by the model # Read the image image = cv2\.imread(image_object) # Get the original dimensions original_height, original_width = image\.shape[:2] # Determine the scaling factor to use # e\.g\. if max_dimension == 640, original_width == 1663, original_height == 1119 # then max(original_height, original_width) == 1663 # and then scale_factor = 640 / 1663 = 0\.3848 scale_factor = max_dimension / max(original_height, original_width) # Calculate the new dimensions # e\.g\. in this example new_width == 640 # and new_height = 1119 * 0\.3848 = 430\.643 -> 430 to the nearest integer new_width = int(original_width * scale_factor) new_height = int(original_height * scale_factor) # Resize the image to (new_width, new_height) # e\.g\. in this example to 640 x 430 resized_image = cv2\.resize(image, (new_width, new_height), interpolation=cv2\.INTER_AREA) # Create a black canvas with the max dimensions # e\.g\. in this example 640 x 640 black_canvas = np\.zeros((max_dimension, max_dimension, 3), dtype=np\.uint8) # Calculate offsets - how much to the right/down the original image moved to be superimposed on the black canvas # e\.g\. in this example it only moves down because the width > height # so x_offset == 0 # and y_offset is (640 - 430) / 2 = 105 x_offset = (max_dimension - new_width) // 2 y_offset = (max_dimension - new_height) // 2 # Center the resized image on the black canvas black_canvas[y_offset:y_offset + new_height, x_offset:x_offset + new_width] = resized_image # Process the image to a numpy array np_image = black_canvas\.astype(np\.float32) / 255\.0 np_image = np\.transpose(np_image, (2, 0, 1)) # Convert HWC to CHW format np_image = np\.expand_dims(np_image, axis=0) # Add batch dimension return np_image, black_canvas, scale_factor, (x_offset, y_offset) def post_process(outputs: np\.ndarray, scaled_image: np\.ndarray, scale_factor: Tuple[float, float], offsets: Tuple[int, int], confidence_score_threshold: Optional[float] = 0\.8) -> Tuple[pd\.DataFrame, np\.ndarray]: # outputs (np\.ndarray): A NumPy array of shape (batch_size, num_samples, num_features), where num_features should be 6\. # The array contains bounding box coordinates (BB1, BB2, BB3, BB4), confidence scores, and class IDs\. # resized_image (np\.ndarray): The resized image on which to draw the bounding boxes\. # scale_factor (float): A float representing the scaling factor between the original image and resized image for the YOLO model\. # offsets (Tuple[int, int]): A tuple containing the offsets (x_offset, y_offset)\. # confidence_score_threshold (Optional[float]): An optional confidence score threshold\. If provided, only rows with # a confidence score greater than this threshold will be included in the resulting DataFrame\. """ Tuple[pd\.DataFrame, np\.ndarray]: A tuple where: - The first element is a Pandas DataFrame with columns ['batch_id', 'class_id', 'confidence_score', 'TopLeftPointX', 'TopLeftPointY', 'width', 'height']\. The DataFrame includes the batch ID for each sample, bounding box coordinates adjusted based on the provided scaling factors and offsets, confidence scores, and class IDs\. If a threshold is provided, only rows with a confidence score above the threshold are included\. - The second element is a NumPy array representing the resized image with bounding boxes drawn\. """ # Extract the scaling factors and offsets x_offset, y_offset = offsets # Reshape outputs so that the batch dimension is added as a column to the 2D matrix batch_size, num_samples, num_features = outputs\.shape reshaped_data = outputs\.reshape(batch_size * num_samples, num_features) batch_ids = np\.repeat(np\.arange(batch_size), num_samples) # Convert to (topleftx, toplefty, width, height) # Order here matters (e\.g\. don't fix top left until getting width & height) reshaped_data[:, 2] = (reshaped_data[:, 2] / scale_factor - reshaped_data[:, 0] / scale_factor) # width reshaped_data[:, 3] = (reshaped_data[:, 3] / scale_factor - reshaped_data[:, 1] / scale_factor) # height reshaped_data[:, 0] = (reshaped_data[:, 0] - x_offset) / scale_factor # top_left_x reshaped_data[:, 1] = (reshaped_data[:, 1] - y_offset) / scale_factor # top_left_y # Round coordinates and dimensions to nearest integers reshaped_data[:, 0:4] = np\.round(reshaped_data[:, 0:4]) # Create a dataframe from the numpy array df = pd\.DataFrame(reshaped_data, columns=['TopLeftPointX', 'TopLeftPointY', 'width', 'height', 'score', 'class_id']) # Add the batch_id column in case we add batching later df['batch_id'] = batch_ids # Convert specific columns to integers df['TopLeftPointX'] = df['TopLeftPointX']\.astype(int) df['TopLeftPointY'] = df['TopLeftPointY']\.astype(int) df['width'] = df['width']\.astype(int) df['height'] = df['height']\.astype(int) # Reorder columns df = df[['batch_id', 'class_id', 'score', 'TopLeftPointX', 'TopLeftPointY', 'width', 'height']] # Filter based on the threshold only if threshold is not None print("confidence_score_threshold = ",confidence_score_threshold) if confidence_score_threshold is not None: df = df[df['score'] > confidence_score_threshold] return df, scaled_image def rm_main(onnx_model_object, image_object, parameters): 	 	# Create a new data frame containing parameters\. 	image_object = image_object\.name 	onnx_model_object = onnx_model_object\.name 	 	############################################# Load Inference Engine ############################################# 	 	# Set up the inference session 	session_options = ort\.SessionOptions() 	 	# Create an inference session 	session = ort\.InferenceSession(onnx_model_object, providers=['CPUExecutionProvider'], sess_options=session_options) 	 	# Get the input and output names 	input_name = session\.get_inputs()[0]\.name 	output_name = session\.get_outputs()[0]\.name 	################################################## Pre-Process ################################################## 	 	# NOTE: The model requires an image that is 640 x 640\. Pre-processing rescales / resizes the image to meet this requirement\. 	 	# Get the image dimensions required by the model 	batch, channels, width, height = session\.get_inputs()[0]\.shape 	max_dimension = max(width, height) 	 	# Rescale the image with padding 	np_image, scaled_image, scale_factor, (x_offset, y_offset) = pre_process(image_object=image_object, max_dimension=max_dimension) 	 	################################################### Inference ################################################### 	 	# Run the inference 	outputs = session\.run([output_name], {input_name: np_image})[0] 	 	################################################## Post-Process ################################################# 	 	# Convert the scored onnx output numpy array to a pandas dataframe 	df, scaled_image = post_process(outputs=outputs, scaled_image=scaled_image, scale_factor=scale_factor, offsets=(x_offset, y_offset), confidence_score_threshold=0\.8) 	 	# Return the new data frame and pass through the input data\. 	return df"/>
<parameter key="use_default_python" value="false"/>
<parameter key="package_manager" value="specific python binaries"/>
<parameter key="conda_environment" value="ai-edge-torch"/>
<parameter key="python_binary" value="/altair/python/onnxruntime_v01/onnxruntime_v01/bin/python3"/>
<parameter key="threshold" value="0.8"/>
</operator>
<connect from_op="Get model" from_port="out 1" to_op="Scoring Image" to_port="onnx"/>
<connect from_op="Get Image (Edge)" from_port="image" to_op="Write Image" to_port="img"/>
<connect from_op="Write Image" from_port="file" to_op="Scoring Image" to_port="image"/>
<connect from_op="Scoring Image" from_port="scores" to_port="result 1"/>
<portSpacing port="source_input 1" spacing="0"/>
<portSpacing port="sink_result 1" spacing="0"/>
<portSpacing port="sink_result 2" spacing="0"/>
<description align="center" color="yellow" colored="false" height="59" resized="true" width="305" x="87" y="45">Altair&#174; AI Edge&#8482; Tutorial Process - Image Inferencing with YOLOv10</description>
</process>
</operator>
</process>