'Hello World' Tutorial for Altair® AI Edge™ devices using AI Edge Toolbox
This tutorial is designed to get you started using an Altair® AI Edge™ device using the AI Edge Toolbox extension for AI Studio.
Our 'Hello World' process for the Altair® AI Edge™ device takes a picture, crops a very small square from it, and returns the average RGB color of your cropped square. This can be a very simple way to get the current color of an indicator light, the product color in an industrial setting, or simply to see if it is light or dark outside.
Note: This is a good example of edge processing where these color calculations are done on the device, rather than a server. This drastically improves the performance of the process as the large file image does not need to travel over your network in order to be used for calculations; only a very 'lightweight' result of three integers will be returned.
Designing and deploying process workflows for Altair® AI Edge™ devices can be tricky at first if you are used to immediately seeing your results as you build a process. Altair® AI Edge™ devices are "headless" - there is no screen or keyboard. We hope this tutorial will get you comfortable with this special kind of process design & deployment. Please follow this tutorial step-by-step and do not skip steps along the way.
Note: this is a long tutorial. Get yourself a bag of Haribo Goldbears and reward yourself for each step you accomplish. You will be more successful and have an amazing sugar high when you're done!
Part 1: Setting up your Altair® AI Edge™ device
1) Connect your Altair® AI Edge™ device to a 15W+ PoE injector that is already connected to a router/switch with access to the internet over port 443.
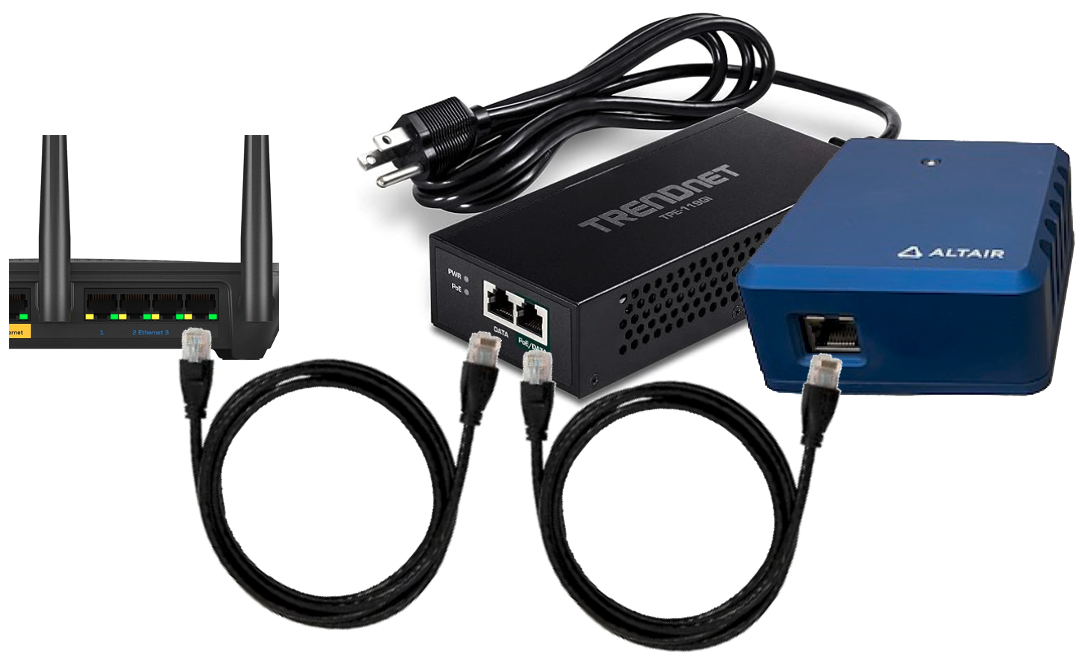
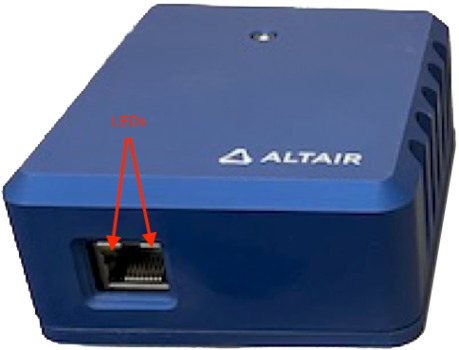
2) Look to ensure that both yellow and green LEDs are illuminating on the RJ45 Ethernet jack.
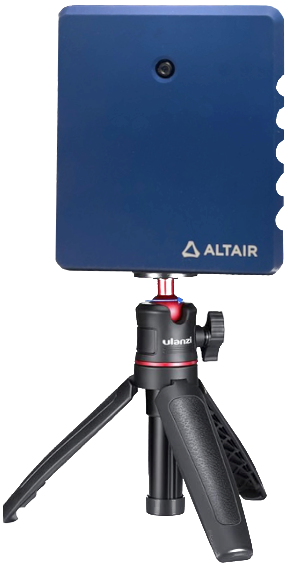
3) Mount your Altair® AI Edge™ device on a simple tripod or in another way so that it is stable, upright, and has access to the RJ45 Ethernet jack on the bottom of the device.
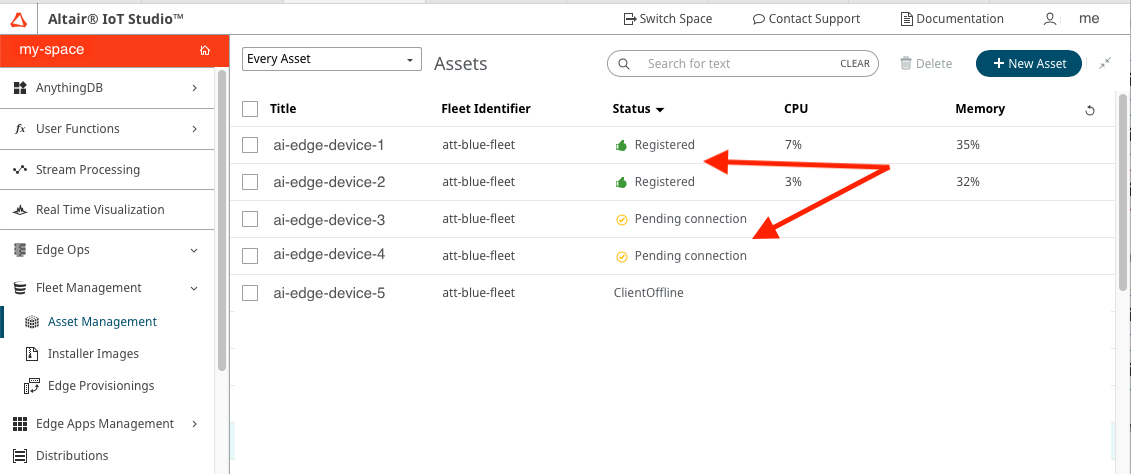
4) Log into IoT Studio and go to your assigned 'space'. Navigate to EdgeOps → Fleet Management → Asset Management. Find your device on the list and ensure that the status of your device has changed from 'Pending connection' to either 'Registered' or "Subscribed'.
Note: This may take several minutes to complete
5) [optional] Eat one Haribo Goldbear.
Part 2: Create a new test AI Edge project in AI Hub and connect it to AI Studio
6) Go to your AI Hub url and create a new project called ai-edge-hello-world. If you do not know how to do this, please see the AI Hub documentation pages.
7) Connect your AI Studio to this new project ai-edge-hello-world. If you do not know how to do this, please see the AI Studio documentation pages.
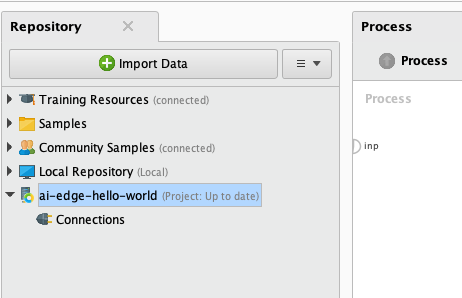
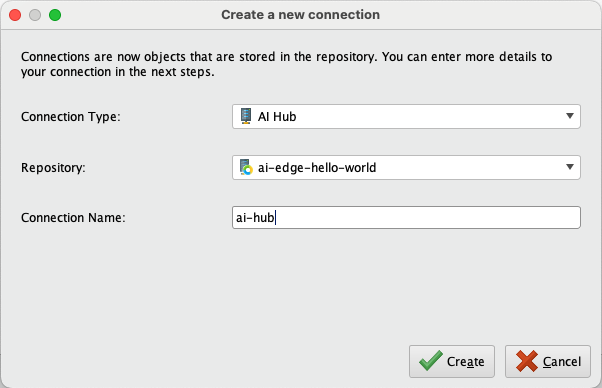
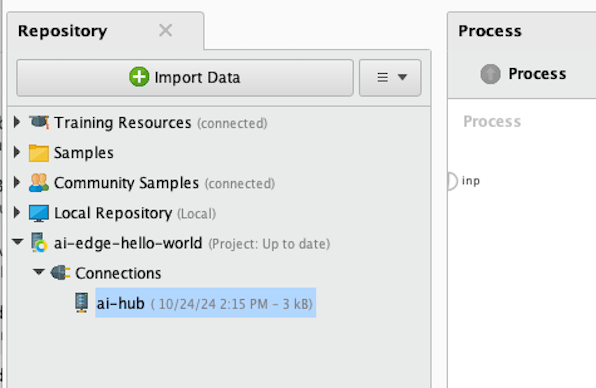
8) Create a new AI Hub connection IOObject called ai-hub in ai-edge-hello-world using the Admin Tools extension functionality. There is a separate docs page on how to do this.
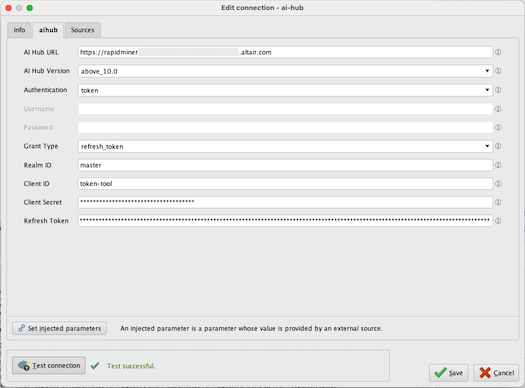
9) Test the AI Hub connection IOObject to ensure it is working properly by double-clicking the connector in your Repository and then clicking the "Test Connection" button in the lower-left corner of the pop-up window.
| Create Connection Step 1 | Create Connection Step 2 | AI Hub connection IOObject in project repository |
|---|---|---|
 |
 |
 |
10) [optional] Eat one Haribo Goldbear.
Part 3: Setting up AI Edge Toolbox in AI Studio
11) Install the AI Edge Toolbox extension in AI Studio.
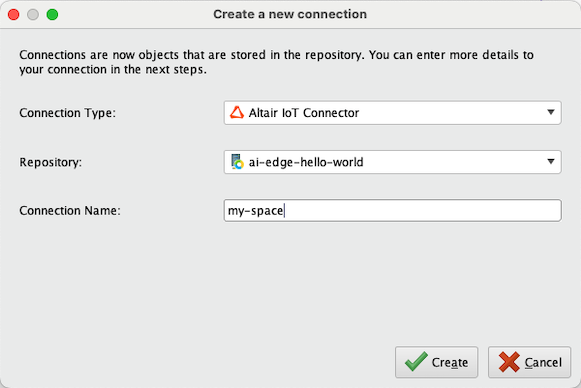
12) Create an IoT Connection IOObject in AI Studio with your IoT Studio space.
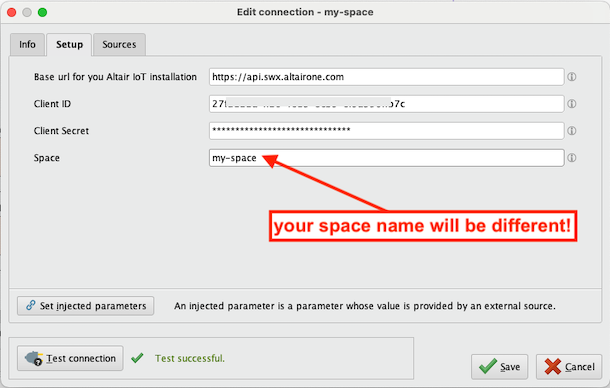
13) Test the IoT connection IOObject to ensure it is working properly by double-clicking the connector in your Repository and then clicking the "Test Connection" button in the lower-left corner of the pop-up window.
| Create Connection Step 1 | Create Connection Step 2 | IoT Connector connection IOObject in project repository |
|---|---|---|
 |
 |
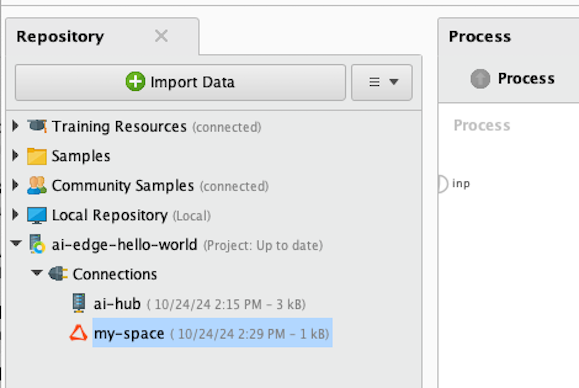 |
Note: this tutorial process will use the space name
my-spacefrom hereon in but yours will be different!
14) [optional] Eat one Haribo Goldbear.
Part 4: Use the Get Edge Device Health (IoT) operator to get the current health status of your Altair® AI Edge™ device
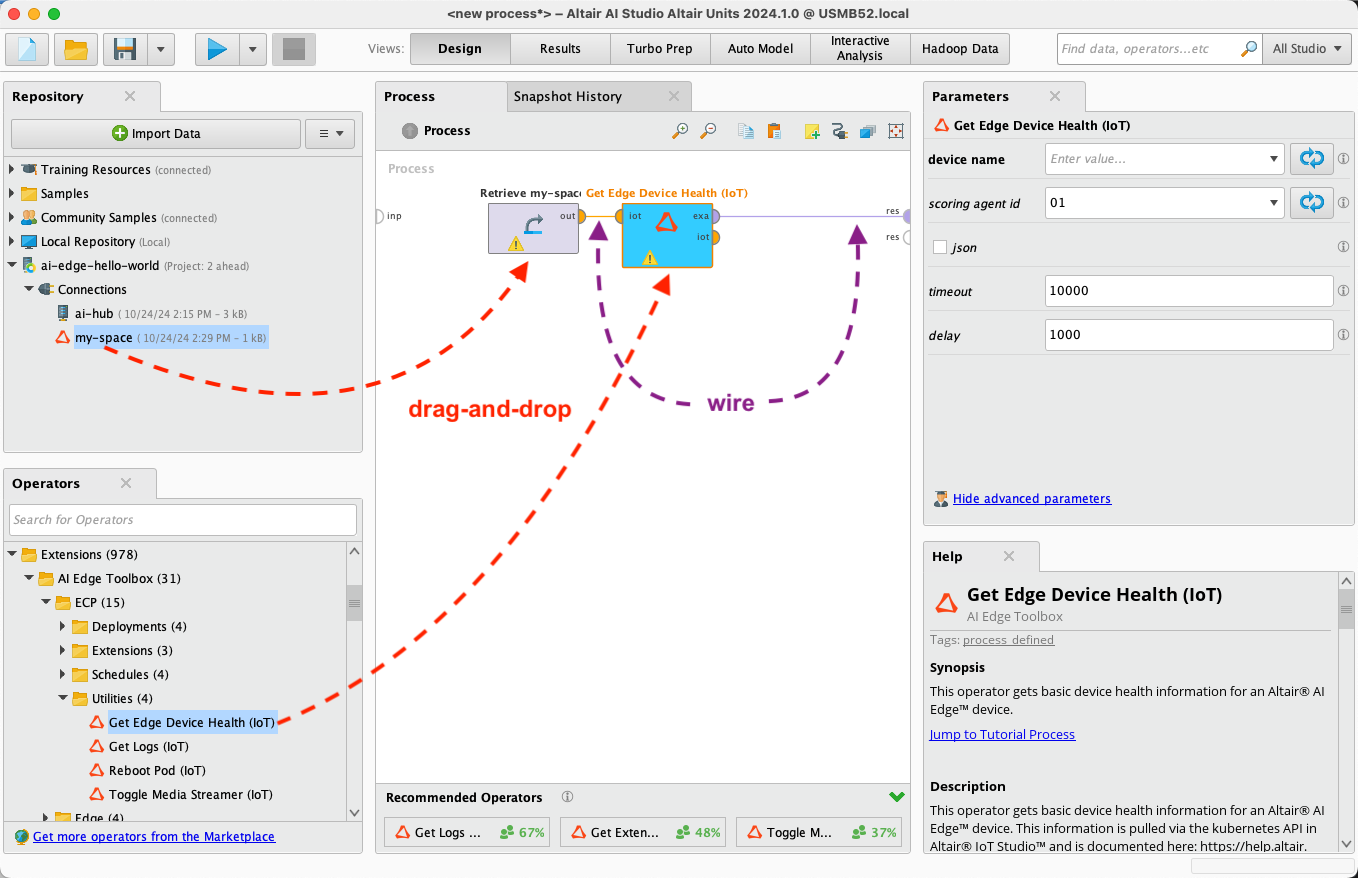
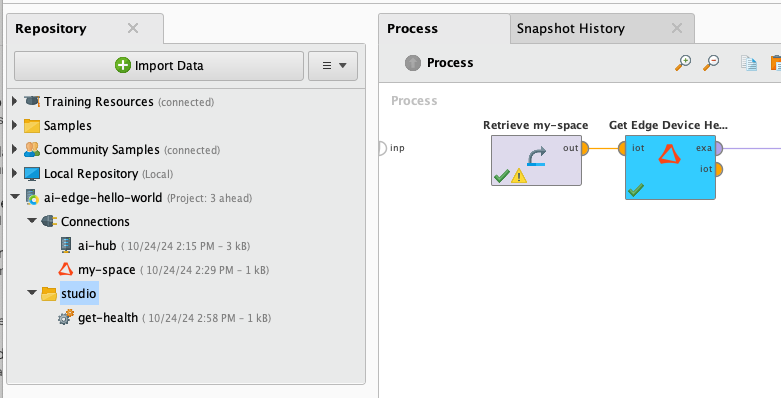
15) Drag-and-drop your IoT Connection IOObject and a 'Get Edge Device Health (IoT)' operator into a new process and wire as shown below.
16) Click the Dynamic Field button  next to the
 device name parameter to create a list of all devices available to you in your space. Examine the green progress bar on the bottom right corner of AI Studio and wait until it finishes. When finished, select your device from the list.
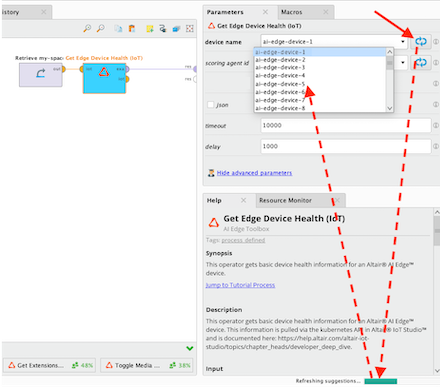
Note: If the list does not populate, try again and examine the Log panel to see if any errors are occurring.
17) It is unusual that you would have more than one scoring agent on your Altair® AI Edge™ device. If you do, click the dynamic field button next to the scoring agent id parameter to see what scoring agents you have available. Otherwise simply leave this as 01.
Note: If you do not see this parameter in the list, click the 'Show advanced parameters' link at the bottom of the Parameters panel.
18) If you know that you or your Altair® AI Edge™ device is on a slow network, increase the timeout parameter from the default value of 10000 milliseconds to 30000 milliseconds (or higher). Otherwise leave it at the default value.
19) The delay parameter is the number of milliseconds that the operator will wait between queries to IoT Studio to see if your request has been completed. The lower this number, the faster this operator may complete its operation. However your IoT Studio instance may run out of Altair Units (AUs) if you run this very fast over and over again. See IoT Studio Altair Units documentation for more information. For this tutorial we recommend leaving the delay parameter at the default value of 1000 milliseconds (1 second) between queries.
20) Run this simple process and ensure that your Altair® AI Edge™ device is healthy.

21) Create a new folder in your ai-edge-hello-world project called studio and save this process as get-health so you can run it again later.
22) [optional] Eat one Haribo Goldbear to ensure that you stay healthy.
Part 5: Build your 'Hello World' process
23) Download and import this process into AI Studio: get-avg-pixel.rmp
![]()
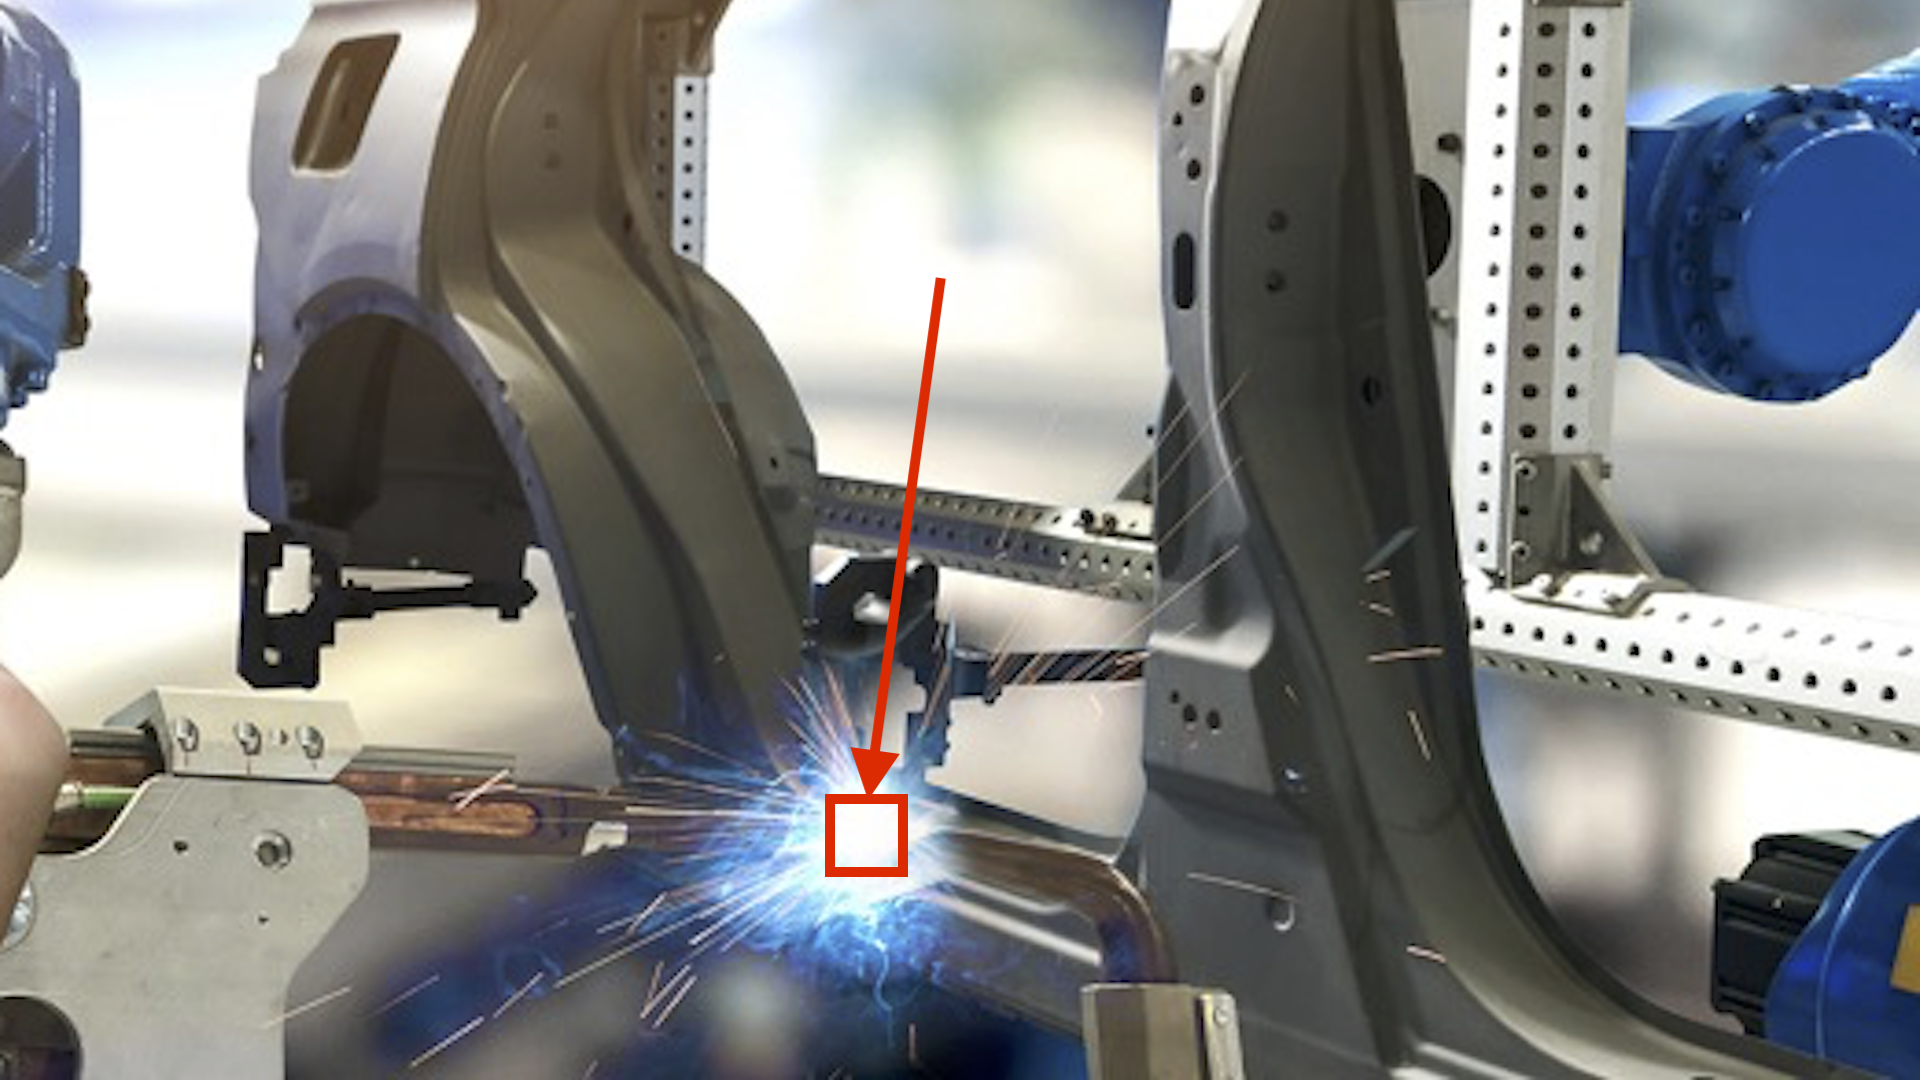
This process retrieves a stock image of a welding process, crops a small square around the arc, and returns the average blue, green, and red color intensities of that square. Color intensity values range from 0 (no intensity) to 255 (full intensity). When you run the process, it returns an average pixel intensity of 251.089 across all three color channels (blue, green, and red). Hence we can deduce that the pixels in the square are very close to full intensity on all three channels of this color image which mixes to white.
| original image with crop box shown | cropped box | result |
|---|---|---|
 |
 |
Run the process with the breakpoints so you understand how it works. Note that all the calculations will be performed on the Altair® AI Edge™ device; only a relatively lightweight response of five numbers will be returned when queried.
24) Replace the first two operators with a Read Image (Edge) operator from the AI Edge Toolbox extension so that it will use your Altair® AI Edge™ device camera image instead of the stock image.
Note: All operators with an AI Edge device icon
can only be run inside Altair® AI Edge™ devices. If you try to run them inside AI Studio, you will get an error message.
![]()
25) [optional] If you want to store the original image in IoT Studio Object Storage so you can see it prior to the crop, add a Write Image + a Store Object (Edge) operator to the ori output port of Crop Image to store the original camera image in IoT Studio's Object Storage. Use img.png as the filename parameter.
![]()
26) Create a new folder in your ai-edge-hello-world project called edge and save this process as get-avg-pixel.
![]()
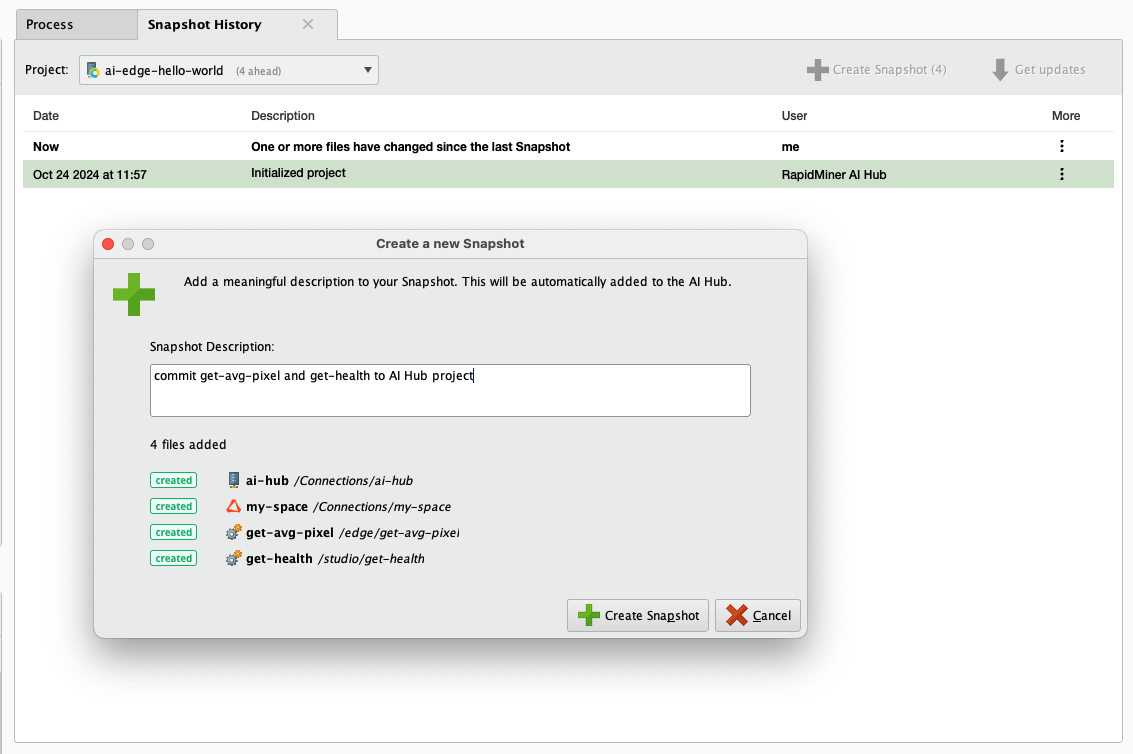
27) Create a new snapshot of your ai-edge-hello-world project so your local repository is synchronized with your AI Hub.
| create snapshot | snapshot completed |
|---|---|
 |
 |
28) [optional] Eat two Haribo Goldbears - you're doing great!
Part 6: Deploy your 'Hello World' process to your Altair® AI Edge™ device
29) Create a new blank process. Save it as push-deployment in the ai-edge-hello-world/studio folder.
30) Drag-and-drop both your IoT Connector and your AI Hub connection IOObjects into your process.
31) Add a new Push Deployment (IoT) operator to your process and wire it as shown below. Use the Dynamic Field buttons  to fill in the parameters. The parameter
 deployment name can be anything you like as long as it is lowercase with no spaces or special characters.

32) Save and run your process. It may take more than a minute to run depending on a variety of factors. It is doing a lot of things in the background: querying AI Hub to create a deployment zip file, downloading the zip file to your local AI Studio, uploading the zip file to IoT Studio Object Storage, and finally telling IoT Studio to send this zip file to your Altair® AI Edge™ device.

33) [optional] Eat one Haribo Goldbear - leave the feasting for below.
Part 7: Run your 'Hello World' process on your Altair® AI Edge™ device
34) Open and save a new blank process in ai-edge-hello-world/studio called query-endpoint.
IF YOU USED THE MEDIA STREAMER TO SET UP YOUR CAMERA, YOU MUST TURN IT OFF PRIOR TO CONTINUING WITH THIS TUTORIAL!!
35) Build, configure, and wire the process as shown below. Notice that we are wiring two outputs from the Query Edge Endpoint (IoT) operator: the top exa output will show general information about whether or not the query was successfully run, whereas the second dat output will show an ExampleSet containing the data coming out of the get-avg-pixel process we wrote earlier.
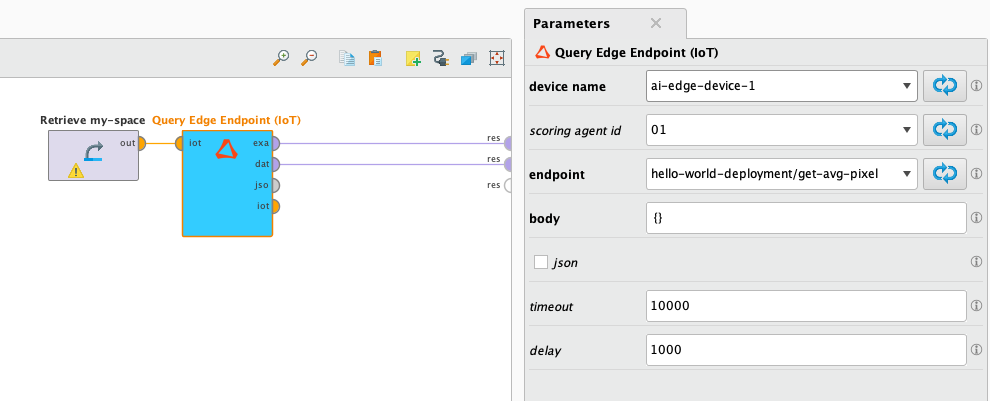
36) Run the process. It should return aggregated pixel intensities of the cropped area in the cropped 63x63 area of the image your Altair® AI Edge™ device camera captured.

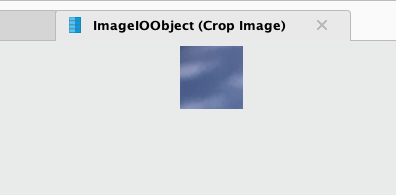
In this result the average blue pixel intensity is approximately 155 out of 255 which is a strong blue intensity. In contrast, the green and red averages are much lower (approximately 56 out of 255 and 48 out of 255 respectively).
If we validate this against a test image, the results make sense.
| original image with crop annotation | cropped square from AI Studio |
|---|---|
 |
 |
37) [optional] Eat the rest of the bag of Haribo Goldbears - you did it!