Using the Azure Data Lake Storage Connector
This guide targets the Gen2 Azure Data Lake Storage architecture. For the older storage architecture see the Gen1 documentation
The Azure Data Lake Storage Connector allows you to access your Azure Data Lake Storage Gen2 account directly from Altair AI Studio. Both read and write operations are supported. You can also read from a set of files in an Azure Data Lake Storage directory, using the ![]() Loop Azure Data Lake Storage Gen2 operator. This document will walk you through how to:
Loop Azure Data Lake Storage Gen2 operator. This document will walk you through how to:
Connect to your Azure Data Lake Storage Gen2 account
Before you can use the Azure Data Lake Storage Connector, you have to configure your Azure environment to support remote connections and set up a new Azure Data Lake Storage Gen2 Connection in Altair AI Studio.
For this purpose, you need to go through the following main steps (see details below).
- Create a web application registration on the Azure portal.
- Acquire information for the remote connection.
- Set up and test the new Azure Data Lake Storage Gen2 Connection.
Step 1: Create a web application registration on Azure portal
The default and recommended way to authorize to Azure is to use a web application registration (Active Directory Service Principal). You can also use a shared key. In the latter case you can skip this step.
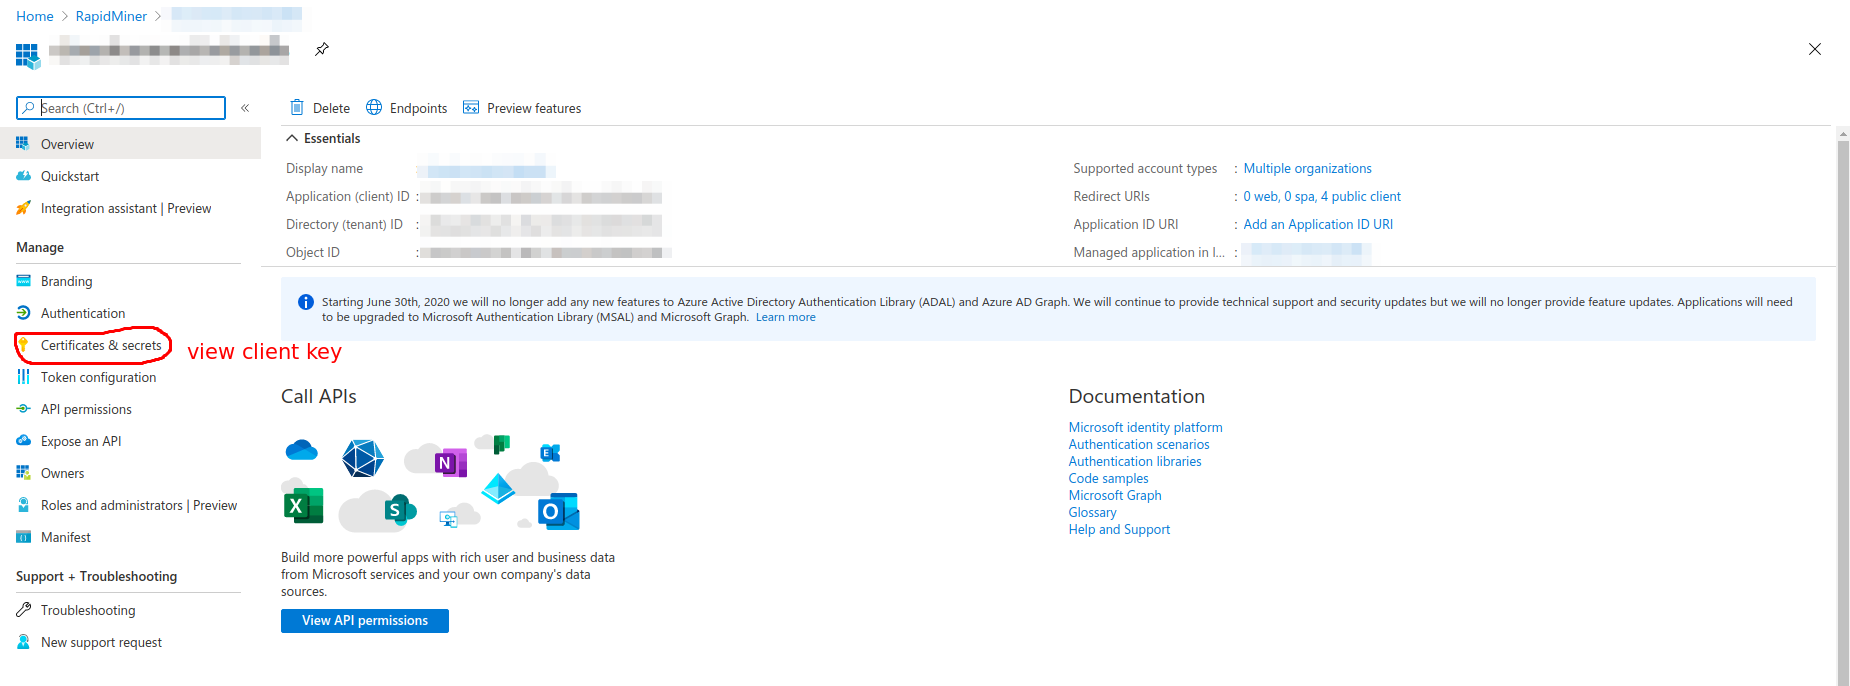
Create and configure an Azure AD web application to allow service-to-service authentication with Azure Data Lake Storage Gen2 using Azure Active Directory. Go through Step 1 to Step 2 of the Service-to-service authentication guide. The first step registers a web application that will provide access to Azure Data Lake Storage. Note that you can use arbitrary values for the Name and Sign-on URL fields. The second step describes how to get your Tenant ID, the application ID for the registered application, and a key that needs to be provided in Altair AI Studio so that it is able to use this application. You also have to grant the desired privileges for the resources to the newly registered application. You can use several tools such as the Azure Web Portal, Azure CLI or the Azure Storage Explorer desktop application to control access to the resources.
After performing those steps in your Azure Tenant, you should have a web application registration that is configured to access some or all folders of your target Azure Data Lake Storage Gen2 resource. Note that for the file browser of the operators (see below) to work, you need to give Read and Execute access on the container, and on all directories where you want to allow navigation. Besides that, you need Write permission to be able to write to the cloud storage. If you can work without the file browser, you can limit the permissions to the target folders / files that your operators directly use.
Step 2: Acquire information for the remote connection
You can access resources by using Active Directory Service Principal (recommended) or a Shared Key. To create the Connection in Altair AI Studio, you need to acquire the following information.
For Active Directory Service Principal:
- Name of your account.
- Application ID and application key for the Web application you created.
- Tenant ID that identifies your company's account.
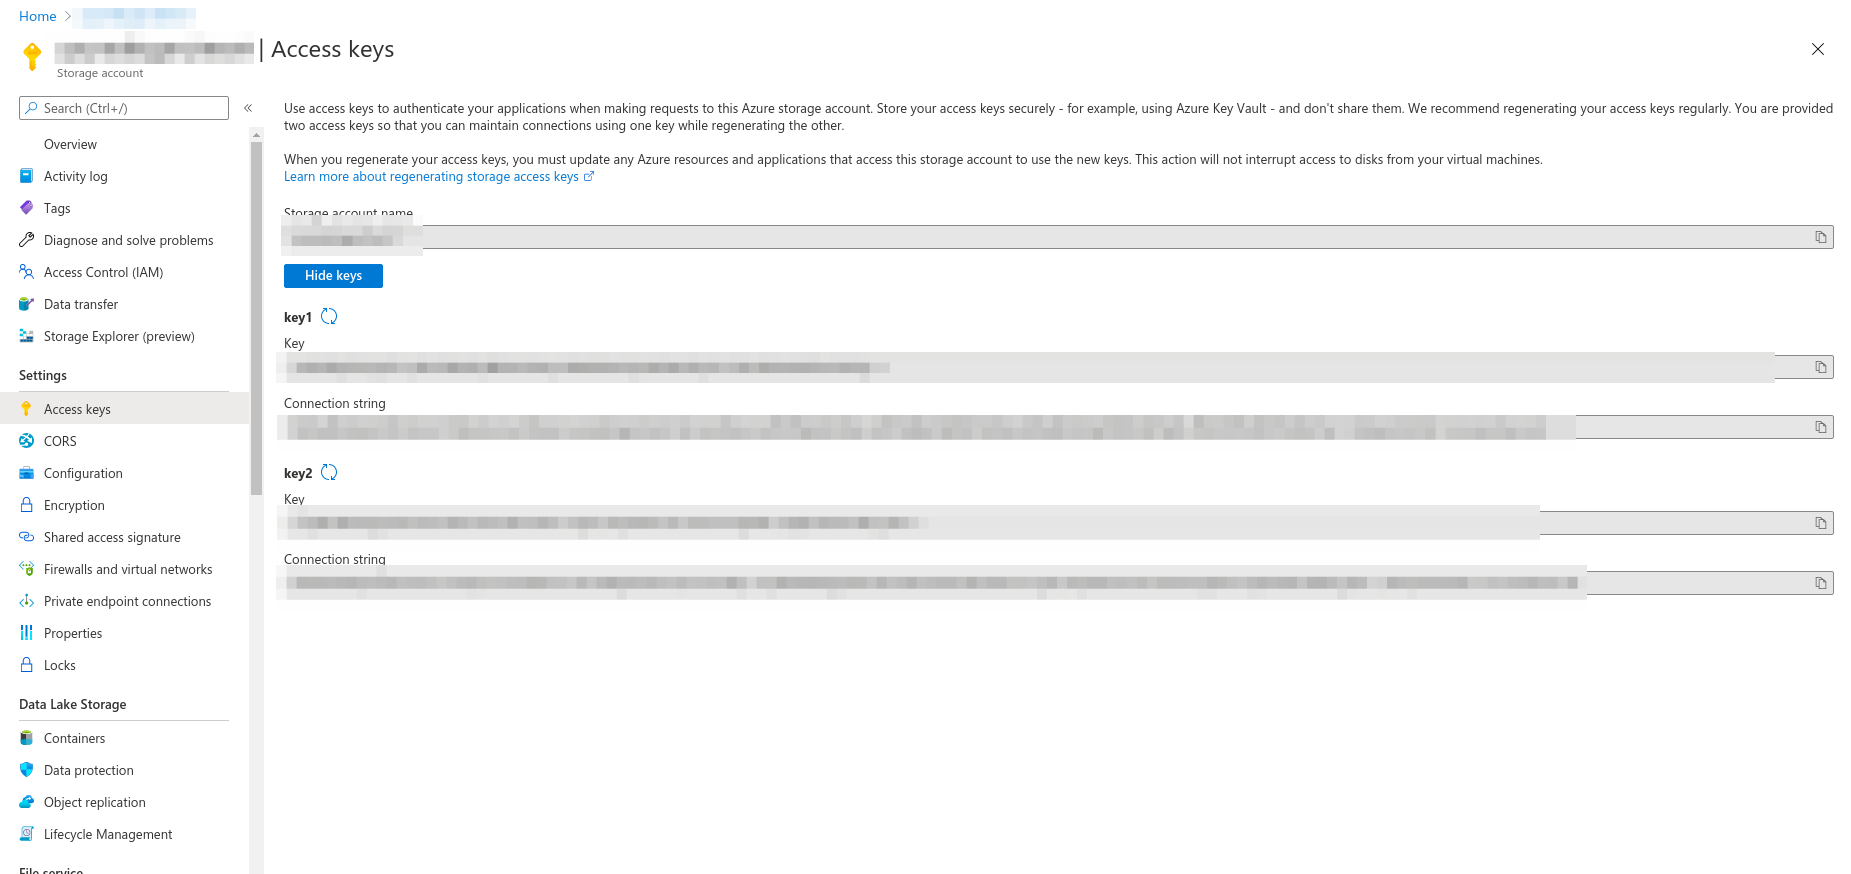
For Shared Key:
- Name of your account.
- Key to your account.
Step 3: Setup and test the new Azure Data Lake Storage Gen2 Connection
After you have all information, it is straightforward to set up your Connection.
In Altair AI Studio, right-click on the repository you want to store your Azure Data Lake Storage Gen2 Connection in and choose
 Create Connection.
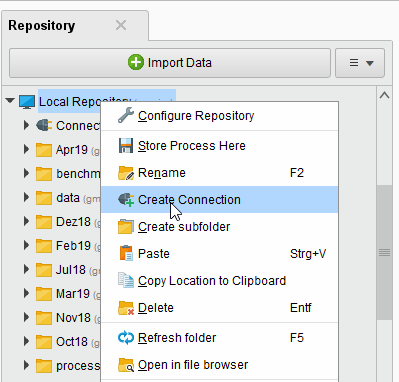
You can also click on Connections > Create Connection
and select the repository from the dropdown of the following dialog.Give a name to the new Connection, and set Connection Type to
 Azure Data Lake Storage Gen2:
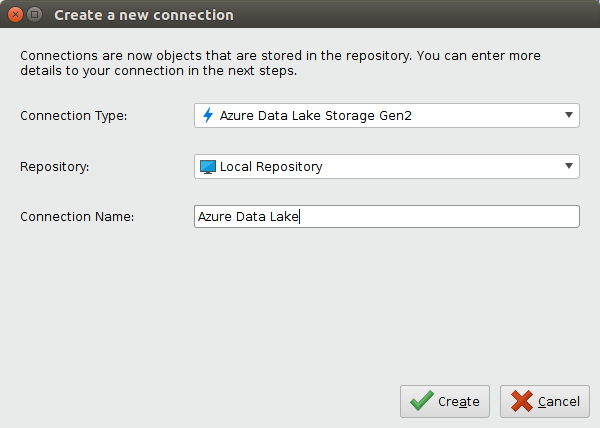
Click on
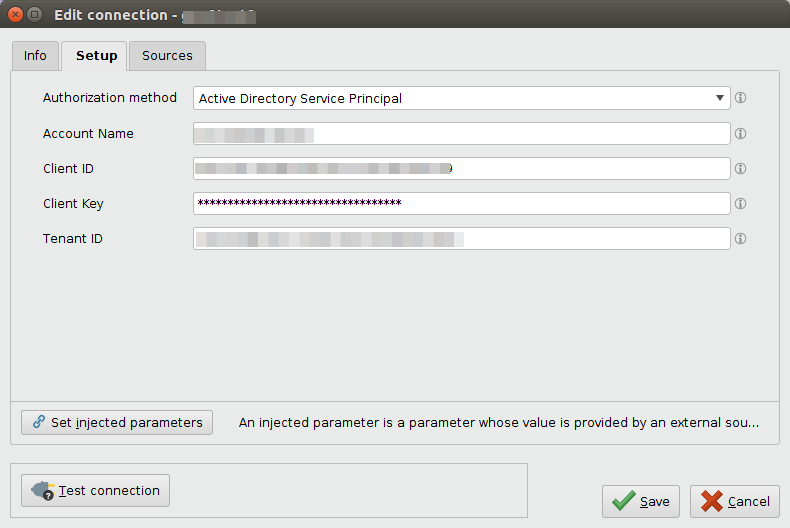
 Create and switch to the Setup tab in the Edit connection dialog.
Fill in the Connection details of your Azure Data Lake Storage Gen2 account. Either choose Active Directory Service Principal (recommended) or Shared Key. For the first provide the Account name, Client ID (web application ID), Client Key (password to access the web application) and Tenant ID, while for the latter the Account name and Account key .
While not required, we recommend testing your new Azure Data Lake Storage Gen2 Connection by clicking the
 Test connection button.
If the test fails, please check whether the details are correct.
Test connection button.
If the test fails, please check whether the details are correct.Click
Save to save your Connection and close the Edit connection dialog. You can now start using the Azure Data Lake Storage operators.
Read from Azure Data Lake Storage
The ![]() Read Azure Data Lake Storage Gen2 operator reads data from your Azure Data Lake Storage Gen2 account.
The operator can be used to load arbitrary file formats, since it only downloads and does not process the files.
To process the files you will need to use additional operators such as Read CSV, Read Excel, or Read XML.
Read Azure Data Lake Storage Gen2 operator reads data from your Azure Data Lake Storage Gen2 account.
The operator can be used to load arbitrary file formats, since it only downloads and does not process the files.
To process the files you will need to use additional operators such as Read CSV, Read Excel, or Read XML.
Let us start with reading a simple csv file from Azure Data Lake Storage.
Drag a
Read Azure Data Lake Storage Gen2 operator into the Process Panel.
Select your Azure Data Lake Storage Gen2 Connection for the connection entry parameter from the Connections folder of the repository you stored it in by clicking on the  button next to it:
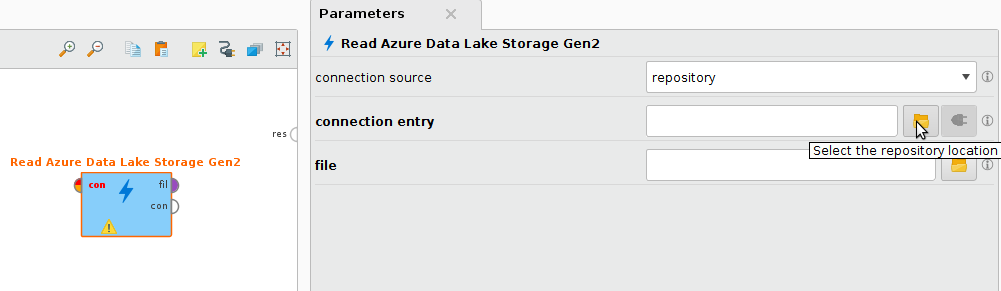
Alternatively, you can drag the Azure Data Lake Storage Gen2 Connection from the repository into the Process Panel and connect the resulting operator with the
Read Azure Data Lake Storage Gen2 operator.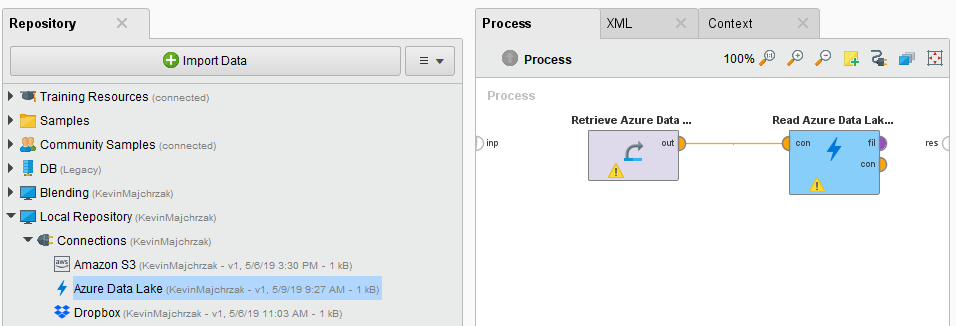
Click on the file chooser button
to view the files in your Azure Data Lake Storage Gen2 account.
Select the file that you want to load and click Open.
Note that you need to have Read and Execute access to the root directory, if you want to use the file browser starting from the root folder. If you do not have that permission, you can type a path into the parameter field.
If you have access to the parent folder of that path (file or directory) and Execute access up to the container level, you can open the file browser. Or you can always use a manually typed path and use the operator with that (in that case, permission is only checked during runtime).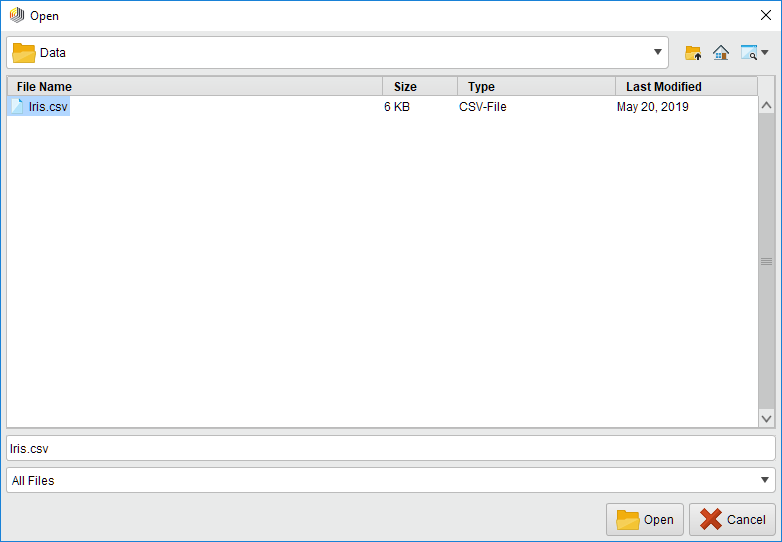
As mentioned above, the
Read Azure Data Lake Storage Gen2 operator does not process the contents of the specified file.
In our example, we have chosen a csv file (a comma separated values file).
This file type can be processed via the Read CSV operator.Add a Read CSV operator between the
Read Azure Data Lake Storage Gen2 operator and the result port. You may set the parameters of the Read CSV operator - such as column separator -, depending on the format of your csv file: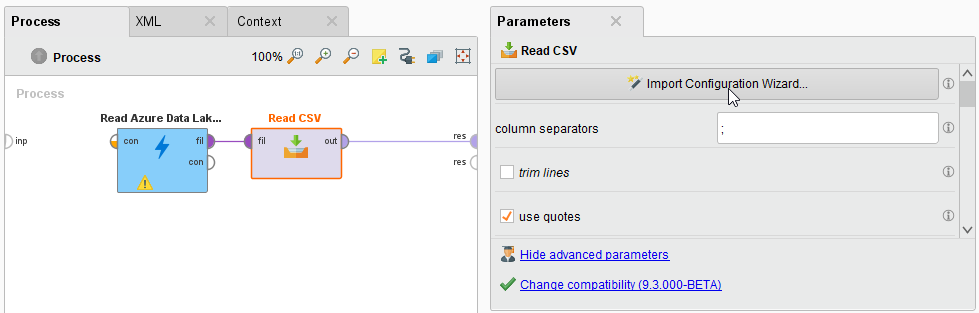
Run
 the process! In the Results perspective, you should see a table containing the rows and columns of your choosen csv file:
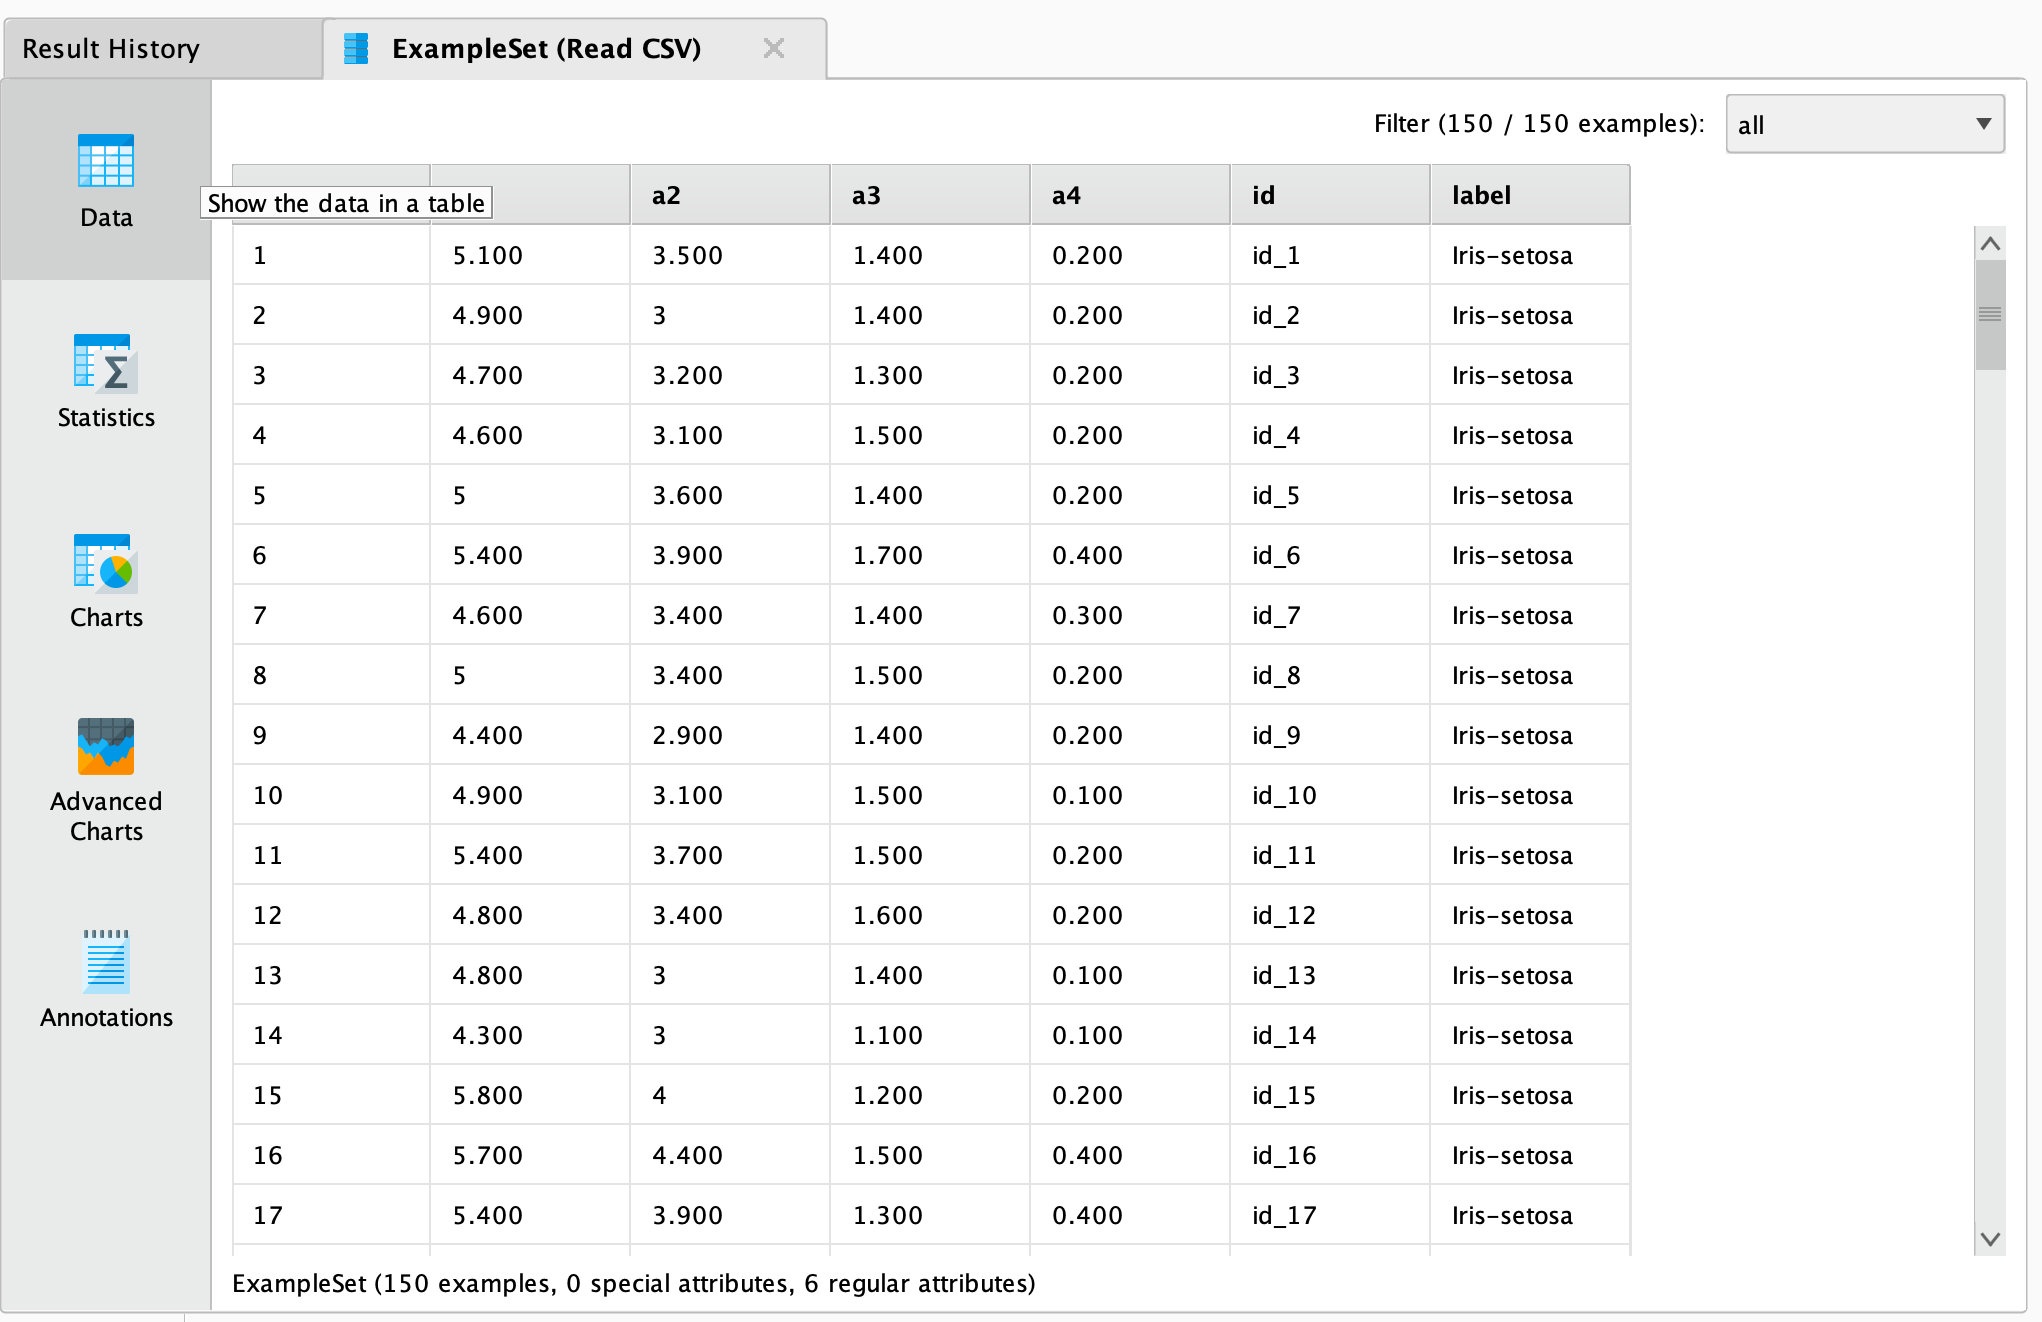
You could now use further operators to work with this document, e.g., to determine the commonness of certain events.
To write results back to Azure Data Lake Storage, you can use the ![]() Write Azure Data Lake Storage Gen2 operator.
It uses the same Connection Type as the
Write Azure Data Lake Storage Gen2 operator.
It uses the same Connection Type as the ![]() Read Azure Data Lake Storage Gen2 operator and has a similar interface.
You can also read from a set of files in an Azure Data Lake Storage directory, using the
Read Azure Data Lake Storage Gen2 operator and has a similar interface.
You can also read from a set of files in an Azure Data Lake Storage directory, using the ![]() Loop Azure Data Lake Storage Gen2 operator.
For this you need to specify the connection entry and the folder that you want to process, as well the steps of the processing loop with nested operators. For more details please read the help of
the
Loop Azure Data Lake Storage Gen2 operator.
For this you need to specify the connection entry and the folder that you want to process, as well the steps of the processing loop with nested operators. For more details please read the help of
the ![]() Loop Azure Data Lake Storage Gen2 operator.
Loop Azure Data Lake Storage Gen2 operator.