Using the SharePoint Connector
The SharePoint Connector gives you access to the files and lists on a particular SharePoint site. The following operators are available:
- Read SharePoint
- Write SharePoint
- Delete SharePoint
- Loop SharePoint
- Read List SharePoint
This document will walk you through how to:
Connect to your Microsoft account
In order to access the SharePoint service, you need to set up an application connection with Microsoft. This involves a number of steps and at the end, you will have the credentials to create a SharePoint connection, which is needed as an input for all the SharePoint operators. These steps require user-specific choices, but the overall workflow along with some hints is explained here.
The connection is based on Microsoft's Graph API using it's v1.0 endpoint. Further information on Graph API can be found at: https://developer.microsoft.com/en-us/graph.
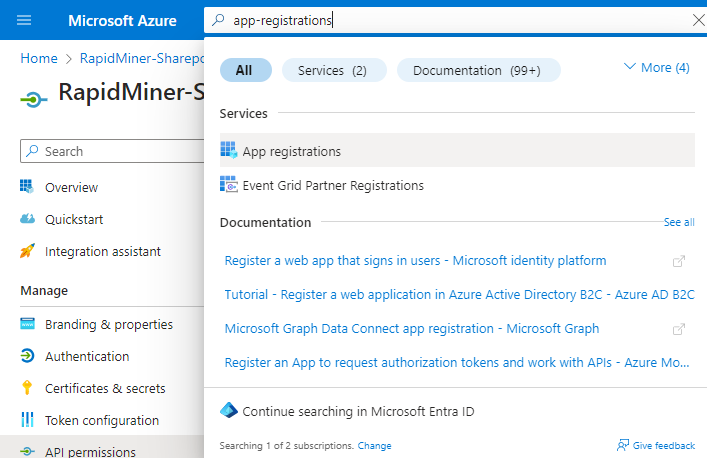
Log in to Microsoft Azure Portal at https://portal.azure.com with your company's Active Directory account (which you use to access SharePoint, Outlook or other Office365 services).
Search for App Registrations and then click on New registration. Enter a name for your application and optionally provide a redirect URI (https://localhost) for the type Web.
During the App creation, the system will give you a Client Secret, which is a hash string. Keep it as it’s needed for the connection. You can later create new secrets from Certificates and secrets.

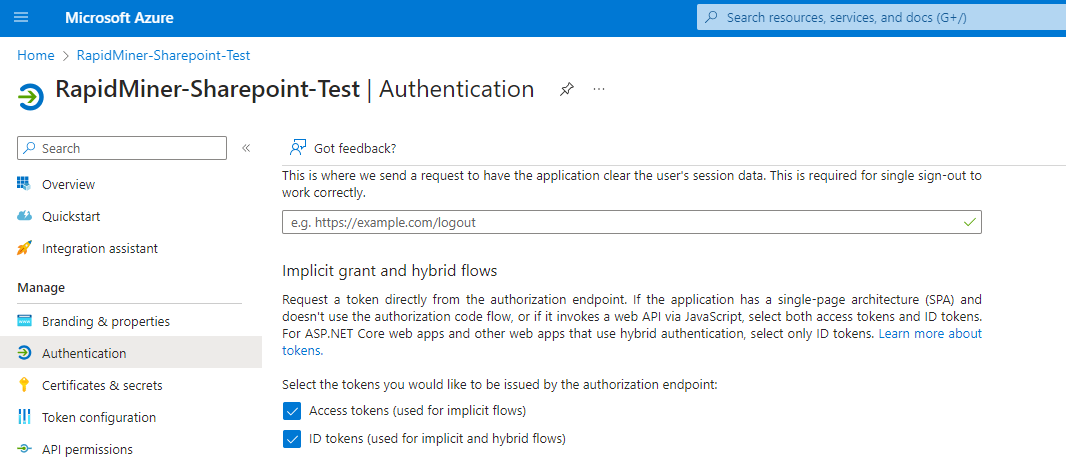
During App creation, please enable the two check-boxes for Access tokens and ID tokens. You can edit that later in Authentication.
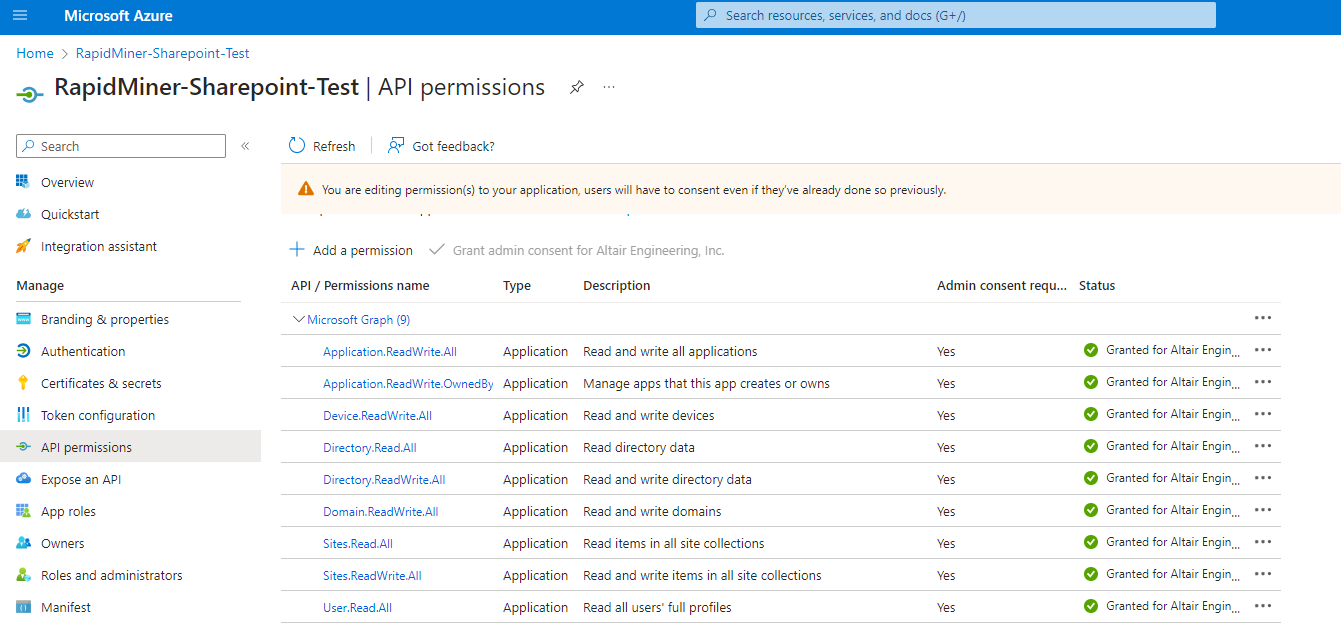
Grant permissions
After the App has been created, you need to grant it API-level permissions. Click on API permissions link in the left panel. It will show you the Microsoft Graph API hierarchy. Select Application permissions and grant at least these:
- Application.ReadWrite.All
- Application.ReadWrite.OwnedBy
- Device.ReadWrite.All
- Directory.Read.All
- Directory.ReadWrite.All
- Domain.ReadWrite.All
- Sites.Manage.All
- Sites.Read.All
- Sites.ReadWrite.All
- User.Read.All
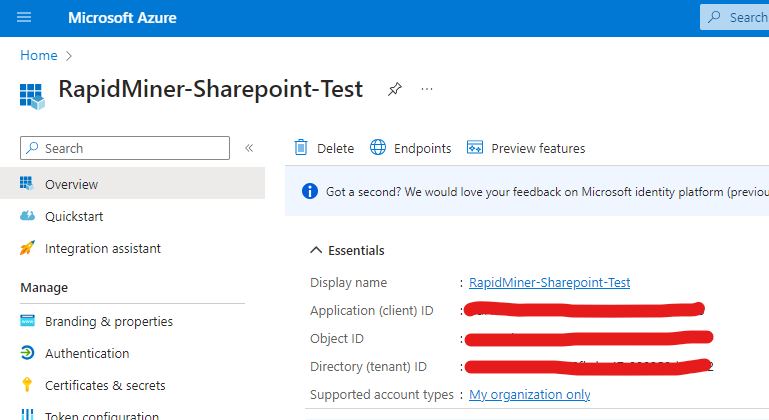
After the App has been created, click on the name of your App. You will see some properties you’ll need for the Connection:
- Application (client) ID, and
- Directory (tenant) ID.
Your admin needs to approve your account. Approval is done opening this URL and following the message displayed. You can build the URL with
https://login.microsoftonline.com/<YOUR_DIRECTORY_TENANT_ID>/adminconsent?client_id=<YOUR_APPLICATION_CLIENT_ID>
You need the previously obtained values of the placeholders marked between angle brackets.
The SharePoint Site is visible in your SharePoint URL. If the URL is
https://company.sharepoint.com/sites/onboarding
then
- the SharePoint URL is company.sharepoint.com
- and the SharePoint Site is onboarding
Once the approval is done, the connection is ready to be used.